I figured one-pan dinners were mostly hype. A little too good to be true, you know? It took about three tries of this garlic butter chicken and rice to realize I was the problem, not the concept. I mean, the first time I made it, the rice was crunchy, the chicken was dry, and I was standing there thinking, “This is supposed to be easy?” Turns out, I was rushing. I was impatient. I wanted the meal on the table in twenty minutes flat, and that just isn’t how good rice works.
The second time, I got distracted by a phone call and let the garlic burn. That bitter smell hung around for hours. But that third attempt? Something clicked. I stopped trying to rush the process and just let the pan do its thing. The rice soaked up all that buttery, garlicky goodness, and the chicken came out so tender it practically fell apart. Honestly, it felt like a small victory. I remember standing over the stove, fork in hand, just staring at this golden, fragrant pan of food and thinking, “Oh. That’s what everyone was talking about.”
This one-pan garlic butter chicken and rice isn’t just a weeknight dinner. It’s the kind of meal that makes you feel like you’ve got your life together, even if the rest of the day was a mess. It’s a quiet promise that simple, honest cooking still wins. And honestly? That’s a feeling worth chasing.
Why You’ll Love This Recipe
Let’s be real for a second. Weeknight dinners can feel like a chore. You’re tired, the day was long, and the last thing you want is a sink full of pots and pans. This recipe fixes that. It’s the definition of a low-effort, high-reward meal. Here is why this one is different:
- One Pan, Minimal Mess: Everything cooks in a single skillet. That means less scrubbing, less stacking, and more time on the couch. It’s a game-changer for busy weeknights.
- Bold, Comforting Flavor: The garlic butter sauce isn’t just a suggestion; it’s the star. It coats every grain of rice and seeps into the chicken, creating a rich, savory depth that feels like a hug in a bowl.
- Simple Pantry Ingredients: You don’t need a specialty grocery run. Chicken, rice, garlic, butter, and a few basic seasonings are all it takes. This is the kind of recipe you can pull together on a whim.
- Perfect for Meal Prep: The flavors actually get better overnight. Make a double batch on Sunday, and you have lunch or dinner sorted for the next couple of days. It’s a total crowd-pleaser.
- Naturally Satisfying: It’s a complete meal in one pan. You get your protein, your carbs, and all that buttery goodness. No need for a complicated side dish.
I’ve tested this recipe more times than I care to admit. I’ve burned the garlic, undercooked the rice, and over-salted the chicken. But this version? This is the one. It’s the perfect balance of technique and simplicity. It’s not just another chicken and rice recipe; it’s the one you’ll come back to again and again. It’s comfort food reimagined—faster, easier, but with the same soul-soothing satisfaction.
What Ingredients You Will Need
This recipe uses simple, wholesome ingredients that come together to create something truly special. You likely have most of these in your kitchen already, which is part of the beauty of it. Here is what you need to grab:
- Chicken Thighs (1.5 lbs / 680g): I prefer boneless, skinless thighs here. They stay juicier and more forgiving than chicken breasts, especially during the simmering process. If you only have breasts, that’s fine—just watch the cooking time so they don’t dry out.
- Unsalted Butter (3 tbsp / 42g): This is the backbone of the flavor. Use unsalted so you can control the salt level. I like Kerrygold for its richness, but any good quality butter works.
- Garlic (6 cloves, minced): Fresh garlic is non-negotiable here. The jarred stuff just won’t give you that same punchy, aromatic flavor. Mince it yourself; it takes thirty seconds.
- Long-Grain White Rice (1 cup / 200g): Basmati or jasmine works beautifully. Avoid short-grain rice, as it can get too sticky. Rinsing the rice before cooking is a must—it removes excess starch and prevents it from turning into a gluey mess.
- Chicken Broth (2 cups / 480ml): Use a good quality broth or stock. It’s the liquid that the rice cooks in, so it needs to taste good on its own. Low-sodium is best so you can season to your liking.
- Onion (1 medium, diced): A yellow or white onion works perfectly. It adds a subtle sweetness and depth that balances the garlic and butter.
- Dried Thyme (1 tsp): Earthy and slightly floral, thyme is a classic pairing with chicken and garlic. If you have fresh thyme, use about a tablespoon of leaves.
- Paprika (1 tsp): I use sweet paprika for color and a mild, smoky warmth. It gives the chicken a beautiful golden crust.
- Salt and Black Pepper (to taste): Simple, but essential. Season each layer as you go for the best flavor.
- Fresh Parsley (for garnish): Optional, but it adds a pop of color and a fresh finish that cuts through the richness.
Substitution Notes: You can swap the chicken thighs for boneless chicken breasts, but reduce the initial searing time by a minute or two per side. For a dairy-free version, use a high-quality olive oil or vegan butter substitute. If you are gluten-free, this recipe is naturally gluten-free as long as your broth is certified gluten-free.
Equipment Needed
You don’t need a lot of fancy gear for this one. That’s the whole point. But having the right tools makes the process smoother and the results more consistent.
- Large Skillet or Braiser (12-inch / 30cm): A heavy-bottomed skillet with a tight-fitting lid is your best friend here. A cast-iron skillet or a stainless steel pan works perfectly. Avoid non-stick if you can—you want a good sear on the chicken.
- Sharp Chef’s Knife: For mincing garlic and dicing the onion. A dull knife makes prep miserable and dangerous.
- Cutting Board: A sturdy board for all that chopping.
- Wooden Spoon or Spatula: For stirring the rice and scraping up any browned bits from the bottom of the pan. Those bits are pure flavor.
- Measuring Cups and Spoons: For accuracy with the rice and broth. Eyeballing it can lead to soggy or crunchy rice.
- Liquid Measuring Cup: For measuring the chicken broth easily.
Budget-Friendly Options: If you don’t have a heavy skillet, a deep, wide pot will work in a pinch. Just keep an eye on the heat distribution. You can also use a metal spatula instead of a wooden one, but be careful not to scratch your pan.
Preparation Method
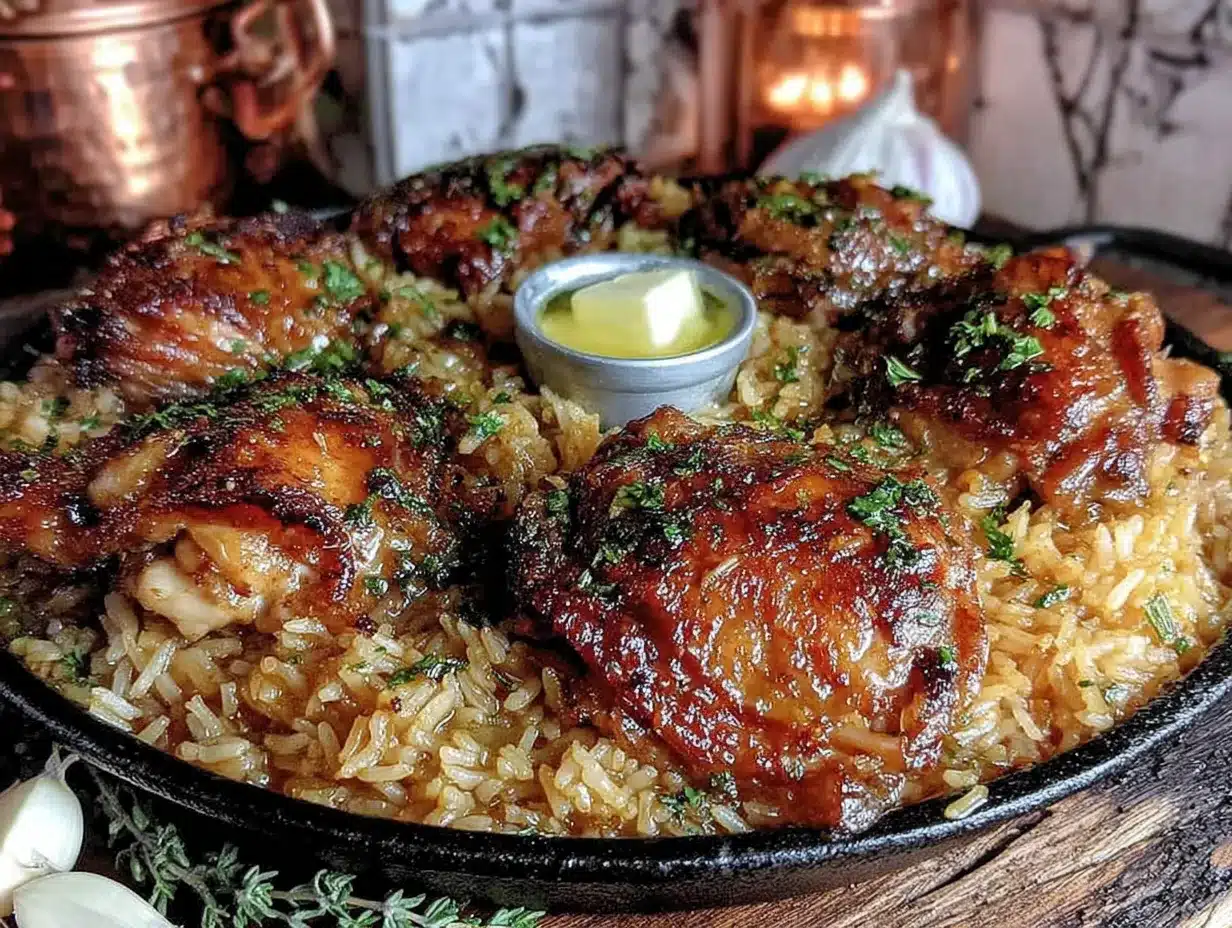
Alright, let’s get cooking. This is where the magic happens. Follow these steps, and you’ll have a perfect one-pan dinner on the table in about 45 minutes.
- Prep the Chicken (5 minutes): Pat the chicken thighs dry with paper towels. This is crucial for a good sear. Season them generously on both sides with salt, pepper, and the paprika. Let them sit at room temperature while you prep the other ingredients.
- Sear the Chicken (8-10 minutes): Heat your large skillet over medium-high heat. Add 1 tablespoon of the butter. Once it’s melted and shimmering, place the chicken thighs in the pan, skin-side down (if they have skin) or just one layer. Don’t overcrowd the pan; work in batches if needed. Sear for 4-5 minutes per side, until golden brown and crispy. The chicken won’t be cooked through yet, and that’s fine. Transfer the chicken to a plate and set aside.
- Sauté the Aromatics (3-4 minutes): Reduce the heat to medium. Add the remaining 2 tablespoons of butter to the pan. Once melted, add the diced onion. Cook, stirring occasionally, for about 2-3 minutes until softened and translucent. Add the minced garlic and the dried thyme. Cook for another minute until fragrant. Be careful not to burn the garlic—it turns bitter quickly.
- Toast the Rice (2 minutes): Add the rinsed and drained rice to the pan. Stir it around in the butter and onion mixture for about 1-2 minutes. This toasts the rice slightly, which helps it stay separate and adds a nutty flavor.
- Deglaze and Add Liquid (1 minute): Pour in the chicken broth. Use your wooden spoon to scrape up all those browned bits from the bottom of the pan. That’s called “fond,” and it’s pure flavor. Bring the broth to a gentle simmer.
- Return the Chicken (1 minute): Nestle the seared chicken thighs back into the pan, on top of the rice and liquid. Don’t push them down; just let them sit on top.
- Simmer and Cook (20-25 minutes): Cover the skillet with a tight-fitting lid. Reduce the heat to low. Let it simmer gently for 20 minutes. Do not lift the lid during this time! The steam is what cooks the rice perfectly. After 20 minutes, turn off the heat and let it sit, covered, for another 5-10 minutes. This allows the rice to finish absorbing the liquid.
- Fluff and Serve (2 minutes): Remove the lid. Carefully fluff the rice with a fork. Garnish with fresh parsley. Serve hot, with the chicken on top of the rice.
Sensory Cues: You’ll know the rice is done when it’s tender and has absorbed all the liquid. The chicken should be tender and easily pull apart with a fork. The aroma of garlic and butter will fill your kitchen.
Cooking Tips & Techniques
I’ve made every mistake in the book with this recipe. Let me save you some trouble. Here are the tips I wish someone had told me.
- Don’t Skip Rinsing the Rice: This is the number one mistake people make. Rinsing removes the excess starch that turns rice into a sticky, gummy mess. Rinse it in a fine-mesh sieve under cold water until the water runs clear. It takes thirty seconds and makes a world of difference.
- Pat the Chicken Dry: Wet chicken won’t sear. It will steam. And steamed chicken is sad, pale chicken. Take the extra minute to pat it dry with paper towels. You’ll get that beautiful golden crust that adds so much flavor.
- Don’t Peek at the Rice: I know it’s tempting. You want to see if it’s done. But every time you lift that lid, you let out steam and heat. That can mess with the cooking time and leave you with crunchy rice. Trust the process. Set a timer and walk away.
- Use a Heavy Pan: A thin-bottomed pan will scorch the rice before it’s cooked through. A heavy skillet, like cast iron or stainless steel, distributes heat evenly and prevents hot spots. It’s worth the investment.
- Let It Rest: That final 5-10 minute rest off the heat is not optional. It allows the rice to finish absorbing the liquid and the flavors to meld together. Patience is a virtue here.
I once tried to rush this by using a non-stick pan and skipping the rice rinse. The result was a sad, sticky, burnt mess. I learned my lesson. Now, I follow these rules every single time, and the results are consistently perfect.
Variations & Adaptations
This recipe is a fantastic base for customization. Here are a few ways I’ve adapted it over the years to keep things interesting.
- Add Vegetables: Toss in a cup of frozen peas and carrots during the last 5 minutes of cooking. Or, add a handful of fresh spinach right before you fluff the rice—it will wilt beautifully. You can also add sliced mushrooms along with the onions for an earthy twist.
- Make it Spicy: Add 1/2 teaspoon of red pepper flakes along with the garlic. Or, stir in a teaspoon of sriracha or chili paste into the broth for a warm, spicy kick. It’s a great way to wake up the flavors.
- Try Different Herbs: Swap the dried thyme for dried oregano or rosemary. A teaspoon of dried Italian seasoning works wonders too. Fresh herbs like basil or chives make a great garnish instead of parsley.
- Use Bone-In Chicken: If you have bone-in, skin-on chicken thighs, the cooking time will increase by about 10-15 minutes. You’ll also need to add a bit more broth to compensate for the extra evaporation. The flavor, however, is even richer.
- Mediterranean Twist: Add a teaspoon of dried oregano, a pinch of cinnamon, and a handful of chopped Kalamata olives and sun-dried tomatoes along with the broth. It’s a totally different but equally delicious meal.
I once made a version with leftover rotisserie chicken and added a big handful of frozen corn. It was a fantastic way to use up leftovers and turned into a new family favorite. Don’t be afraid to experiment!
Serving & Storage Suggestions
This dish is best served hot, right out of the pan. But it also holds up surprisingly well for leftovers.
- Serving: Serve the chicken and rice in shallow bowls. Garnish with a generous sprinkle of fresh parsley and a crack of black pepper. A squeeze of lemon juice over the top adds a bright, acidic finish that cuts through the richness.
- Storage: Store leftovers in an airtight container in the refrigerator for up to 4 days. The flavors actually meld together and get even better overnight. It’s a fantastic meal prep option.
- Reheating: The best way to reheat is on the stovetop. Add a splash of chicken broth or water to a pan, add the leftovers, and heat over medium-low heat, stirring occasionally, until warmed through. You can also microwave it, but the rice might dry out a bit. If using the microwave, cover the bowl with a damp paper towel to add moisture.
- Freezing: This dish freezes well for up to 3 months. Let it cool completely, then transfer to a freezer-safe container. Thaw overnight in the refrigerator before reheating.
- Flavor Development: The rice will absorb more of the garlic butter flavor as it sits. Leftovers often taste even better than the first serving. Don’t be surprised if you find yourself looking forward to lunch the next day.
Nutritional Information & Benefits
This meal is surprisingly balanced for something that feels so indulgent. Here is a rough estimate per serving (based on 4 servings):
- Calories: ~550-650
- Protein: ~35-40g
- Fat: ~25-30g
- Carbohydrates: ~45-50g
- Fiber: ~2g
Health Benefits: Chicken thighs are a great source of protein and essential B vitamins. Butter, in moderation, provides healthy fats and fat-soluble vitamins. Garlic is known for its immune-boosting properties. This meal is also relatively low in sugar and can be part of a balanced diet. If you are watching your sodium, use low-sodium broth and go easy on the added salt.
Dietary Considerations: This recipe is naturally gluten-free. For a lower-carb option, you can swap the rice for cauliflower rice, but the cooking time and method will need to be adjusted significantly. It is not suitable for dairy-free or vegan diets without substitutions.
Conclusion
This one-pan garlic butter chicken and rice is more than just a recipe; it’s a reliable friend on a busy weeknight. It’s the kind of meal that proves you don’t need a dozen pots, a laundry list of ingredients, or hours of time to create something genuinely delicious and satisfying. It’s simple, honest cooking at its best.
I encourage you to make it your own. Add your favorite vegetables, spice it up, or swap the herbs. That’s the beauty of a dish like this—it’s a canvas for your own tastes. I love this recipe because it always delivers. It’s the meal I turn to when I need a guarantee of comfort and flavor.
So, grab your skillet and give it a try. I promise you won’t be disappointed. When you do, come back and let me know how it turned out. Did you add a twist? Did your family love it? Drop a comment below and share your experience. I can’t wait to hear about it!
Frequently Asked Questions
Can I use chicken breasts instead of thighs?
Yes, you can. Boneless, skinless chicken breasts will work, but they can dry out more easily. Reduce the searing time by a minute or two per side, and check for doneness a few minutes earlier during the simmering stage. The internal temperature should reach 165°F (74°C).
Why is my rice crunchy?
Crunchy rice usually means it didn’t cook long enough or there wasn’t enough liquid. Make sure you are using a tight-fitting lid and not peeking during the simmering time. Also, ensure you are using the correct ratio of 2 cups of liquid to 1 cup of rice. Letting it rest off the heat for 5-10 minutes also helps.
Can I use brown rice instead of white rice?
You can, but the cooking time and liquid ratio will change significantly. Brown rice typically needs about 45-50 minutes to cook and requires more liquid (about 2 1/2 cups). You will also need to add more broth during the cooking process. I recommend sticking with white rice for this recipe for the best results.
Can I make this in a slow cooker or Instant Pot?
This recipe is specifically designed for the stovetop. While you could adapt it for an Instant Pot, the method would be quite different. For a slow cooker, the rice tends to get mushy. If you want a similar flavor profile for a slow cooker, try making a separate creamy Tuscan white bean chicken casserole or a salsa verde shredded chicken instead.
How do I prevent the garlic from burning?
Garlic burns quickly, especially over high heat. The key is to add it to the pan after the onions have softened and the heat has been reduced to medium. Cook it for just one minute until fragrant, then immediately add the rice and broth. This prevents it from scorching and turning bitter.
Pin This Recipe!
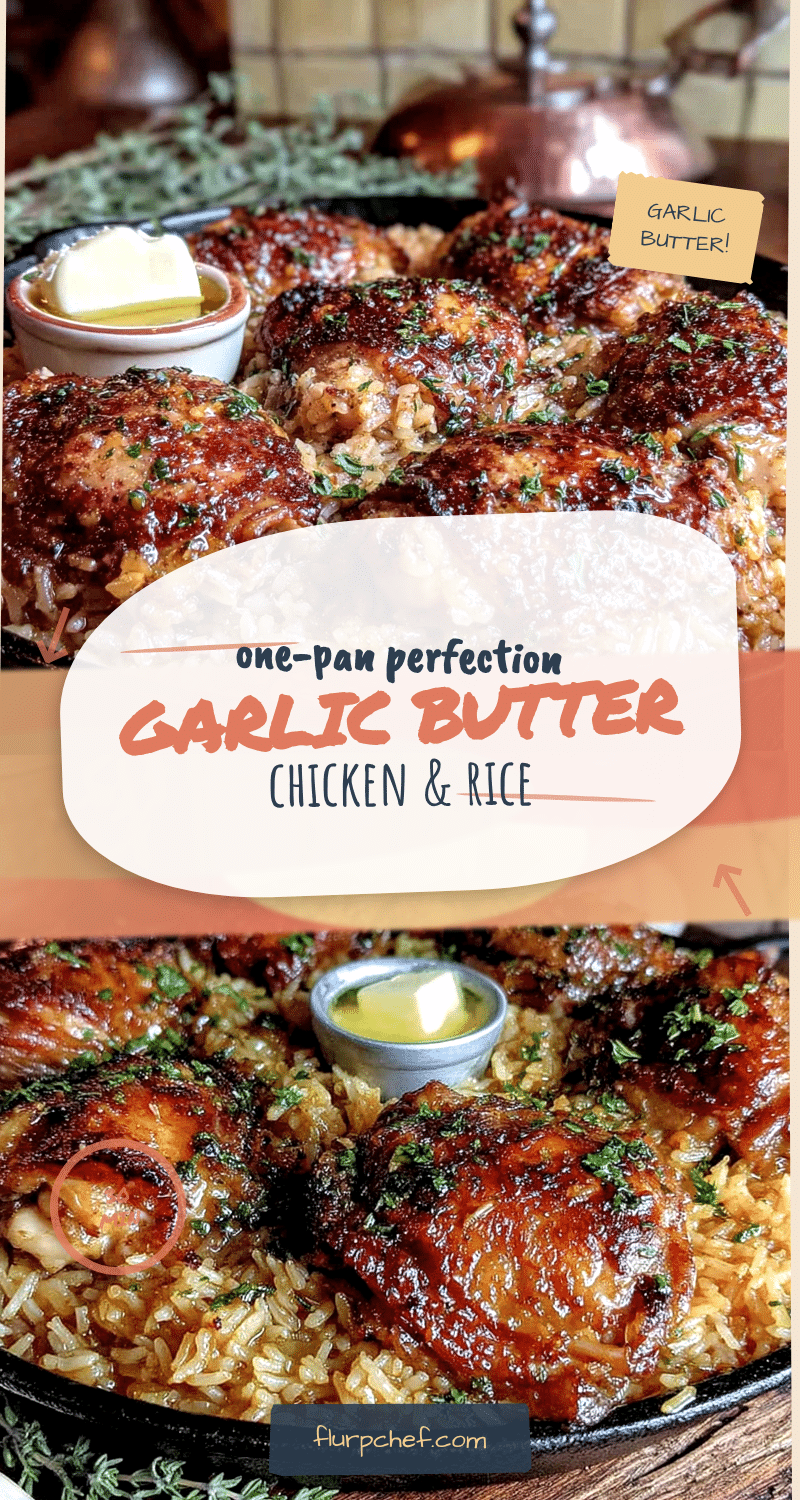
One-Pan Garlic Butter Chicken and Rice – Easy Weeknight Dinner

This one-pan garlic butter chicken and rice is a low-effort, high-reward weeknight dinner. Tender chicken and perfectly cooked rice are coated in a rich, savory garlic butter sauce, all made in a single skillet for minimal cleanup.
- Prep Time: 10 minutes
- Cook Time: 35 minutes
- Total Time: 45 minutes
- Yield: 4 servings 1x
- Category: Main Course
- Cuisine: American
Ingredients
- 1.5 lbs (680g) boneless, skinless chicken thighs
- 3 tbsp (42g) unsalted butter
- 6 cloves garlic, minced
- 1 cup (200g) long-grain white rice (basmati or jasmine), rinsed
- 2 cups (480ml) low-sodium chicken broth
- 1 medium yellow or white onion, diced
- 1 tsp dried thyme
- 1 tsp sweet paprika
- Salt and black pepper to taste
- Fresh parsley for garnish (optional)
Instructions
- Pat the chicken thighs dry with paper towels. Season generously on both sides with salt, pepper, and paprika. Let sit at room temperature while prepping other ingredients.
- Heat a large skillet over medium-high heat. Add 1 tablespoon of butter. Once melted and shimmering, sear the chicken thighs for 4-5 minutes per side until golden brown. Transfer to a plate (chicken will not be cooked through).
- Reduce heat to medium. Add remaining 2 tablespoons of butter. Sauté diced onion for 2-3 minutes until softened. Add minced garlic and dried thyme; cook for 1 minute until fragrant, being careful not to burn the garlic.
- Add the rinsed and drained rice to the pan. Stir for 1-2 minutes to toast slightly.
- Pour in the chicken broth. Use a wooden spoon to scrape up any browned bits from the bottom of the pan. Bring to a gentle simmer.
- Nestle the seared chicken thighs back into the pan on top of the rice and liquid.
- Cover the skillet with a tight-fitting lid. Reduce heat to low. Simmer for 20 minutes without lifting the lid. Then turn off the heat and let it rest, covered, for 5-10 minutes.
- Remove the lid. Fluff the rice with a fork. Garnish with fresh parsley. Serve hot.
Notes
Don’t skip rinsing the rice to avoid stickiness. Pat chicken dry for a good sear. Do not lift the lid during simmering. Let the dish rest off the heat for 5-10 minutes after cooking. For best results, use a heavy-bottomed pan like cast iron or stainless steel.
Nutrition
- Serving Size: 1 serving (about 1/4
- Calories: 600
- Sugar: 3
- Sodium: 600
- Fat: 28
- Saturated Fat: 12
- Carbohydrates: 48
- Fiber: 2
- Protein: 38
Keywords: one-pan dinner, garlic butter chicken, chicken and rice, weeknight dinner, easy dinner, one skillet meal


