I was getting my car’s oil changed—a Tuesday, I think, with a cracked vinyl chair and a stack of old magazines. The mechanic, a quiet man named Carlos who usually just nodded and handed me keys, was wiping his hands on a rag. “You like to bake, right?” he asked, not looking up. I blinked. How did he even know that? Turns out, he’d seen a bag of flour in my backseat once. “My abuela’s Pan de Muerto,” he said, pulling a crumpled piece of paper from his shirt pocket. “She makes it every November 1st. You should try it. It’s the one that gets everyone talking at the altar.” I wasn’t expecting baking advice from my mechanic, but there I was, holding a grease-stained recipe for what would become the star of my Día de Muertos gatherings.
Honestly, I almost lost that paper. It fell between the passenger seat and the center console, and I found it weeks later while cleaning out crumbs. But I’m so glad I did. That first batch filled my kitchen with the warmest, most intoxicating scent—orange blossoms, anise, and butter. My husband walked in and just stood there, eyes closed. “What is that?” he whispered. That’s the thing about this Pan de Muerto with Orange Blossom Glaze. It doesn’t just taste good. It smells like a memory you didn’t know you had. And when you serve it at a gathering, it becomes the thing everyone asks about before they leave. Maybe you’ve been there—that moment when a dish steals the whole evening?
I’ve tweaked Carlos’s abuela’s recipe over the years, testing it on friends, neighbors, and anyone who’d sit at my table. I’ve learned the hard way that over-kneading makes it tough, and that the glaze needs to be warm when you pour it. But the core of it—the soft, pillowy bread with that floral, citrusy kick—is pure tradition. This isn’t just a recipe. It’s a conversation starter, a centerpiece, and honestly, the easiest way to impress a crowd without breaking a sweat. Let me show you how to make it.
Why You’ll Love This Recipe
Let me tell you why this Pan de Muerto with Orange Blossom Glaze has earned a permanent spot in my hosting rotation. I’ve tested this recipe more times than I can count—through sticky dough disasters and glaze mishaps—and I can promise you, it delivers every single time.
- Crowd-Pleasing Flavor: The combination of orange blossom water, anise, and a hint of cinnamon creates a flavor profile that’s both familiar and exotic. It’s the kind of bread that makes people close their eyes after the first bite.
- Impressive Without the Stress: This bread looks like you spent hours on it, but the process is surprisingly forgiving. The braided top and bone shapes feel fancy, but I’ve messed them up plenty and it still looks gorgeous.
- Perfect for Hosting: You can make the dough a day ahead, let it rise in the fridge, and bake it fresh before guests arrive. Your kitchen will smell incredible, and you’ll look like a hero with zero last-minute panic.
- Authentic & Adaptable: This recipe stays true to the traditional Mexican Day of the Dead bread, but I’ve included easy swaps for dietary needs—dairy-free butter works beautifully, and you can skip the anise if it’s not your thing.
- It’s a Conversation Piece: Seriously, every time I bring this to a potluck or set it on my dinner table, people ask about it. The orange blossom glaze is the first thing they notice—that glossy, fragrant finish that makes the bread look like it belongs in a bakery window.
This isn’t just another sweet bread recipe. It’s the one that makes you feel like a real baker, the one that gets photographed before it’s sliced, and the one your friends will text you for weeks later asking, “Can you make that bread again?”
What Ingredients You Will Need
This recipe uses simple, wholesome ingredients to create a bread that’s soft, fragrant, and utterly memorable. Most of these are pantry staples, but a few specialty items make all the difference. Let’s walk through them.
For the Dough
- All-purpose flour – 4 cups (500g). I prefer King Arthur Flour for its consistent protein content, but any good brand works. Spoon and level your flour for the best results.
- Active dry yeast – 2 ¼ teaspoons (one packet). Make sure it’s fresh! I’ve had batches flop because my yeast was old. Proof it in warm water with a pinch of sugar first to be sure.
- Warm milk – ½ cup (120ml), heated to about 110°F. Whole milk gives the richest texture, but 2% works fine.
- Unsalted butter – ½ cup (113g), softened. I use Kerrygold for its creaminess, but any good butter works. For dairy-free, try Miyoko’s vegan butter.
- Granulated sugar – ½ cup (100g). This adds sweetness and helps with browning.
- Large eggs – 3, room temperature. Cold eggs can shock the yeast. Let them sit on the counter for 30 minutes before starting.
- Orange zest – 2 tablespoons from about 2 oranges. Use a microplane for the best texture. This is where that bright, citrusy flavor comes from.
- Orange blossom water – 2 tablespoons. This is the secret ingredient! You can find it at Mexican markets or online. A little goes a long way.
- Anise seeds – 1 teaspoon, lightly crushed. This adds that subtle licorice note that makes Pan de Muerto so distinctive. Skip it if you’re not a fan.
- Salt – 1 teaspoon. Don’t skip it—it balances the sweetness and strengthens the dough.
For the Glaze & Topping
- Powdered sugar – 1 ½ cups (180g), sifted to avoid lumps.
- Orange blossom water – 2 tablespoons, plus more as needed.
- Milk – 2 tablespoons, or enough to reach a drizzling consistency.
- Orange zest – 1 teaspoon, for garnish.
- Granulated sugar – ¼ cup (50g), for sprinkling on top. I like to mix a little orange zest into it for extra flavor.
Substitution Notes
If you’re gluten-sensitive, I’ve had success with a 1:1 gluten-free flour blend, though the texture is a bit denser. For a vegan version, use plant-based milk, vegan butter, and a flax egg (1 tablespoon ground flaxseed mixed with 3 tablespoons water per egg). The orange blossom water is non-negotiable for that authentic flavor, but you can substitute with a teaspoon of vanilla extract and an extra tablespoon of orange zest if you must.
Equipment Needed
- Stand mixer with dough hook – This makes kneading a breeze. I use my KitchenAid Artisan, and it handles this dough beautifully. No stand mixer? No problem—knead by hand for about 10 minutes.
- Large mixing bowl – For rising the dough. Glass or ceramic works best.
- Baking sheet – A half-sheet pan lined with parchment paper. I like Nordic Ware for even baking.
- Microplane or zester – For getting fine orange zest without the bitter white pith.
- Pastry brush – For applying the egg wash. A silicone brush is easy to clean.
- Cooling rack – Essential for letting the glaze set without getting soggy on the bottom.
- Plastic wrap or a clean kitchen towel – For covering the dough while it rises.
That’s really it! Nothing too fancy. If you don’t have a stand mixer, you can absolutely knead by hand—it’s a bit of a workout, but there’s something satisfying about feeling the dough come together.
Preparation Method
Alright, let’s get baking. This recipe takes about 3 hours total, with most of that being rising time. The active work is only about 30 minutes.
- Proof the yeast. In a small bowl, combine the warm milk (110°F) with 1 tablespoon of the sugar and the active dry yeast. Let it sit for 5-10 minutes until it’s foamy and smells like bread. If it doesn’t foam, your yeast is dead—start over with fresh yeast.
- Mix the dry ingredients. In the bowl of your stand mixer, whisk together the flour, remaining sugar, anise seeds, and salt. Make a well in the center.
- Combine wet ingredients. Add the proofed yeast mixture, softened butter, eggs, orange zest, and orange blossom water to the well. Mix on low speed with the dough hook until a shaggy dough forms, about 2 minutes.
- Knead the dough. Increase speed to medium and knead for 8-10 minutes. The dough should be smooth, elastic, and slightly tacky but not sticky. If it’s too sticky, add flour 1 tablespoon at a time. If it’s too dry, add milk 1 teaspoon at a time. I’ve learned that under-kneaded dough makes dense bread, so don’t rush this step.
- First rise. Shape the dough into a ball and place it in a lightly greased bowl, turning to coat. Cover with plastic wrap or a damp towel and let it rise in a warm, draft-free place for 1 ½ to 2 hours, until doubled in size. I like to put it in my oven with the light on—it’s the perfect cozy spot.
- Shape the bread. Punch down the dough and turn it out onto a lightly floured surface. Divide it into two pieces: one larger piece (about ⅔ of the dough) for the base, and one smaller piece (about ⅓) for the decorations. Shape the large piece into a round loaf and place it on the prepared baking sheet.
- Make the decorations. Divide the smaller piece into 4 equal parts. Roll each into a rope about 6 inches long. Two ropes will be the “bones” (cross them over the top of the loaf), and two ropes will be the “teardrops” (shape them into small rounds and place them where the bones intersect). This is the traditional look, but honestly, I’ve done a simple braid before and it still looks stunning.
- Second rise. Cover the shaped loaf loosely with plastic wrap and let it rise for another 45 minutes to 1 hour, until puffy. Meanwhile, preheat your oven to 350°F (175°C).
- Bake. Brush the loaf gently with an egg wash (1 egg beaten with 1 tablespoon water) for a golden crust. Bake for 25-30 minutes, until deep golden brown and the internal temperature reaches 190°F. The smell in your kitchen right now is absolutely intoxicating.
- Cool completely. Transfer the bread to a cooling rack and let it cool for at least 1 hour. I know it’s tempting to glaze it warm, but trust me—the glaze will just slide off and make a mess.
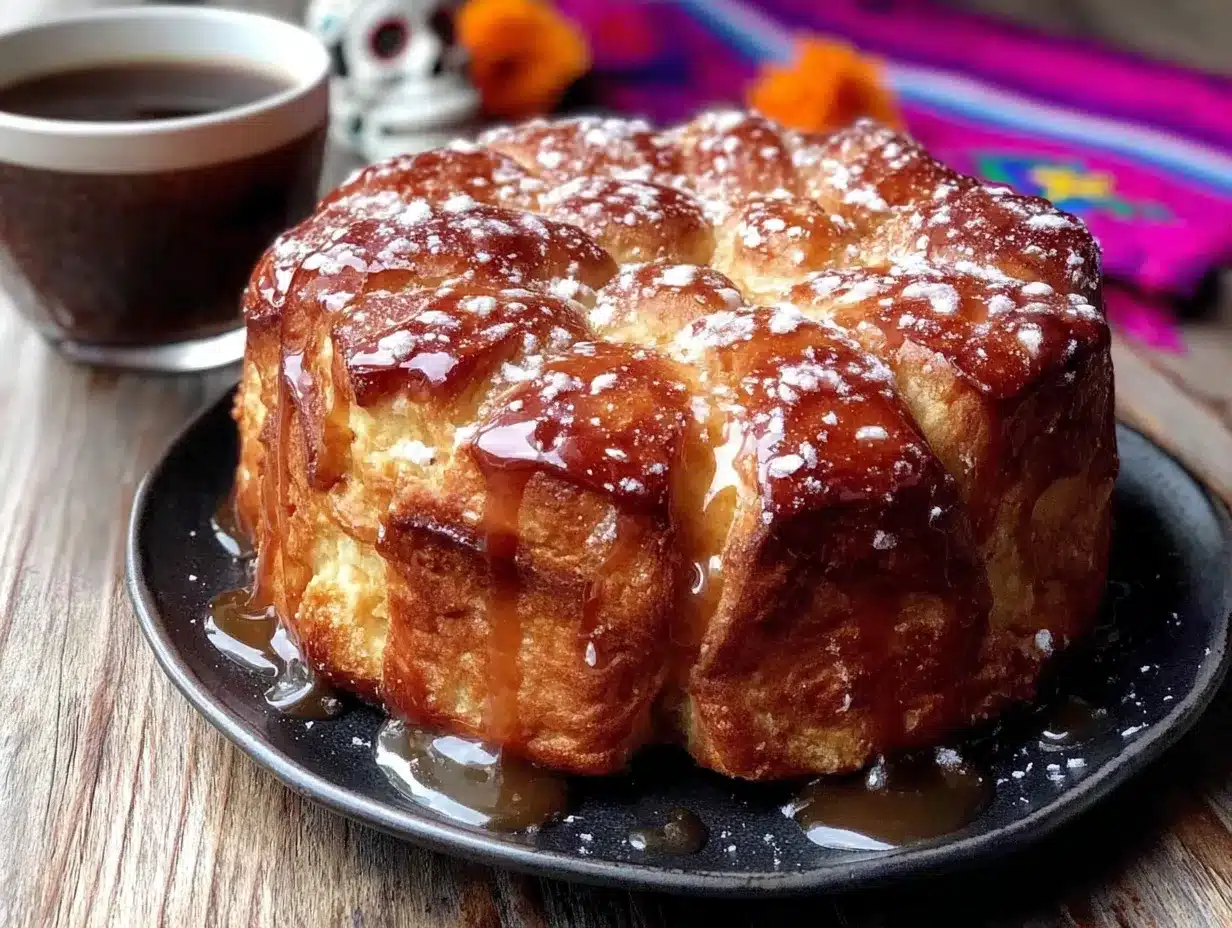
- Make the glaze. In a small bowl, whisk together the sifted powdered sugar, orange blossom water, and milk until smooth. It should be thick but pourable. Drizzle over the cooled bread, letting it cascade down the sides. Sprinkle with the orange zest sugar mixture while the glaze is still wet.
Let the glaze set for about 20 minutes before serving. That first slice is pure magic—soft, fragrant, and absolutely worth every step.
Cooking Tips & Techniques
I’ve made this Pan de Muerto with Orange Blossom Glaze at least a dozen times, and I’ve made every mistake in the book. Here’s what I’ve learned so you don’t have to.
Temperature matters. Yeast is a living thing, and it’s picky about temperature. Milk that’s too hot (above 120°F) will kill it. Too cold (below 100°F) and it won’t activate. I use an instant-read thermometer to be precise, but if you don’t have one, the milk should feel like warm bathwater on your wrist.
Don’t over-flour your surface. This dough is meant to be slightly tacky. If you add too much flour while shaping, the bread will be dry and dense. Instead, oil your hands lightly and work on a barely floured surface.
Watch the bake time. Every oven is different. My old oven would burn the bottom if I didn’t rotate the pan halfway through. Start checking at 20 minutes—if the top is browning too fast, tent it loosely with foil. The bread is done when it sounds hollow when tapped on the bottom, or when a thermometer reads 190°F.
Multitasking tip: While the dough is doing its first rise, set out your butter and eggs to come to room temperature for the next step. Also, zest your oranges and measure your dry ingredients. It makes the active part so much smoother.
My biggest failure: The first time I made this, I forgot the orange blossom water entirely. The bread was bland and I was so disappointed. Now I set the bottle right next to my mixing bowl so I can’t miss it. Learn from my mistake!
Variations & Adaptations
One of the best things about this recipe is how adaptable it is. Here are a few ways I’ve changed it up over the years.
Chocolate Orange Twist: Fold ½ cup of dark chocolate chips into the dough just before the first rise. The combination of orange blossom and chocolate is absolutely divine. I did this for a friend’s birthday and it was gone in minutes.
Dairy-Free Version: Use vegan butter and oat milk in the dough. For the glaze, substitute the milk with a dairy-free alternative. I’ve tested this with a friend who’s lactose intolerant, and she said it was the best bread she’d had in years.
Spiced Variation: Add 1 teaspoon of ground cinnamon and ½ teaspoon of ground nutmeg to the dry ingredients. This gives the bread a warmer, more autumnal flavor that’s perfect for a cozy gathering.
Savory Option: Reduce the sugar to ¼ cup, omit the orange blossom water and anise, and add 1 tablespoon of dried rosemary and ½ cup of grated Parmesan cheese. This makes an incredible bread for serving with soups or stews.
Mini Loaves: Instead of one large loaf, divide the dough into 8 equal pieces and shape into small rounds. Skip the decorations and just bake for 15-18 minutes. These are perfect for gifting or for a smaller gathering.
Serving & Storage Suggestions
This Pan de Muerto with Orange Blossom Glaze is at its absolute best on the day it’s made. The glaze is glossy, the bread is pillowy soft, and the aroma is still hanging in the air. Serve it slightly warm or at room temperature—I prefer room temperature because the glaze sets perfectly.
For a Día de Muertos gathering, I like to set the whole loaf on a beautiful wooden board or a colorful ceramic platter. Surround it with fresh marigolds (cempasúchil) and a few candles for that authentic touch. Let guests tear off pieces or slice it themselves—it’s meant to be shared.
It pairs beautifully with a cup of Mexican hot chocolate, café de olla, or even a simple cup of black coffee. For something stronger, a glass of horchata or a Mexican lager works wonderfully. If you’re serving it as part of a larger meal, it goes well with tamales or a hearty pozole.
Storage: Keep any leftovers in an airtight container at room temperature for up to 3 days. The glaze will soften slightly, but the bread will still be delicious. Do not refrigerate—it will dry out the bread.
Freezing: You can freeze the unglazed bread for up to 2 months. Wrap it tightly in plastic wrap and then foil. When you’re ready to serve, thaw it at room temperature, then warm it in a 300°F oven for 10 minutes. Glaze it after it’s cooled. I’ve done this for holiday prep, and it works like a charm.
Reheating: For that fresh-baked taste, pop slices in a 300°F oven for 5 minutes. The microwave will make it rubbery, so avoid it if you can.
Nutritional Information & Benefits
Let’s be real—this is a treat, not a health food. But knowing what’s in it helps, especially if you’re mindful about your diet.
Per serving (1/8 of the loaf with glaze): approximately 380 calories, 12g fat, 62g carbohydrates, 8g protein, 3g fiber, 28g sugar. These are estimates and will vary based on exact ingredients and portion sizes.
The orange blossom water isn’t just for flavor—it’s known for its calming properties in traditional herbal medicine. The anise seeds aid digestion, which is helpful after a rich meal. And the eggs and butter provide protein and healthy fats that make this bread more satisfying than your average sweet roll.
For those with dietary concerns: this recipe contains gluten, dairy, and eggs. It is not suitable for vegans unless modified as suggested above. The sugar content is moderate for a sweet bread, but you can reduce the glaze sugar by half if you prefer a less sweet finish.
I personally love that this bread feels celebratory without being over-the-top indulgent. It’s the kind of thing you can enjoy a slice of without feeling like you’ve derailed your whole week.
Conclusion
This Pan de Muerto with Orange Blossom Glaze has become more than just a recipe in my kitchen—it’s a tradition. Every time I make it, I think of Carlos and his abuela, of that greasy scrap of paper, and of all the friends who’ve asked for the recipe after tasting it. It’s the bread that brings people together, that makes a gathering feel special, that turns a simple evening into something worth remembering.
I hope you’ll try it. Don’t be intimidated by the shaping or the decorations—the first time I made it, my “bones” looked more like lumpy worms, and it still tasted incredible. That’s the beauty of homemade bread. It’s forgiving, it’s rewarding, and it’s always, always worth the effort.
So go ahead. Make this for your next dinner party, your Día de Muertos altar, or just because you want your kitchen to smell like heaven. And when you do, come back and tell me how it went. I’d love to hear about your own twists and triumphs. Happy baking!
Frequently Asked Questions
Can I make Pan de Muerto without a stand mixer?
Absolutely! You can knead the dough by hand on a lightly floured surface for about 10 minutes. It’s a great arm workout, and you’ll really feel when the dough is smooth and elastic. Just be patient and don’t add too much extra flour.
Where can I find orange blossom water?
Orange blossom water is available at most Mexican grocery stores, Middle Eastern markets, or online. The Mymouné brand is widely available and works beautifully. If you can’t find it, you can substitute with 1 teaspoon of vanilla extract and an extra tablespoon of orange zest.
Why didn’t my dough rise?
This usually happens for one of three reasons: your yeast was old or expired, your milk was too hot and killed the yeast, or your kitchen was too cold. Always proof your yeast first to make sure it’s active, and find a warm spot for rising—like your oven with the light on.
Can I freeze Pan de Muerto?
Yes! Freeze the unglazed, fully cooled bread wrapped tightly in plastic wrap and foil for up to 2 months. Thaw at room temperature, warm in a 300°F oven for 10 minutes, then glaze and serve. It’s a lifesaver for holiday prep.
What if I don’t have anise seeds?
You can skip them entirely, or substitute with ½ teaspoon of fennel seeds or a few drops of anise extract. The anise adds that traditional flavor, but the bread is still delicious without it. I’ve made it both ways and my family loves it either way.
Pin This Recipe!
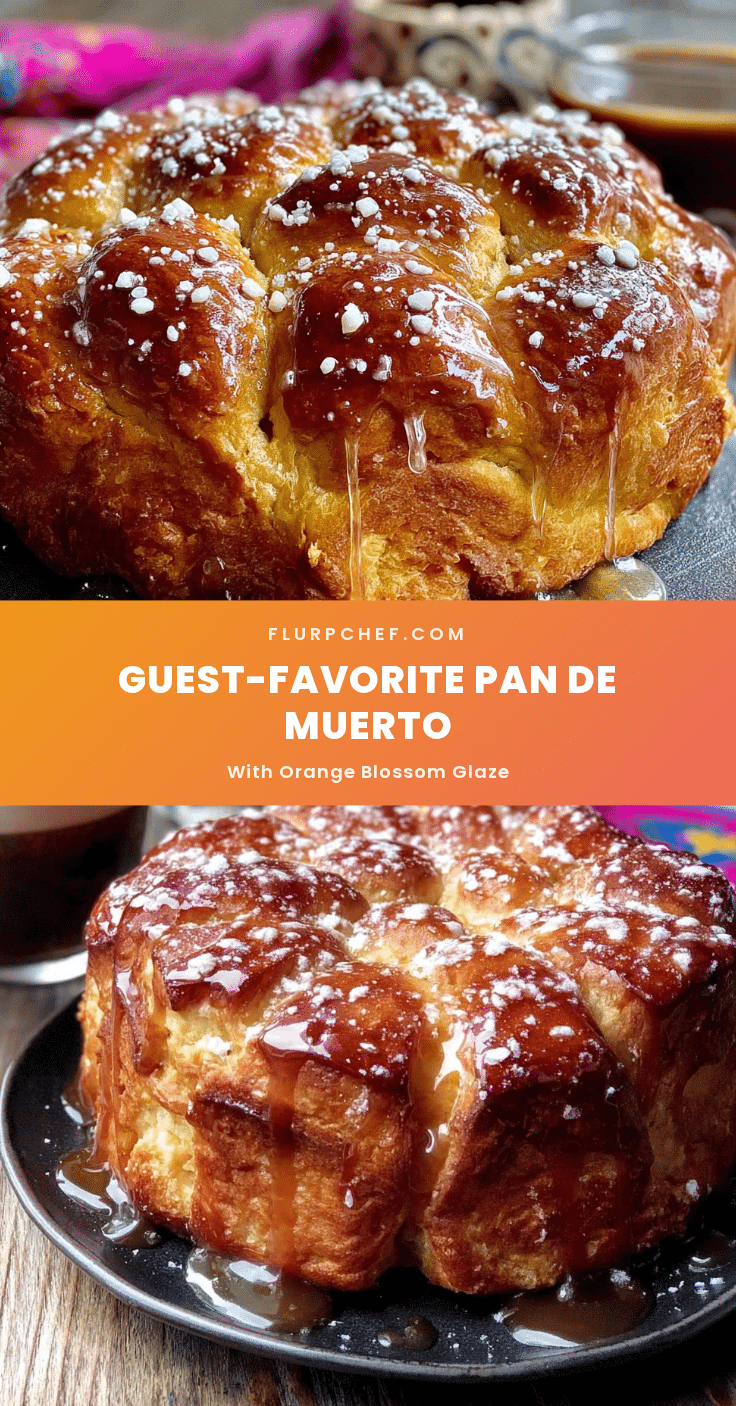
Pan de Muerto with Orange Blossom Glaze
A soft, pillowy Mexican Day of the Dead bread infused with orange blossom water, anise, and citrus zest, topped with a fragrant orange blossom glaze. Perfect for Día de Muertos gatherings or any celebration.
- Prep Time: 30 minutes
- Cook Time: 30 minutes
- Total Time: 3 hours (including rising time)
- Yield: 8 servings 1x
- Category: Bread
- Cuisine: Mexican
Ingredients
- 4 cups (500g) all-purpose flour
- 2 ¼ teaspoons (one packet) active dry yeast
- ½ cup (120ml) warm milk (about 110°F)
- ½ cup (113g) unsalted butter, softened
- ½ cup (100g) granulated sugar
- 3 large eggs, room temperature
- 2 tablespoons orange zest (from about 2 oranges)
- 2 tablespoons orange blossom water
- 1 teaspoon anise seeds, lightly crushed
- 1 teaspoon salt
- 1 ½ cups (180g) powdered sugar, sifted
- 2 tablespoons orange blossom water (for glaze)
- 2 tablespoons milk (for glaze)
- 1 teaspoon orange zest (for garnish)
- ¼ cup (50g) granulated sugar (for topping)
Instructions
- Proof the yeast: In a small bowl, combine warm milk (110°F) with 1 tablespoon of the granulated sugar and active dry yeast. Let sit for 5-10 minutes until foamy.
- Mix dry ingredients: In the bowl of a stand mixer, whisk together flour, remaining sugar, anise seeds, and salt. Make a well in the center.
- Combine wet ingredients: Add proofed yeast mixture, softened butter, eggs, orange zest, and orange blossom water to the well. Mix on low speed with dough hook until a shaggy dough forms, about 2 minutes.
- Knead dough: Increase speed to medium and knead for 8-10 minutes until smooth, elastic, and slightly tacky. Add flour 1 tablespoon at a time if too sticky, or milk 1 teaspoon at a time if too dry.
- First rise: Shape dough into a ball and place in a lightly greased bowl, turning to coat. Cover with plastic wrap or a damp towel and let rise in a warm, draft-free place for 1 ½ to 2 hours until doubled in size.
- Shape bread: Punch down dough and turn onto a lightly floured surface. Divide into two pieces: ⅔ for the base, ⅓ for decorations. Shape large piece into a round loaf and place on a parchment-lined baking sheet.
- Make decorations: Divide smaller piece into 4 equal parts. Roll each into a 6-inch rope. Cross two ropes over the top of the loaf as ‘bones’, and shape two ropes into small rounds (teardrops) where the bones intersect.
- Second rise: Cover shaped loaf loosely with plastic wrap and let rise for 45 minutes to 1 hour until puffy. Preheat oven to 350°F (175°C).
- Bake: Brush loaf gently with egg wash (1 egg beaten with 1 tablespoon water). Bake for 25-30 minutes until deep golden brown and internal temperature reaches 190°F. Cool on a rack for at least 1 hour.
- Make glaze: In a small bowl, whisk together sifted powdered sugar, orange blossom water, and milk until smooth and pourable. Drizzle over cooled bread. Sprinkle with orange zest sugar mixture while glaze is wet. Let set for 20 minutes before serving.
Notes
For best results, use fresh yeast and proof it first. The dough should be slightly tacky but not sticky. Let the bread cool completely before glazing to prevent the glaze from sliding off. The bread can be made a day ahead and stored at room temperature. For freezing, freeze unglazed bread for up to 2 months.
Nutrition
- Serving Size: 1 slice (1/8 of loaf
- Calories: 380
- Sugar: 28
- Sodium: 290
- Fat: 12
- Saturated Fat: 7
- Carbohydrates: 62
- Fiber: 3
- Protein: 8
Keywords: Pan de Muerto, Day of the Dead bread, orange blossom bread, Mexican sweet bread, Día de Muertos recipe, holiday bread


