I want a cheesecake that tastes like a candy cane and a holiday party had a beautiful, creamy baby. And I want it now, not after a water bath and a four-hour chill. That’s the exact thought that hit me last December while staring at a half-eaten box of peppermint bark on my counter. The chocolate was getting stale, the cheesecake craving was real, and my oven was already occupied with a batch of pumpkin cream cheese swirl muffins for a brunch the next day. I needed something that combined the cool, crisp snap of peppermint with the dense, velvety richness of a classic cheesecake, but I didn’t have the patience for a full-sized, fussy dessert.
So I grabbed a bag of Oreos, a block of cream cheese, and that lonely peppermint bark. I figured I’d just… wing it. Honestly, some of my best recipes come from that place of mild desperation and a fridge full of leftovers. I crushed the cookies for a no-bake crust, because let’s face it, turning on the oven for a crust feels like a betrayal when you’re trying to keep things simple. I whipped up a super creamy, no-bake cheesecake filling—the kind that sets up firm in the fridge but stays luscious on your tongue. Then I folded in chunks of that crushed peppermint bark, poured it over the crust, and topped it with even more bark and white chocolate drizzle.
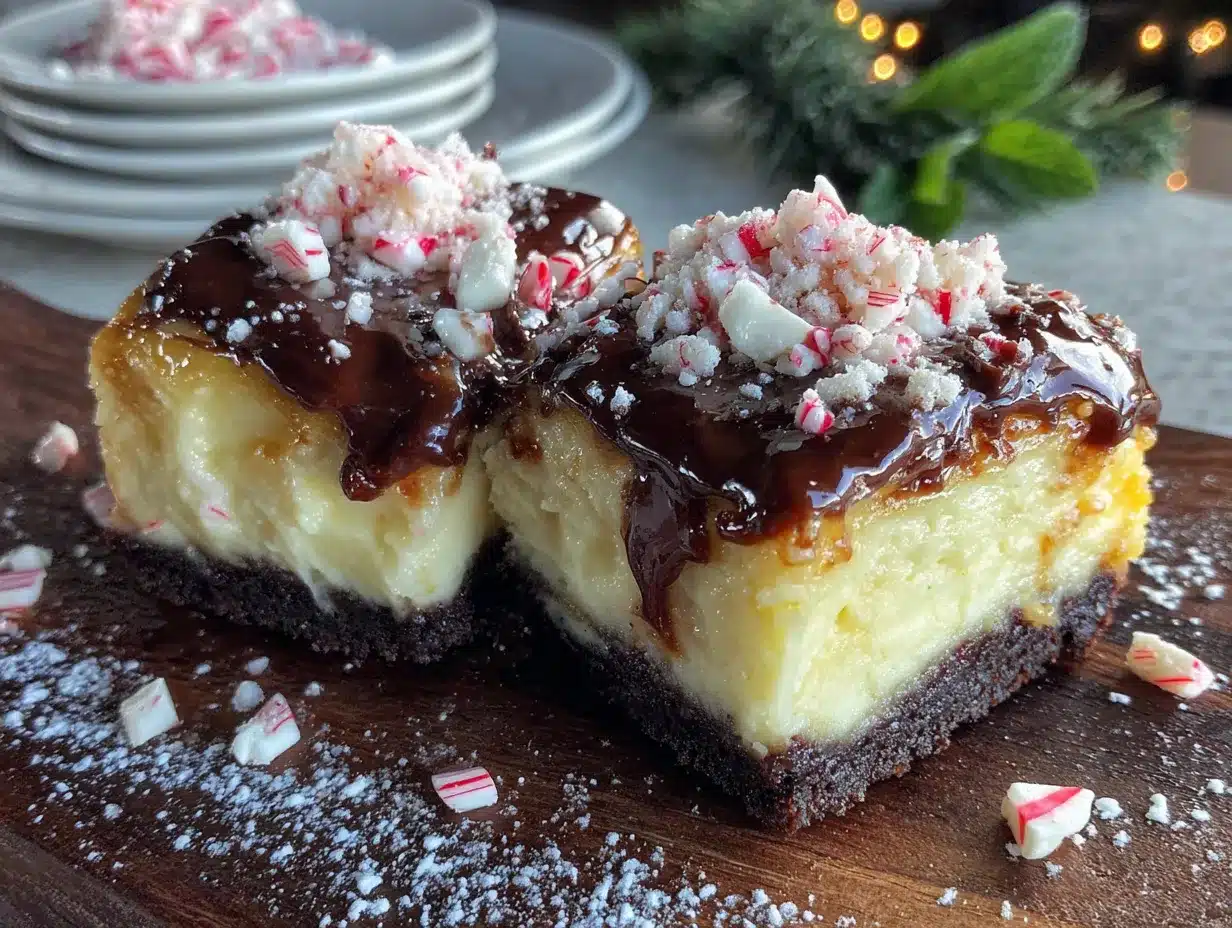
The result was ridiculous. Like, stand-at-the-counter-and-eat-three-bars-in-a-row ridiculous. The crust is salty and dark, the filling is tangy and sweet, and the peppermint adds that icy, festive crunch that makes you feel like you’re biting into a Christmas miracle. These Perfect Peppermint Bark Cheesecake Bars aren’t just a holiday dessert; they’re the solution to every last-minute potluck, cookie swap, or “I need a treat right this second” emergency. They’re the reason I now keep a backup box of peppermint bark in my pantry all winter long.
Why You’ll Love This Recipe
I’ve tested this recipe about six times now (purely for research, of course), and each batch disappears faster than the last. Here’s why these bars are going to become your new holiday secret weapon.
- No-Bake Magic: You don’t even need to turn on your oven for the filling. The crust gets a quick bake, but that’s it. This is a game-changer when your oven is full of casseroles and cookies.
- Simple Ingredients: Cream cheese, heavy cream, powdered sugar, vanilla, and peppermint bark. That’s it. No fancy extracts or hard-to-find items. You probably have most of this on hand.
- Perfect for the Holidays: These bars are the star of any Christmas party, cookie exchange, or cozy night in. They look fancy, but they’re secretly the easiest thing you’ll make all season.
- Crowd-Pleaser: I’ve served these to kids, adults, and even my picky uncle who “doesn’t like sweets.” He had three. The combination of chocolate, peppermint, and creamy cheesecake is universally loved.
- Unbelievably Delicious: The texture is what gets me every time. The crunchy Oreo crust, the silky cheesecake, and the crunchy, melty bits of peppermint bark create a symphony in your mouth. It’s next-level comfort food, I swear.
What makes this recipe different from every other peppermint cheesecake out there? It’s the simplicity, honestly. Most recipes ask you to make a complicated ganache or a from-scratch crust. I use store-bought peppermint bark (or homemade, if you’re feeling fancy) and a classic no-bake cheesecake technique that never fails. It’s not just another version—it’s the best version because it’s the most reliable. You get that perfect, clean slice every single time without the stress.
This is the kind of dessert that makes you close your eyes after the first bite. It’s comfort food reimagined for the holidays—faster, easier, but with the same soul-soothing satisfaction. Perfect for impressing guests without breaking a sweat, or turning a simple Tuesday into something memorable.
What Ingredients You Will Need
This recipe uses simple, wholesome ingredients to deliver that bold peppermint-and-chocolate flavor without any fuss. Most of these are pantry staples, especially during the holiday season.
For the Crust
- Oreo cookies (or any chocolate sandwich cookie): 24 whole cookies. You’ll use the whole cookie, cream filling and all. The filling helps bind the crust. (I prefer the classic Oreo for that deep chocolate flavor.)
- Unsalted butter: 5 tablespoons, melted. (Adds richness and helps the crust hold together.)
- Pinch of salt: Just a tiny one, to balance the sweetness.
For the Cheesecake Filling
- Full-fat cream cheese: 16 ounces (two 8-ounce blocks), softened to room temperature. (This is non-negotiable for that creamy texture. Low-fat will make it grainy.)
- Powdered sugar: 1 cup, sifted. (Sifting prevents lumps. Trust me on this one.)
- Heavy whipping cream: 1 cup, cold. (This gives the filling its light, mousse-like structure.)
- Vanilla extract: 1 teaspoon. (Use pure vanilla if you have it, not imitation.)
- Peppermint extract: ½ teaspoon. (Be careful—a little goes a long way. Too much and it tastes like toothpaste.)
For the Topping & Mix-In
- Peppermint bark: 8 ounces (about 1 ½ cups chopped). I recommend the kind with white and dark chocolate layers and crushed candy cane pieces. (I use Ghirardelli or Williams Sonoma when I’m feeling fancy, but store-brand works great too.)
- White chocolate chips: ½ cup, for drizzling. (Optional, but it makes them look bakery-level pretty.)
- Coconut oil: 1 teaspoon. (Helps the white chocolate melt smoothly for drizzling.)
- Optional garnish: Crushed candy canes or extra peppermint bark pieces.
Substitution Guidance: Need a gluten-free option? Use gluten-free chocolate sandwich cookies for the crust, and check your peppermint bark label (most are gluten-free, but double-check). For a dairy-free version, use dairy-free cream cheese and coconut cream instead of heavy cream. The texture will be slightly different, but still delicious. If you can’t find peppermint bark, you can use 4 ounces of dark chocolate and 4 ounces of white chocolate, plus ½ cup of crushed candy canes mixed in.
Equipment Needed
You don’t need a ton of fancy gadgets for these bars, which is part of their charm. Here’s what you’ll want to have on hand.
- 9×9-inch baking pan: This is the perfect size for thick, satisfying bars. An 8×8 will work, but your bars will be taller and may need a slightly longer chill time.
- Parchment paper: Absolutely essential for easy removal. Leave some overhang on two sides to create “handles.”
- Food processor or zip-top bag and rolling pin: For crushing the Oreos into fine crumbs. A food processor is faster, but a bag and a rolling pin work great too (and it’s a good arm workout).
- Electric hand mixer or stand mixer: You need something to whip the cream and cream cheese. A whisk and a lot of elbow grease will work, but it’s a pain. I prefer my hand mixer for this.
- Medium mixing bowls: One for the crust, one for the filling.
- Rubber spatula: For folding in the peppermint bark and scraping every last bit of filling into the pan.
- Small microwave-safe bowl: For melting the white chocolate drizzle.
I’ve made this recipe using a cheap hand mixer I got for twenty bucks, and it worked perfectly. Don’t feel like you need the most expensive equipment. The only thing I’d splurge on is a good-quality 9×9 pan—a dark, non-stick one helps the crust bake evenly.
Preparation Method
Let’s get to the good part. Follow these steps, and you’ll have a pan of gorgeous, crowd-pleasing bars in no time.
Step 1: Make the Crust
Preheat your oven to 325°F (160°C). Line your 9×9-inch pan with parchment paper, leaving a couple of inches of overhang on two opposite sides. This will be your lifeline for lifting the bars out later.
Place the 24 Oreo cookies in a food processor and pulse until they become fine crumbs. If you’re using a bag, put the cookies in a zip-top bag, seal it, and crush them with a rolling pin until no large pieces remain. You should have about 2 cups of crumbs.
Pour the crumbs into a medium bowl. Add the melted butter and a pinch of salt. Stir with a fork until the mixture looks like wet sand and all the crumbs are evenly moistened. It should clump together when you squeeze it in your fist.
Press the mixture firmly and evenly into the bottom of your prepared pan. Use the bottom of a flat measuring cup or a glass to really pack it down. This is important—a loose crust will fall apart when you cut the bars. Bake for 8 minutes. It will smell amazing. Let it cool completely on a wire rack while you make the filling.
Step 2: Whip the Cream
In a large, clean mixing bowl (or the bowl of your stand mixer), pour the cold heavy whipping cream. Using the whisk attachment, beat on medium-high speed until stiff peaks form. This takes about 3-4 minutes. You’ll know it’s ready when you lift the whisk and the cream holds its shape without drooping. Don’t over-whip it, or you’ll end up with butter. Set this bowl aside in the fridge for a moment.
Step 3: Make the Cheesecake Base
In another large bowl, beat the softened cream cheese with an electric hand mixer on medium speed until it’s completely smooth and fluffy—about 2 minutes. Scrape down the sides of the bowl with a spatula. Add the sifted powdered sugar, vanilla extract, and peppermint extract. Beat again on low speed until everything is combined, then increase to medium and beat for another minute until it’s light and airy. It should look like a thick, creamy frosting.
Step 4: Fold It All Together
Take the whipped cream out of the fridge. Using a rubber spatula, gently fold about one-third of the whipped cream into the cream cheese mixture. This “lightens” the base, making it easier to fold in the rest without deflating it. Once that’s incorporated, add the remaining whipped cream and fold gently until no white streaks remain. Be patient—you want to keep as much air in the mixture as possible for that light, mousse-like texture.
Step 5: Add the Peppermint Bark
Chop your peppermint bark into small, bite-sized chunks. Reserve about ¼ cup for the topping. Gently fold the remaining chopped bark into the cheesecake mixture. Fold just until it’s evenly distributed. Don’t overmix, or the bark will start to melt and streak the filling.
Step 6: Assemble and Chill
Pour the cheesecake filling over the cooled crust. Use your spatula to spread it into an even layer, right to the edges. Sprinkle the reserved chopped peppermint bark over the top. Cover the pan with plastic wrap and refrigerate for at least 6 hours, but overnight is best. I know the wait is torture, but it’s necessary for clean, perfect slices.
Step 7: Make the Drizzle (Optional)
About 30 minutes before you’re ready to serve, make the white chocolate drizzle. In a small microwave-safe bowl, combine the white chocolate chips and coconut oil. Microwave in 20-second intervals, stirring after each, until the chocolate is completely smooth and melted. Let it cool for a couple of minutes, then drizzle it over the chilled bars using a fork or a small piping bag (or just drizzle it messily—that’s the aesthetic).
Step 8: Slice and Serve
Lift the bars out of the pan using the parchment paper handles. Place them on a cutting board. Use a sharp, large knife to slice them into 16 squares (a 4×4 grid). For the cleanest cuts, wipe the knife clean with a damp paper towel between each slice. Serve cold. Store any leftovers in the fridge.
Cooking Tips & Techniques
I’ve made a few mistakes so you don’t have to. Here are the things I learned the hard way.
- Room temperature cream cheese is a must: If your cream cheese is cold, it will be lumpy and won’t blend smoothly. Leave it on the counter for at least an hour before you start. If you’re in a hurry, cut it into cubes and microwave it for 10 seconds at a time until it’s soft but not warm.
- Don’t over-whip the cream: I once got distracted and whipped my cream into butter. It was a sad, grainy mess. Watch it closely. As soon as it holds stiff peaks, stop.
- Chill time is non-negotiable: I know you want to eat these immediately. I get it. But if you cut them too early, they’ll be a sloppy, delicious mess. Give them the full overnight chill. The filling sets up perfectly and slices like a dream.
- Use a hot knife for clean slices: Run your knife under hot water, dry it off, then slice. The heat helps glide through the cold cheesecake without dragging the filling. Wipe the blade clean between each cut.
- Toast the crust for extra flavor: Baking the Oreo crust for those 8 minutes does more than just set it. It deepens the chocolate flavor and adds a subtle toastiness that balances the sweet filling. Don’t skip it.
One time, I forgot to add the peppermint extract. The bars were still good—just a plain cheesecake bar with bark on top. It was a sad, mint-less mistake. Learn from my forgetfulness and double-check your ingredients!
Variations & Adaptations
This recipe is a fantastic base for all kinds of creative twists. Here are a few ways I’ve played with it.
- Dark Chocolate Dream: Swap the Oreo crust for a dark chocolate graham cracker crust (use 1 ½ cups dark chocolate graham cracker crumbs and 5 tablespoons melted butter). Use dark chocolate peppermint bark instead of the white/dark combo for a less sweet, more intense chocolate experience.
- Mint Chocolate Chip: Fold in ½ cup of mini chocolate chips along with the peppermint bark. The extra chocolate chips give you a little burst of chocolate in every bite, like a mint chocolate chip ice cream in bar form.
- Gluten-Free Version: Use gluten-free chocolate sandwich cookies for the crust. Most peppermint bark is naturally gluten-free, but always check the label. This version tastes just as good—no one will know the difference.
- Peppermint Mocha Twist: Add 1 tablespoon of instant espresso powder dissolved in 1 teaspoon of hot water to the cream cheese mixture along with the vanilla. The coffee flavor enhances the chocolate and peppermint in a really sophisticated way. I did this for a Christmas brunch, and it was a hit.
- No-Bake Crust Option: If you really don’t want to turn on the oven, you can skip baking the crust. Just press the Oreo-butter mixture into the pan and freeze it for 15 minutes before adding the filling. The crust will be a bit more crumbly, but it still works.
Serving & Storage Suggestions
These bars are best served cold, straight from the fridge. The texture is perfect when it’s firm but still creamy. I like to take them out about 5 minutes before serving to take the chill off just a touch.
Presentation ideas: Arrange the bars on a festive platter. Sprinkle a little extra crushed candy cane on top right before serving for that fresh, snowy look. A dollop of whipped cream on the side is never a bad idea.
Pairing suggestions: These bars are incredible with a hot cup of coffee, a peppermint mocha, or a glass of cold milk. For a holiday party, they pair beautifully with a warm spiced pumpkin apple cider mocktail. The creamy, minty bars balance the tart, spiced drink perfectly.
Storage: Store the bars in an airtight container in the refrigerator for up to 5 days. They actually get better on day two—the flavors meld together beautifully. You can also freeze them for up to 3 months. Wrap individual bars tightly in plastic wrap, then place them in a freezer-safe bag. Thaw in the refrigerator overnight before serving. The texture holds up really well, which is great for making them ahead for the holidays.
Reheating: Don’t. These are a cold dessert. If you want a warm treat, make a different recipe. The beauty of these bars is the cool, creamy contrast to the crunchy crust and bark.
Nutritional Information & Benefits
Let’s be real—this is a decadent dessert, not a health food. But knowing what’s in it helps you enjoy it mindfully. Here’s an approximate breakdown per bar (based on 16 servings).
- Calories: ~320
- Fat: 22g
- Saturated Fat: 13g
- Carbohydrates: 28g
- Sugar: 22g
- Protein: 4g
The cream cheese provides a good amount of calcium and protein, believe it or not. The peppermint is known for its digestive benefits and can help soothe an upset stomach—so technically, these bars are good for you after a big holiday meal. (I’m not a nutritionist, but I’ll take any excuse.)
Dietary Considerations: This recipe is not gluten-free, dairy-free, or low-carb as written. However, see the variations section for gluten-free and dairy-free adaptations. It does contain dairy, gluten, and soy (from the Oreos). If you’re serving a crowd with allergies, make sure to label them clearly.
Personally, I see these bars as a treat for the soul. The holidays are about joy, connection, and a little bit of indulgence. One of these bars, savored slowly with a cup of coffee, is a moment of pure happiness. That’s a health benefit in my book.
Conclusion
These Perfect Peppermint Bark Cheesecake Bars are everything I want in a holiday dessert. They’re easy enough for a beginner baker, fancy enough for a party, and absolutely delicious enough to make you forget about every other dessert on the table. The no-bake filling is a lifesaver when you’re short on time, and the combination of crunchy Oreo crust, creamy cheesecake, and cool, crunchy peppermint bark is simply unbeatable.
I really hope you give these a try. Don’t be afraid to customize them—make them your own. Use dark chocolate, add extra peppermint, or swap in a different cookie crust. The best recipes are the ones you make your own. And if you do make them, I’d love to hear about it. Leave a comment below and tell me how they turned out, or share your own twist on the recipe. Your feedback makes this whole blogging thing worth it.
Go on, make a batch. Your holiday table (and your taste buds) will thank you. Happy baking, and happy holidays!
Frequently Asked Questions
Can I use low-fat cream cheese?
I really don’t recommend it. Low-fat cream cheese has a higher water content, which can make your filling grainy and prevent it from setting up properly. Full-fat cream cheese is the key to that silky, luxurious texture. Save the low-fat for spreading on bagels.
How do I get clean, perfect slices?
The secret is patience and a sharp knife. Make sure your bars are fully chilled (overnight is best). Use a large, sharp chef’s knife, and run it under hot water before each slice. Wipe the blade clean with a damp paper towel between cuts. This prevents the filling from dragging and gives you those gorgeous, Instagram-worthy edges.
Can I make these bars ahead of time?
Absolutely! In fact, I prefer making them a day ahead. They need at least 6 hours to chill, but overnight is ideal. The flavors meld together and the texture becomes even more perfect. You can also freeze the fully assembled (but undrizzled) bars for up to 3 months. Thaw in the fridge overnight, then add the drizzle before serving.
What if I can’t find peppermint bark?
No problem at all. You can make a quick substitute by melting 4 ounces of dark chocolate and 4 ounces of white chocolate separately, then swirling them together on a parchment-lined baking sheet. Sprinkle with ½ cup of crushed candy canes and let it set. Chop it up, and you’ve got homemade peppermint bark. Or, you can just use a mix of dark chocolate chunks and crushed candy canes folded into the filling.
Can I double this recipe for a larger crowd?
Yes, and I do this all the time for holiday parties. Double all the ingredients and use a 9×13-inch pan. You may need to increase the chill time to 8-10 hours or overnight to ensure the center sets up properly. The baking time for the crust stays the same. You’ll get about 24 generous bars from the larger pan.
Pin This Recipe!
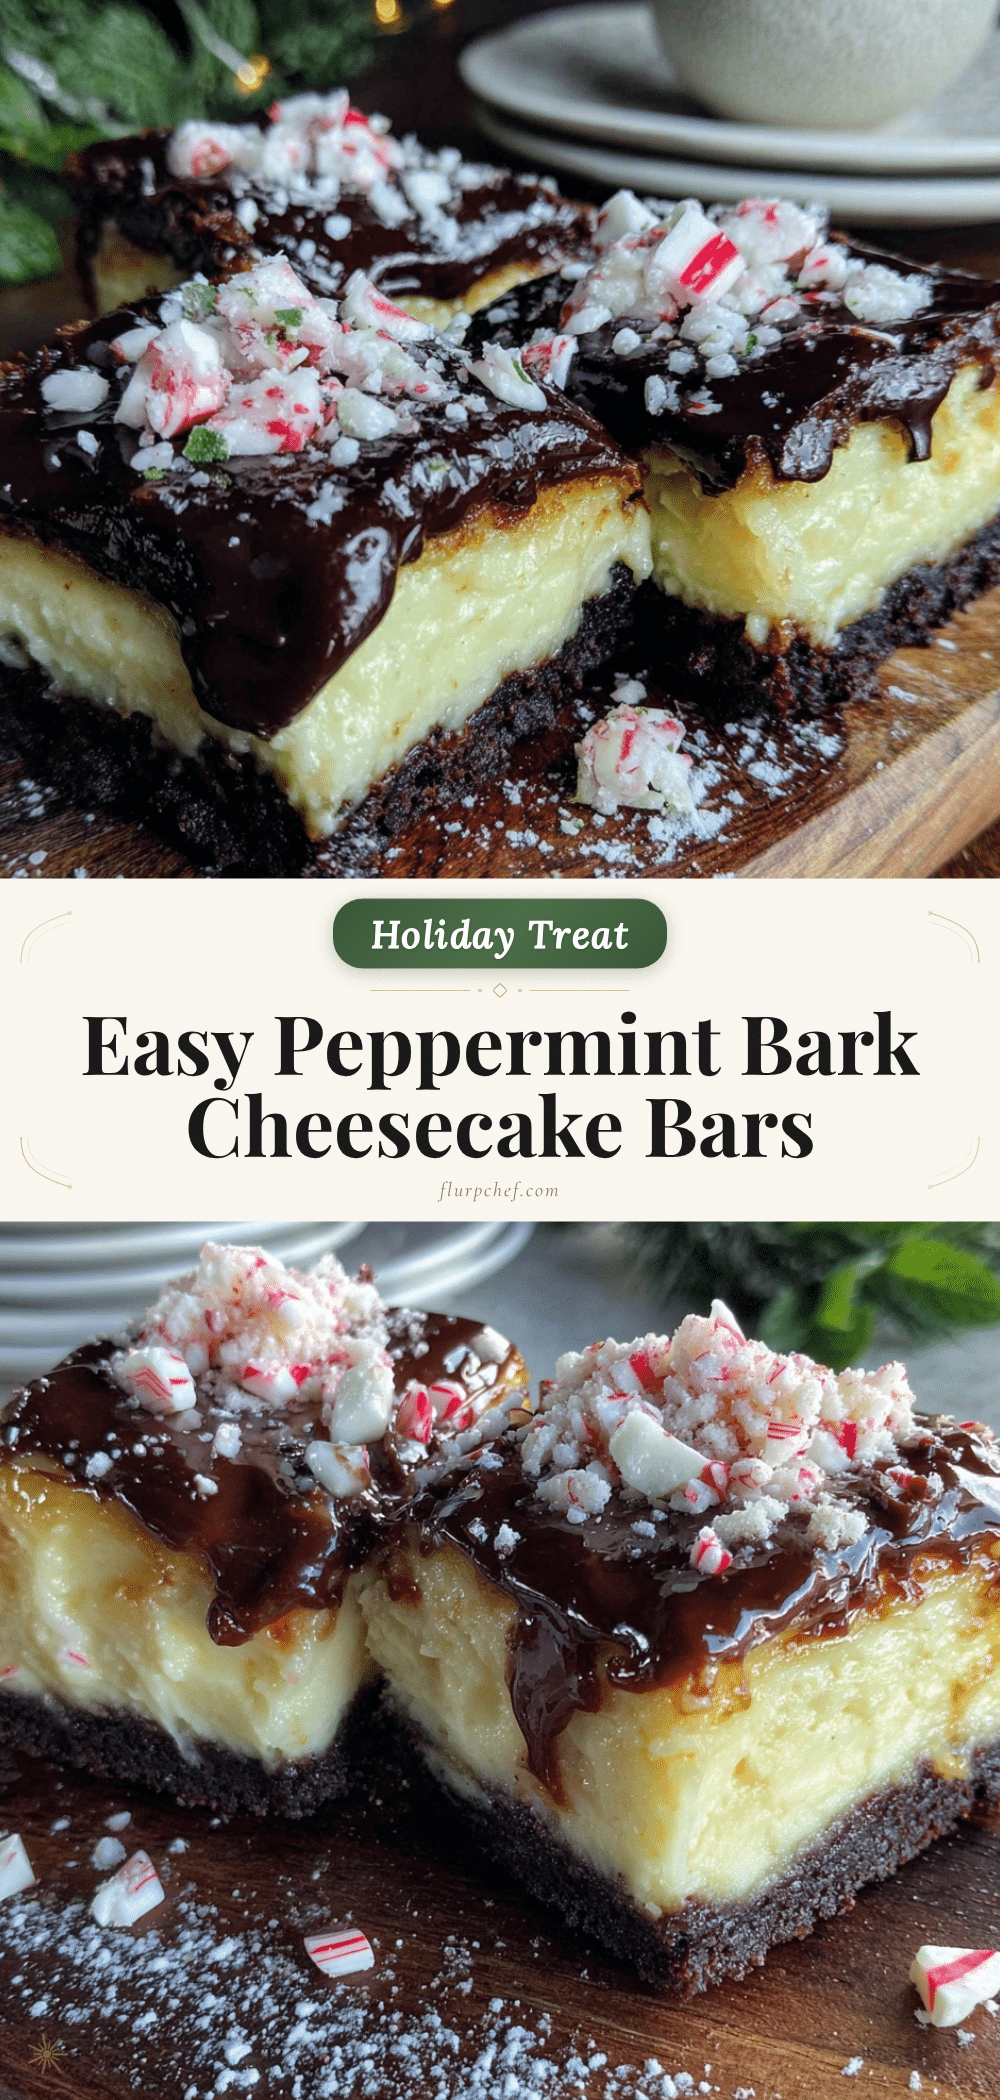
Perfect Peppermint Bark Cheesecake Bars: Easy Holiday Dessert Recipe
These no-bake cheesecake bars feature a crunchy Oreo crust, a creamy peppermint-infused filling, and plenty of chopped peppermint bark for a festive, crowd-pleasing holiday dessert.
- Prep Time: 20 minutes
- Cook Time: 8 minutes
- Total Time: 6 hours 28 minutes (includes chilling)
- Yield: 16 bars 1x
- Category: Dessert
- Cuisine: American
Ingredients
- 24 Oreo cookies (or any chocolate sandwich cookie)
- 5 tablespoons unsalted butter, melted
- Pinch of salt
- 16 ounces full-fat cream cheese, softened to room temperature
- 1 cup powdered sugar, sifted
- 1 cup heavy whipping cream, cold
- 1 teaspoon vanilla extract
- ½ teaspoon peppermint extract
- 8 ounces peppermint bark (about 1½ cups chopped), plus extra for topping
- ½ cup white chocolate chips (for drizzle, optional)
- 1 teaspoon coconut oil (for drizzle, optional)
- Crushed candy canes or extra peppermint bark pieces (optional garnish)
Instructions
- Preheat oven to 325°F (160°C). Line a 9×9-inch baking pan with parchment paper, leaving overhang on two sides.
- Make the crust: Pulse 24 Oreo cookies in a food processor until fine crumbs. Transfer to a bowl, add melted butter and a pinch of salt, and stir until mixture resembles wet sand. Press firmly into the bottom of the prepared pan. Bake for 8 minutes, then let cool completely.
- Whip the cream: In a large bowl, beat cold heavy whipping cream with an electric mixer on medium-high until stiff peaks form, about 3-4 minutes. Refrigerate until needed.
- Make the cheesecake base: In another large bowl, beat softened cream cheese until smooth and fluffy, about 2 minutes. Add sifted powdered sugar, vanilla extract, and peppermint extract. Beat on low until combined, then on medium for 1 minute until light and airy.
- Fold together: Gently fold one-third of the whipped cream into the cream cheese mixture to lighten it. Then fold in the remaining whipped cream until no white streaks remain.
- Add peppermint bark: Chop peppermint bark into small chunks. Reserve ¼ cup for topping. Gently fold the remaining bark into the cheesecake mixture until evenly distributed.
- Assemble: Pour filling over cooled crust and spread evenly. Sprinkle reserved chopped peppermint bark on top. Cover with plastic wrap and refrigerate for at least 6 hours, preferably overnight.
- Make the drizzle (optional): About 30 minutes before serving, combine white chocolate chips and coconut oil in a small microwave-safe bowl. Microwave in 20-second intervals, stirring after each, until smooth. Let cool slightly, then drizzle over chilled bars.
- Slice and serve: Lift bars out of pan using parchment handles. Place on a cutting board and slice into 16 squares (4×4 grid) using a sharp knife. Wipe knife clean between cuts. Serve cold.
Notes
Room temperature cream cheese is essential for a smooth filling. Do not over-whip the cream. Chill time is non-negotiable for clean slices. Use a hot knife for clean cuts. For a gluten-free version, use gluten-free chocolate sandwich cookies and check peppermint bark label. For dairy-free, use dairy-free cream cheese and coconut cream.
Nutrition
- Serving Size: 1 bar
- Calories: 320
- Sugar: 22
- Sodium: 180
- Fat: 22
- Saturated Fat: 13
- Carbohydrates: 28
- Fiber: 1
- Protein: 4
Keywords: peppermint bark cheesecake bars, no-bake cheesecake, holiday dessert, Christmas dessert, Oreo crust, peppermint dessert


