My sister called me last February 12th in a full-blown panic. She had promised her daughter’s entire second-grade class she’d bring in homemade Valentine’s Day treats — and she’d just realized regular round cupcakes with a few sprinkles weren’t going to cut it. “They need to be heart-shaped,” she whispered, like it was a matter of national security. I told her I had zero experience with heart-shaped anything in the baking world, but I’d figure it out. Honestly, I thought it was going to be one of those Pinterest disasters — you know, where the frosting melts, the hearts look like blobs, and you end up ordering pizza and calling it a night.
But here’s the thing — after three test batches and a very patient husband who ate every single failed attempt, I cracked it. These Perfect Red Velvet Heart-Shaped Cupcakes for Valentine’s Day are the result of that frantic, flour-covered Tuesday night. They’re not complicated, they don’t require specialty pans, and the heart shape actually works. Like, really works. The red velvet base is tender and moist with that classic hint of cocoa, and the cream cheese frosting is tangy and smooth — the kind that makes you scrape the bowl clean when nobody’s looking.
What started as a last-minute favor turned into the Valentine’s Day cupcake recipe I now make every single year. And honestly? That’s the best kind of recipe discovery — the one that comes from real life, not some perfectly staged kitchen.
Why You’ll Love This Recipe
I’ve tested this recipe more times than I care to admit, and here’s why it keeps winning:
- Quick & Easy: From start to finish, you’re looking at about 45 minutes. The heart shape adds zero extra time — just a simple trick with a marble and a knife.
- Simple Ingredients: No weird extracts or hard-to-find items. You probably have most of this in your pantry right now.
- Perfect for Valentine’s Day: Whether it’s for a classroom party, a date night dessert, or Galentine’s brunch, these cupcakes deliver the visual wow factor without the stress.
- Crowd-Pleaser: Kids love the heart shape, adults love the red velvet flavor, and everyone loves that cream cheese frosting. I’ve yet to see one come back to the kitchen uneaten.
- Unbelievably Delicious: The texture is what gets me — light, fluffy, and not too sweet. The cocoa is subtle, letting the buttermilk tang and vanilla shine through. It’s comfort in cupcake form.
What makes this recipe different from the rest? It’s the method. Most red velvet recipes use too much cocoa or not enough buttermilk, leaving you with a dry, dense cupcake. I spent time dialing in the ratios so you get that signature red velvet flavor — tender, slightly tangy, and perfectly moist. Plus, the heart-shaped trick is foolproof. No special pan, no complicated cutting, just a simple technique that works every single time.
These are the kind of cupcakes that make people close their eyes after the first bite. The kind that turns a regular Tuesday into something special. And honestly? That’s exactly what Valentine’s Day should feel like.
What Ingredients You Will Need
This recipe uses simple, wholesome ingredients to deliver that classic red velvet flavor and ultra-soft texture. Most of these are pantry staples, which makes these Perfect Red Velvet Heart-Shaped Cupcakes for Valentine’s Day incredibly easy to whip up on a whim.
- All-purpose flour — 1 ½ cups (180g). Standard flour works best here. Spoon and level it into your measuring cup for accuracy.
- Granulated sugar — 1 cup (200g). Adds sweetness and helps create that tender crumb.
- Cocoa powder — 1 tablespoon (5g). Just a touch for that subtle chocolate flavor. I prefer Dutch-processed for a smoother taste, but natural works fine too.
- Baking soda — 1 teaspoon. Helps the cupcakes rise and react with the buttermilk and vinegar.
- Salt — ½ teaspoon. Balances the sweetness and enhances the chocolate.
- Vegetable oil — ½ cup (120ml). Keeps the cupcakes incredibly moist. Canola or any neutral oil works great.
- Buttermilk — ½ cup (120ml). This is non-negotiable for that signature red velvet tang. If you don’t have buttermilk, add 1 tablespoon of lemon juice or white vinegar to regular milk and let it sit for 5 minutes.
- Large eggs — 2, room temperature. Room temperature eggs mix more evenly into the batter.
- White vinegar — 1 teaspoon. Reacts with the baking soda for extra lift and tenderness.
- Vanilla extract — 1 teaspoon. Pure vanilla makes a difference here.
- Red gel food coloring — 1 tablespoon (or more for deeper color). Gel coloring is much more concentrated than liquid, so you use less and get a truer red. I prefer the Americolor brand for consistent results.
- Unsalted butter — ½ cup (113g), softened, for the cream cheese frosting.
- Cream cheese — 8 oz (226g), softened. Full-fat block cream cheese gives the best texture and stability. Avoid the spreadable kind in a tub.
- Powdered sugar — 3 cups (360g), sifted. Sifting prevents lumps in your frosting.
- Vanilla extract — 1 teaspoon, for the frosting.
- Sprinkles or decorations — Optional, for topping. Heart-shaped sprinkles are adorable if you can find them.
Equipment Needed
You don’t need much for this one. Here’s what I use:
- Standard 12-cup muffin tin — Any regular size works. I prefer a non-stick one for easy release.
- Cupcake liners — I like using white or red liners for Valentine’s Day. They show off the red velvet color beautifully.
- Mixing bowls — One large, one medium. Glass or stainless steel is fine.
- Whisk and spatula — A good silicone spatula makes scraping the bowl a breeze.
- Hand mixer or stand mixer — For the frosting. You can whisk by hand, but it takes some elbow grease.
- Measuring cups and spoons — Accurate measurements matter in baking.
- Cooling rack — Essential for even cooling. Don’t skip this or your cupcakes will get soggy bottoms.
- Piping bag and star tip — Optional, but makes the frosting look professional. A zip-top bag with the corner snipped off works in a pinch.
- A marble or small round object — This is the heart of the heart-shaped trick (pun intended). A clean marble, a small ball of foil, or even a cherry tomato works.
If you don’t have a piping bag, don’t stress. A butter knife or offset spatula gives a lovely rustic look that’s just as charming.
Preparation Method
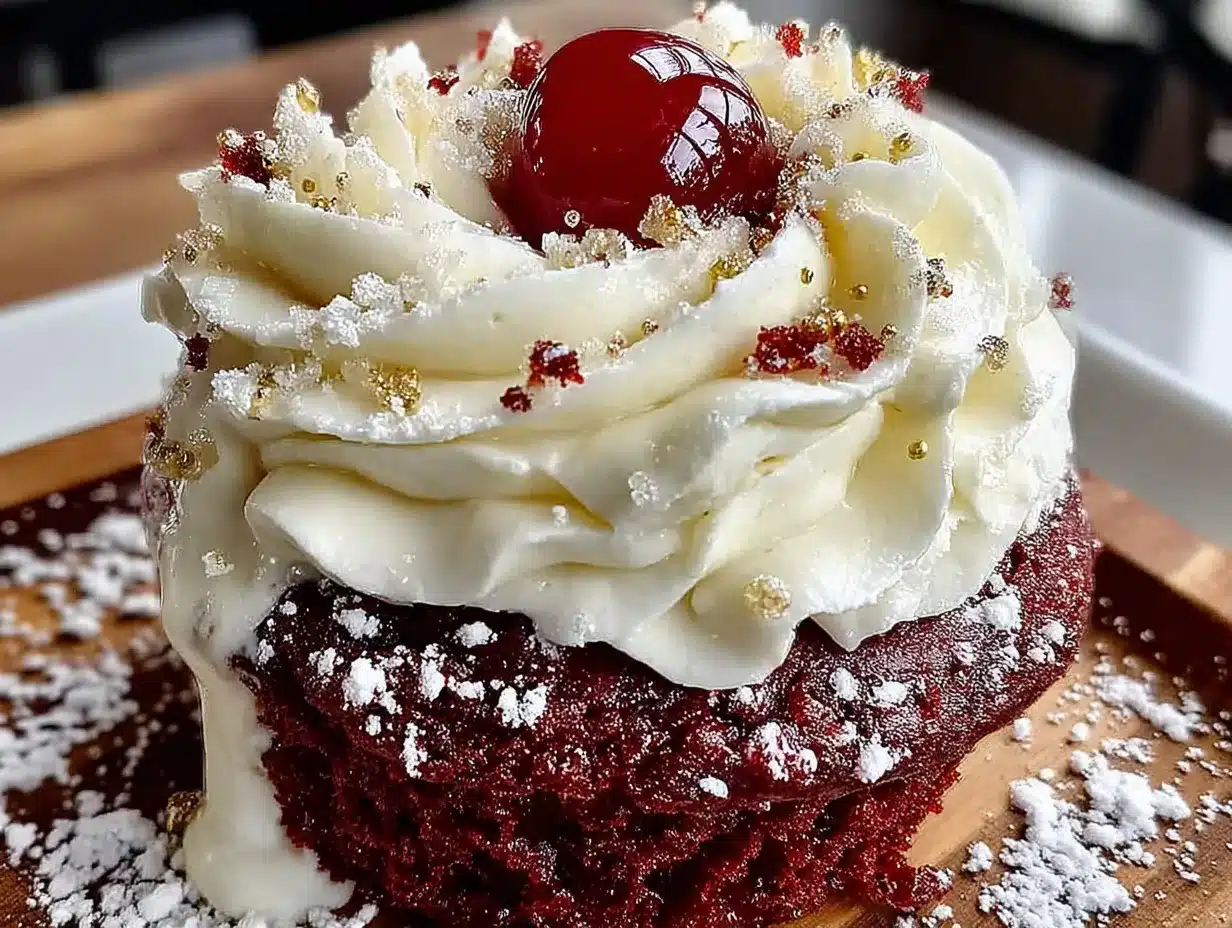
Let me walk you through this step by step. I’ve made these Perfect Red Velvet Heart-Shaped Cupcakes for Valentine’s Day more times than I can count, so I’ll share the little tricks I’ve picked up along the way.
- Preheat your oven to 350°F (175°C). Line your muffin tin with 12 cupcake liners. I like to give the liners a quick spray of non-stick cooking spray — it helps the paper peel off cleanly later.
- In a medium bowl, whisk together the flour, cocoa powder, baking soda, and salt. Make sure there are no lumps. The cocoa powder tends to clump, so I run it through a small sieve if needed.
- In a large bowl, whisk the sugar and oil together until combined. It should look like wet sand. Add the buttermilk, eggs, vinegar, and vanilla, and whisk until smooth. The mixture will be a pale yellowish color at this point.
- Add the red gel food coloring. Start with 1 tablespoon. Whisk it in and see how you feel about the color. I usually end up using about 1 ½ tablespoons for a deep, vibrant red. Remember — the color will darken slightly as it bakes, so go a shade brighter than you think you want.
- Gradually add the dry ingredients to the wet ingredients. Fold gently with a spatula until just combined. Do not overmix — you want to stop as soon as you can’t see any more flour streaks. Overmixing develops gluten and makes tough cupcakes.
- Divide the batter evenly among the 12 liners. I use a cookie scoop for this — it’s neater and gives you even portions. Fill each liner about ⅔ full. Don’t overfill or they’ll dome too much and the heart shape won’t work as well.
- Bake for 18-20 minutes. The tops should spring back when lightly touched, and a toothpick inserted in the center should come out with a few moist crumbs. Start checking at 18 minutes — every oven runs a little differently.
- Let the cupcakes cool in the pan for 5 minutes. Then transfer them to a wire rack to cool completely. This is crucial — if you try to cut them while they’re warm, they’ll crumble. I learned this the hard way.
- While the cupcakes cool, make the frosting. In a large bowl, beat the softened butter and cream cheese together until smooth and creamy, about 2 minutes. Scrape down the sides of the bowl. Add the sifted powdered sugar and vanilla, and beat on low speed until combined, then increase to medium-high and beat for 2-3 minutes until light and fluffy. Don’t overbeat or the frosting can become too soft.
- Now for the heart shape. Once the cupcakes are completely cool, take a small round object — I use a clean marble — and gently press it into the top of each cupcake at an angle, creating an indent. Then, use a small knife to cut a V-shape from the indent outward, creating the top of the heart. You’re essentially carving a shallow heart shape into the top of the cupcake. Don’t go too deep — you just want a subtle shape.
- Pipe or spread the cream cheese frosting over the top of each cupcake. The frosting will fill in the carved shape and create a beautiful heart silhouette. Use a star tip for a classic look, or just spread it with a knife for a more rustic finish.
- Top with sprinkles or decorations if desired. Heart-shaped sprinkles are perfect, but regular sprinkles work too. I sometimes add a single fresh raspberry on top for an extra pop of color.
Cooking Tips & Techniques
Here’s the stuff I wish someone had told me before my first attempt:
Don’t skip the buttermilk. I know it’s tempting to use regular milk, but the acidity in buttermilk is what gives red velvet its signature tang and tender crumb. It also reacts with the baking soda for lift. If you don’t have buttermilk, make your own — it works perfectly.
Room temperature ingredients matter. Cold eggs and cold cream cheese will give you lumpy batter and grainy frosting. Take everything out of the fridge about 30 minutes before you start. Set a timer — I always forget.
Gel food coloring is your friend. Liquid food coloring gives a weak, pinkish red and you’d need half the bottle to get close to the right shade. Gel coloring is concentrated and gives you that deep, rich red with just a tablespoon. I’ve used the AmeriColor Super Red for years and it’s never let me down.
The heart shape trick takes practice. My first few attempts looked more like lopsided blobs than hearts. Go slow, make small cuts, and remember that the frosting hides a multitude of sins. You can always trim a little more if needed.
Chill the frosting if it gets too soft. If your kitchen is warm, the cream cheese frosting can get runny. Pop it in the fridge for 10-15 minutes before piping. It’ll hold its shape much better.
Bake one test cupcake first. If you’re nervous about the color or the heart shape, bake a single cupcake first to test. It saves you from wasting a whole batch if something’s off.
Variations & Adaptations
One of the best things about these Perfect Red Velvet Heart-Shaped Cupcakes for Valentine’s Day is how easy they are to customize. Here are some of my favorite variations:
- Gluten-Free Version: Swap the all-purpose flour for a 1:1 gluten-free baking flour. I’ve used King Arthur Measure for Measure with great results. The texture is slightly more tender, but the flavor is spot on.
- Dairy-Free Option: Use a plant-based buttermilk (add lemon juice to unsweetened almond milk) and dairy-free cream cheese. Miyoko’s brand makes an excellent dairy-free cream cheese that works beautifully in the frosting.
- Chocolate Lover’s Twist: Increase the cocoa powder to 2 tablespoons for a richer chocolate flavor. You’ll need to add an extra tablespoon of buttermilk to balance the dryness.
- Lemon Red Velvet: Add 1 tablespoon of lemon zest to the batter and swap the vanilla in the frosting for lemon extract. The citrus cuts through the richness beautifully.
- Mini Cupcakes: Use a mini muffin tin and bake for 10-12 minutes. You’ll get about 36 mini cupcakes. The heart shape works the same way — just use a smaller round object, like a small bead or a peppercorn.
- No-Frosting Option: If you’re short on time, dust the cupcakes with powdered sugar instead of frosting. It’s still pretty and the red velvet flavor shines through.
I tried the chocolate lover’s twist last year for my husband’s birthday and it was a hit. The extra cocoa made it feel more like a dessert and less like a Valentine’s Day novelty — which honestly, made it even better for everyday occasions.
Serving & Storage Suggestions
These cupcakes are best served at room temperature. The cream cheese frosting softens beautifully and the cake is at its most tender. If you’ve refrigerated them, let them sit out for about 20 minutes before serving.
For presentation, I like to arrange them on a white cake stand or a simple platter. A few fresh raspberries or strawberries scattered around the base adds color and makes it look intentional. If you’re bringing them to a party, a cupcake carrier with a lid is your best friend — I’ve learned that the hard way after a few frosting disasters in the car.
Storage: Store leftover cupcakes in an airtight container in the refrigerator for up to 5 days. The cream cheese frosting needs to be kept cold. Let them come to room temperature before eating for the best texture.
Freezing: You can freeze the unfrosted cupcakes for up to 3 months. Wrap each one tightly in plastic wrap and place them in a freezer bag. Thaw at room temperature, then frost and decorate. The frosting can also be frozen in a piping bag for up to 2 months — just thaw it in the fridge overnight and give it a quick whip before using.
One thing I love about this recipe is that the flavors actually get better after a day in the fridge. The red velvet tang deepens, and the frosting sets up perfectly. So don’t be afraid to make them a day ahead — they’ll still be amazing.
Nutritional Information & Benefits
Here’s the approximate nutritional breakdown for one cupcake (with frosting):
- Calories: 320
- Fat: 16g
- Carbohydrates: 42g
- Protein: 4g
- Sugar: 32g
Now, these are cupcakes — they’re a treat, not a health food. But there are a few redeeming qualities. The cocoa powder provides a small amount of antioxidants, and the buttermilk adds calcium and probiotics. The cream cheese frosting, while indulgent, does contain some protein and calcium from the dairy.
If you’re looking for a lighter option, you can reduce the sugar in the frosting by using a sugar substitute like Swerve, or cut the frosting amount in half. The cupcakes themselves are already lower in sugar than many bakery versions because we’re using just enough to balance the tang.
For those with dietary restrictions, this recipe can be adapted to be gluten-free and dairy-free as mentioned in the variations section. It’s not suitable for vegans as written, but I’ve had success using flax eggs and vegan butter in the past — just expect a slightly denser texture.
Conclusion
These Perfect Red Velvet Heart-Shaped Cupcakes for Valentine’s Day are more than just a pretty dessert. They’re the kind of recipe that saves you when you’re in a pinch, impresses people without making you stress, and honestly just tastes incredible. The red velvet is tender and tangy, the frosting is creamy and smooth, and that heart shape? It’s the little detail that makes people smile.
I love that this recipe came from a real moment of panic and turned into something I now look forward to making every February. It’s proof that you don’t need fancy equipment or years of baking experience to create something special. Just a few simple ingredients, a little patience, and a marble from your junk drawer.
I’d love to hear how yours turn out. Did you try a variation? Did the heart shape work for you? Drop a comment below and let me know. And if you’re looking for more easy, crowd-pleasing desserts, you might also enjoy my creamy no-bake pumpkin pie cheesecake bars or these brown butter pumpkin chocolate chip cookies — both are perfect for any season.
Happy baking, and happy Valentine’s Day. You’ve got this.
Frequently Asked Questions
Can I make these cupcakes without a heart shape?
Absolutely. If you’re short on time or just prefer a classic round cupcake, skip the carving step entirely. The red velvet base and cream cheese frosting are delicious on their own, no shaping required. Just pipe the frosting in a swirl on top and you’re good to go.
Why did my red velvet cupcakes turn out brown?
This usually happens for two reasons: either you didn’t use enough red gel food coloring, or the cocoa powder is too dark. Stick with 1-2 tablespoons of gel coloring (not liquid) and use a natural cocoa powder instead of Dutch-processed. Natural cocoa is lighter in color and gives a truer red.
Can I use a different frosting?
Yes, cream cheese frosting is the classic pairing, but a simple buttercream or even a chocolate ganache works beautifully. If you want to keep it lighter, a dusting of powdered sugar is always an option. Just keep in mind that the tanginess of cream cheese really complements the red velvet flavor.
How do I get perfectly smooth frosting?
Make sure your cream cheese and butter are fully softened before you start beating. Sift your powdered sugar to remove lumps. Beat on medium-high for a full 3 minutes, scraping down the bowl halfway through. If the frosting looks curdled, it’s likely too cold — let it sit at room temperature for 10 minutes and beat again.
Can I freeze these cupcakes with the frosting on?
It’s not recommended. The cream cheese frosting can separate and become watery when thawed. Instead, freeze the unfrosted cupcakes and make the frosting fresh when you’re ready to serve. The frosting comes together in under 10 minutes, so it’s easy to do at the last minute.
Pin This Recipe!
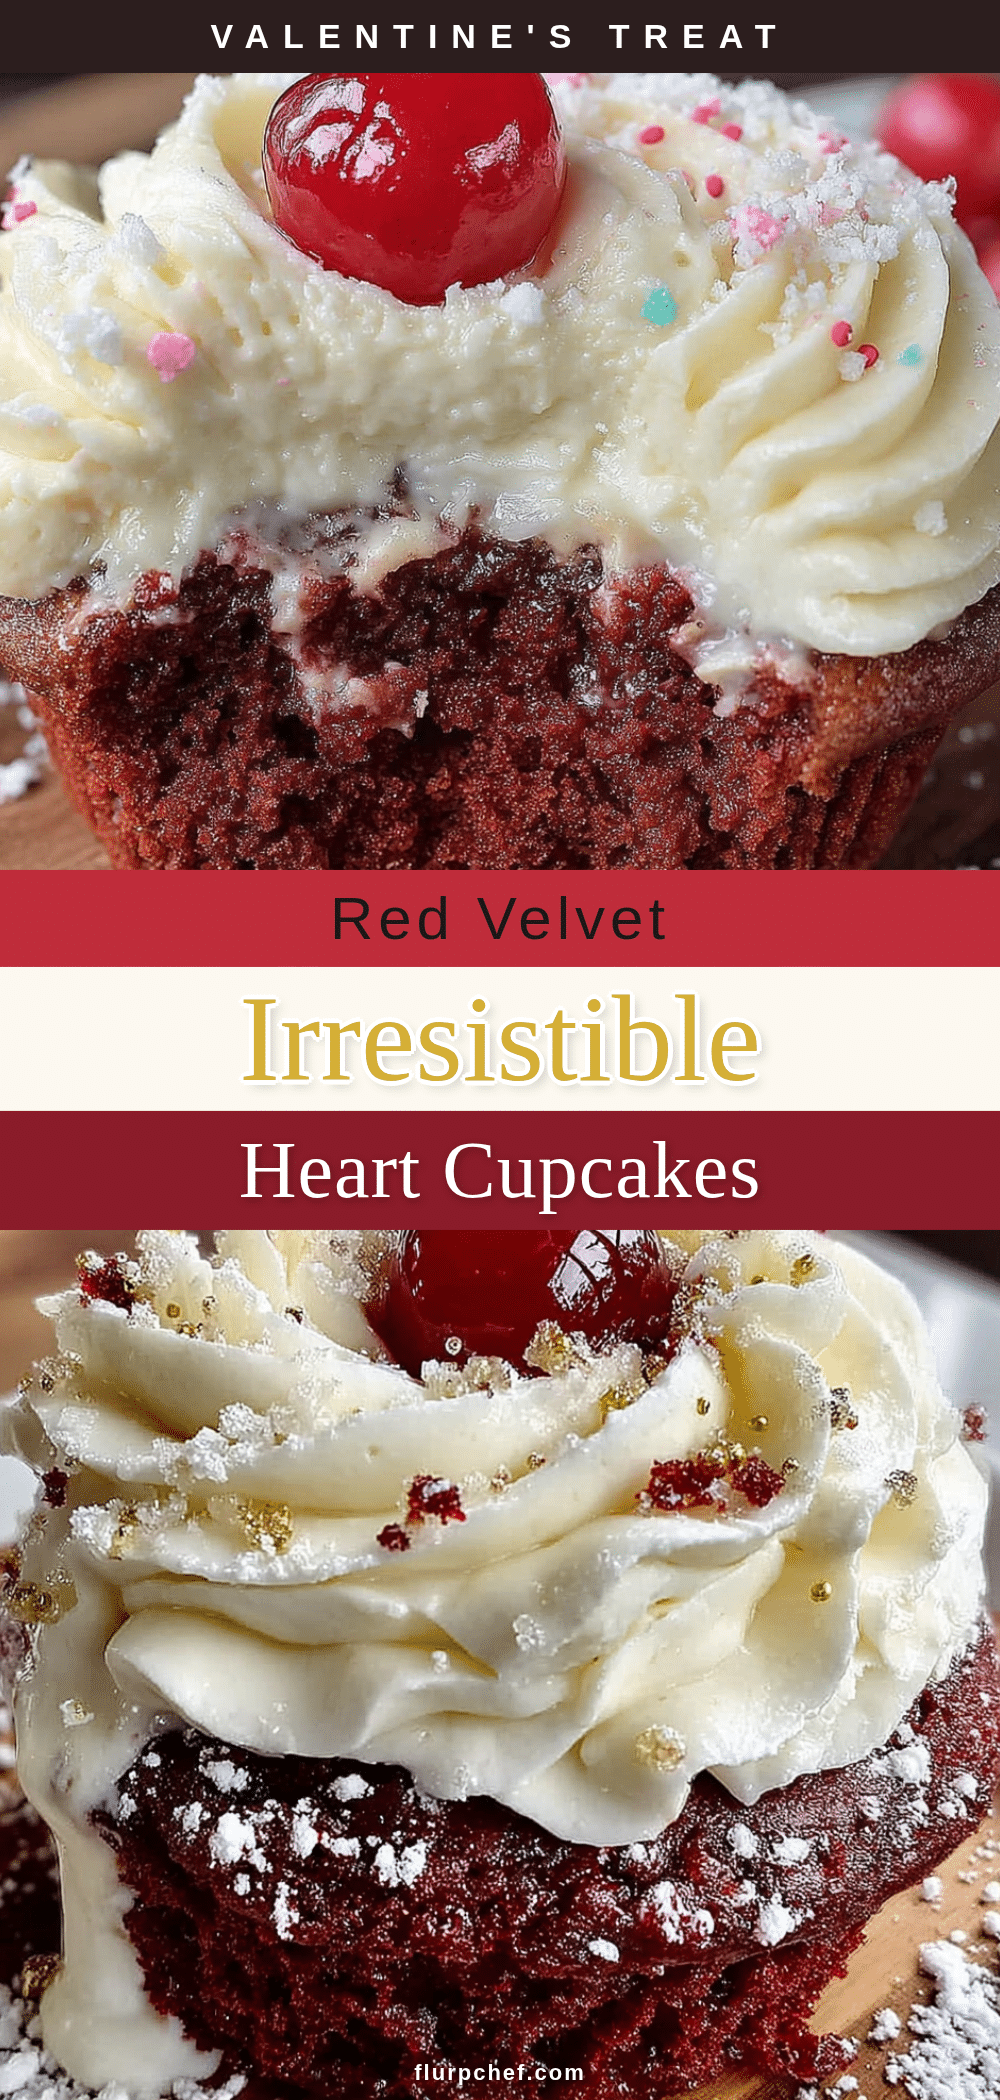
Perfect Red Velvet Valentine Cupcakes: Easy Heart-Shaped Recipe
These Perfect Red Velvet Heart-Shaped Cupcakes for Valentine’s Day are tender, moist, and feature a classic hint of cocoa with a tangy cream cheese frosting. A simple trick with a marble creates a beautiful heart shape without any specialty pans.
- Prep Time: 15 minutes
- Cook Time: 20 minutes
- Total Time: 45 minutes
- Yield: 12 servings 1x
- Category: Dessert
- Cuisine: American
Ingredients
- 1 ½ cups (180g) all-purpose flour
- 1 cup (200g) granulated sugar
- 1 tablespoon (5g) cocoa powder
- 1 teaspoon baking soda
- ½ teaspoon salt
- ½ cup (120ml) vegetable oil
- ½ cup (120ml) buttermilk
- 2 large eggs, room temperature
- 1 teaspoon white vinegar
- 1 teaspoon vanilla extract
- 1 tablespoon red gel food coloring (or more for deeper color)
- ½ cup (113g) unsalted butter, softened
- 8 oz (226g) cream cheese, softened
- 3 cups (360g) powdered sugar, sifted
- 1 teaspoon vanilla extract (for frosting)
- Sprinkles or decorations (optional)
Instructions
- Preheat your oven to 350°F (175°C). Line your muffin tin with 12 cupcake liners. Optionally, spray liners with non-stick cooking spray.
- In a medium bowl, whisk together the flour, cocoa powder, baking soda, and salt until no lumps remain.
- In a large bowl, whisk the sugar and oil together until combined (like wet sand). Add the buttermilk, eggs, vinegar, and vanilla, and whisk until smooth.
- Add the red gel food coloring (start with 1 tablespoon) and whisk until the desired color is reached. The color will darken slightly as it bakes.
- Gradually add the dry ingredients to the wet ingredients, folding gently with a spatula until just combined. Do not overmix.
- Divide the batter evenly among the 12 liners, filling each about ⅔ full.
- Bake for 18-20 minutes, until the tops spring back when lightly touched and a toothpick inserted in the center comes out with a few moist crumbs.
- Let the cupcakes cool in the pan for 5 minutes, then transfer to a wire rack to cool completely.
- While the cupcakes cool, make the frosting: In a large bowl, beat the softened butter and cream cheese together until smooth and creamy, about 2 minutes. Scrape down the sides. Add the sifted powdered sugar and vanilla, beat on low until combined, then increase to medium-high and beat for 2-3 minutes until light and fluffy.
- Once the cupcakes are completely cool, use a small round object (like a clean marble) to gently press into the top of each cupcake at an angle, creating an indent. Use a small knife to cut a V-shape from the indent outward to create the top of a heart.
- Pipe or spread the cream cheese frosting over the top of each cupcake, filling in the carved shape to create a heart silhouette.
- Top with sprinkles or decorations if desired.
Notes
Don’t skip the buttermilk; it provides the signature tang and tender crumb. Room temperature ingredients are crucial for smooth batter and frosting. Gel food coloring is recommended over liquid for a vibrant red. The heart shape trick takes practice; go slow and make small cuts. If the frosting gets too soft, chill it for 10-15 minutes before piping. Bake a test cupcake first if you’re nervous about the color or shape.
Nutrition
- Serving Size: 1 cupcake
- Calories: 320
- Sugar: 32
- Fat: 16
- Carbohydrates: 42
- Protein: 4
Keywords: red velvet cupcakes, heart-shaped cupcakes, Valentine's Day cupcakes, cream cheese frosting, easy cupcake recipe


