My husband claimed he hated sweet breads for breakfast. Fifteen years of marriage, and the man would reach for a bagel or a slice of toast every single time—never a pastry, never a roll with a hint of sugar. Then last October, I made a version of this pan de muerto just for myself on a random Tuesday night. I found him standing at the counter at 11 PM, pulling off pieces with his fingers, muttering something about the orange blossom glaze being “acceptable.”
Honestly, I didn’t say a word. I just watched him finish half the loaf and pretend to be surprised when I found the crumbs on his plate the next morning. That’s the kind of recipe this is—the kind that catches you off guard when you’re not looking.
I know what you’re thinking. Pan de muerto is supposed to be this whole production, right? The traditional version takes hours, requires special molds, and usually involves a level of patience I simply do not possess on a weeknight. Let me tell you, I’ve been there—standing in my kitchen at 9 PM, covered in flour, wondering why I thought making Day of the Dead bread on a Wednesday was a good idea. This quick version came out of that exact moment of desperation.
Maybe you’ve been there too—wanting to make something special but running out of time and energy. That’s why this recipe stuck with me. It gives you all that soft, orange-scented goodness without the all-day commitment. The glaze is what really gets you. That floral sweetness with the citrus kick? It’s the kind of thing that makes you close your eyes after the first bite, even if you swore you didn’t like sweet breakfast breads.
Why You’ll Love This Recipe
This isn’t your grandmother’s pan de muerto—and that’s exactly the point. This version was born from a real weeknight craving when I didn’t have three hours to spare. Here’s why it works:
- Quick & Easy: From start to finish, you’re looking at about 90 minutes instead of the traditional 4-5 hours. The dough comes together in one bowl, and there’s no complicated shaping required.
- Simple Ingredients: No trip to a specialty bakery or Mexican grocery store needed. You probably have everything except the orange blossom water in your pantry right now. And honestly? You can skip it if you must—but don’t.
- Perfect for Weeknights: This is the kind of recipe you start after dinner and have fresh for breakfast the next morning. Or, you know, at 11 PM when your husband discovers it.
- Crowd-Pleaser: I’ve served this to people who said they didn’t like sweet breads, people who’d never heard of pan de muerto, and people who grew up eating the real deal. Every single one of them asked for seconds.
- Unbelievably Delicious: The texture is soft and pillowy, the orange flavor is bright without being overwhelming, and that glaze? It seeps into the warm bread and creates this magical moment you’ll want to repeat.
What makes this recipe different from the dozens of other pan de muerto recipes out there is the technique. I use a quick-rise method that skips the long proofing times without sacrificing that tender crumb. The orange blossom glaze isn’t just a topping—it’s the whole reason this bread works. It balances the slight yeastiness with floral sweetness in a way that feels special, not fussy.
This recipe is comfort food reimagined. It’s faster, simpler, and somehow still has the same soul-soothing satisfaction as the traditional version. Perfect for impressing guests without stress, or turning a regular Tuesday into something memorable.
What Ingredients You Will Need
This recipe uses simple, everyday ingredients to deliver that signature pan de muerto flavor and texture without the complicated steps. Most of these are pantry staples, with just one or two special touches that make all the difference.
For the Dough
- 3 ½ cups all-purpose flour (440g) – I use King Arthur Flour for consistent results, but any brand works. Spoon and level your flour—don’t scoop straight from the bag or you’ll end up with dense bread.
- ¼ cup granulated sugar (50g) – Just enough sweetness to complement the glaze without making the bread itself too sweet.
- 1 packet active dry yeast (2 ¼ teaspoons) – Quick-rise yeast also works here. If using instant yeast, you can skip the proofing step.
- ½ teaspoon salt – Don’t skip this! Salt controls the yeast activity and enhances the orange flavor.
- 1 teaspoon orange zest – From about one medium orange. Make sure to zest before juicing. I recommend organic oranges since you’re eating the peel.
- 3 large eggs, room temperature – Cold eggs will shock your yeast and slow down rising. Set them out 30 minutes before starting.
- ¼ cup unsalted butter (57g), melted and slightly cooled – Butter adds richness and keeps the bread soft for days. Salted butter works if that’s what you have—just reduce the added salt to ¼ teaspoon.
- ½ cup warm milk (120ml) – Around 110°F. Too hot kills the yeast, too cold and it won’t activate. Think bath water temperature.
- 1 teaspoon vanilla extract – Pure vanilla makes a difference here. Imitation vanilla has a chemical aftertaste that doesn’t play well with the orange blossom.
For the Orange Blossom Glaze
- 1 cup powdered sugar (120g) – Sift it if you want a perfectly smooth glaze. I rarely bother and it’s fine.
- 2 tablespoons orange blossom water – This is the star. Find it in the international aisle, a Middle Eastern grocery store, or online. One bottle lasts forever.
- 1 tablespoon fresh orange juice – From that orange you zested earlier. Fresh juice matters here—bottled juice tastes flat.
- 1 teaspoon orange zest – For garnish and extra citrus punch.
For the Topping
- 2 tablespoons melted butter – For brushing after baking. This step is non-negotiable if you want that glossy, soft crust.
- 1 tablespoon granulated sugar mixed with ½ teaspoon cinnamon – Optional but traditional. I sometimes skip it when I want the glaze to shine.
Substitution Notes: If you can’t find orange blossom water, you can use 2 tablespoons of fresh orange juice plus 1 teaspoon of orange extract. It won’t be exactly the same, but it’ll still be delicious. For a dairy-free version, use plant-based butter and oat milk—I’ve tested this with both and the texture holds up surprisingly well.
Equipment Needed
You don’t need any fancy equipment for this recipe. Here’s what you’ll actually use:
- Large mixing bowl – Any bowl works, but a wide one makes kneading easier if you’re doing it by hand.
- Stand mixer with dough hook – Optional but highly recommended. I use my KitchenAid for this because the dough is slightly sticky and hand-kneading takes more flour. If you don’t have one, a wooden spoon and some elbow grease work fine.
- Baking sheet – A standard half-sheet pan lined with parchment paper. No need for a special pan.
- Pastry brush – For brushing on that butter and glaze. A silicone brush is easier to clean than a natural bristle one.
- Zester or microplane – For getting that fine orange zest without the bitter white pith.
- Measuring cups and spoons – I prefer a kitchen scale for accuracy, but cups work if you measure properly.
- Clean kitchen towel – For covering the dough while it rises. A damp paper towel works in a pinch.
That’s it. No bread machine, no special molds, no complicated tools. I’ve made this in a tiny apartment kitchen with a cracked mixing bowl and a fork for whisking. It still turned out great.
Preparation Method
Let’s walk through this step by step. I’ll tell you exactly what to look for at each stage so you know you’re on the right track.
- Proof the yeast: In your mixing bowl, combine the warm milk (110°F, remember), 1 tablespoon of the sugar, and the yeast. Let it sit for 5-10 minutes until it gets foamy and smells like bread. If nothing happens after 10 minutes, your yeast is dead—start over with fresh yeast. I learned this the hard way after wasting an hour on dough that never rose.
- Mix the dry ingredients: In a separate bowl, whisk together the flour, remaining sugar, salt, and orange zest. This distributes the zest evenly so every bite has that citrus flavor.
- Combine wet ingredients: To the proofed yeast mixture, add the beaten eggs, melted butter, and vanilla extract. Whisk until combined. The mixture will look a little lumpy—that’s fine.
- Form the dough: Gradually add the flour mixture to the wet ingredients, stirring with a wooden spoon or your mixer’s paddle attachment until a shaggy dough forms. Switch to the dough hook and knead for 8-10 minutes (or knead by hand for 12-15 minutes). The dough should be smooth, elastic, and slightly tacky but not sticky. If it’s sticking to everything, add flour one tablespoon at a time. If it’s dry and stiff, add milk a teaspoon at a time.
- First rise: Shape the dough into a ball and place it in a lightly greased bowl. Cover with a clean kitchen towel and let it rise in a warm spot for 45-60 minutes, or until doubled in size. I put mine in the microwave with a cup of hot water—it creates the perfect warm, humid environment. The dough should feel puffy and hold a slight indentation when you poke it.
- Shape the bread: Punch down the dough gently. Divide it into two pieces—one larger piece (about two-thirds of the dough) for the base, and one smaller piece for the decorative bones and top. Shape the large piece into a round loaf and place it on your parchment-lined baking sheet. From the smaller piece, roll four “bones” (about 4 inches long) and one small round ball for the top center. Arrange the bones in an X pattern across the loaf, and place the ball in the center. Don’t stress about making it perfect—traditional pan de muerto is supposed to look rustic.
- Second rise: Cover the shaped loaf with the towel and let it rise for another 30-40 minutes. It should look puffy and feel light when you gently touch it. Meanwhile, preheat your oven to 350°F (175°C).
- Bake: Bake for 25-30 minutes, until the top is golden brown and the loaf sounds hollow when you tap the bottom. If the top is browning too fast, tent it loosely with foil after 15 minutes. Every oven runs differently—mine takes exactly 27 minutes, but start checking at 22 minutes.
- First glaze: As soon as the bread comes out of the oven, brush it generously with melted butter. This step keeps the crust soft and adds that beautiful sheen. Let it cool on the baking sheet for 10 minutes.
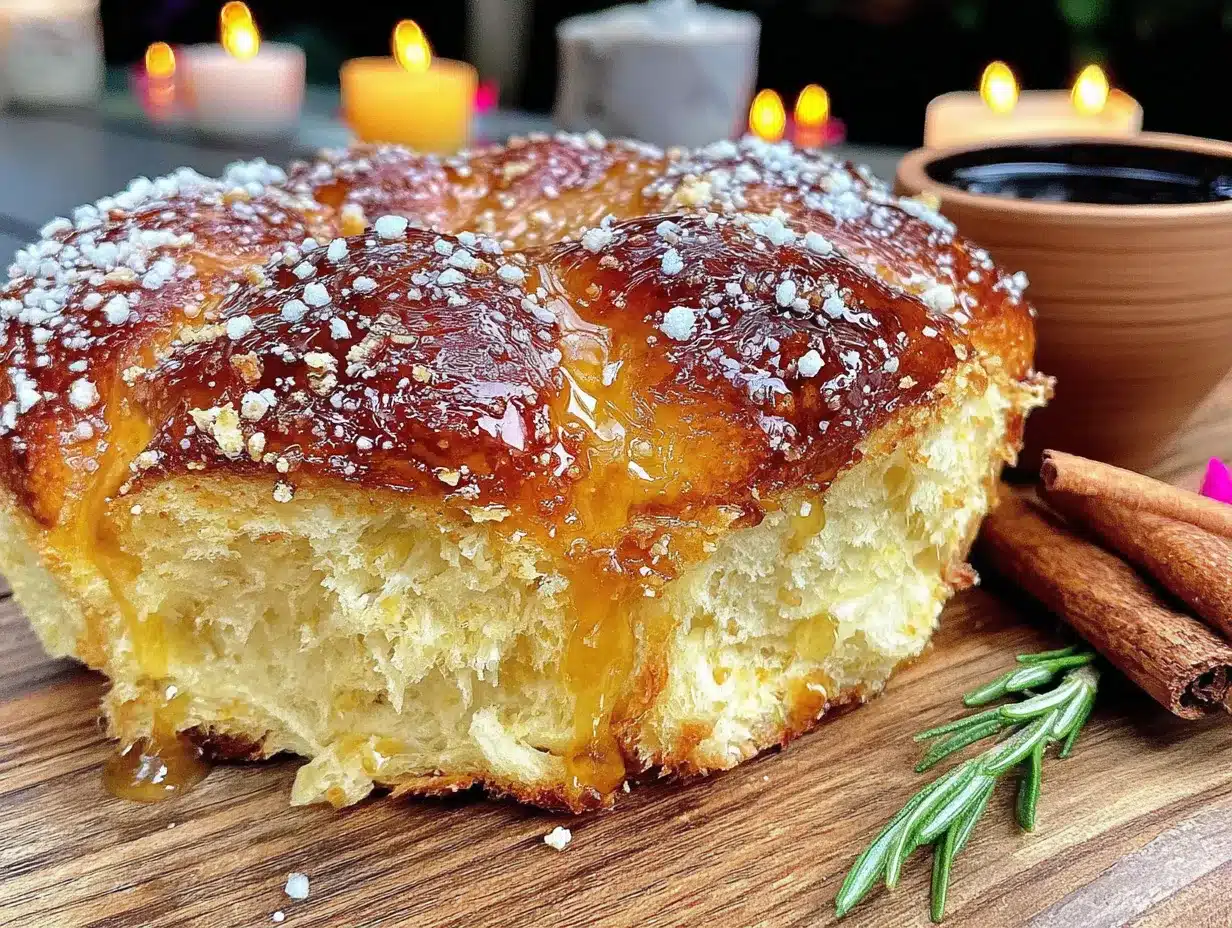
- Orange blossom glaze: While the bread cools, whisk together the powdered sugar, orange blossom water, and fresh orange juice until smooth. The glaze should be thick but pourable—thin with more orange juice if needed, or thicken with more powdered sugar. Drizzle it over the warm bread, letting it cascade down the sides. Sprinkle with the remaining orange zest.
- Final rest: Let the glaze set for at least 15 minutes before slicing. I know it’s tempting, but warm glaze is messy and will slide right off. Trust me on this one.
Cooking Tips & Techniques
After making this recipe more times than I care to count (including some spectacular failures), here’s what I’ve learned:
Don’t over-flour your surface. This dough is meant to be slightly tacky. Adding too much flour during kneading will give you a dense, dry bread. If it’s sticking to your hands, oil them lightly instead of adding flour. That tip came from my neighbor Rosa, who’s been making pan de muerto for forty years.
Temperature matters more than you think. Cold ingredients will sabotage your rise every time. Set your eggs and butter out an hour before you start. If you forget (I do, constantly), place the eggs in a bowl of warm water for 5 minutes and microwave the milk for 15 seconds. Your yeast will thank you.
The glaze is the whole point. I once tried to save time by glazing the bread while it was still hot. The glaze melted into a puddle and soaked into the bread, leaving a sticky mess. Let it cool those 10 minutes—the glaze needs the bread to be warm, not hot, so it sets properly on top.
Make extra glaze. Seriously. Double the glaze recipe. You’ll want to dip every piece in it, and having extra means you can re-glaze the next day when the bread starts to dry out a little. It’s like giving your bread a second chance at perfection.
Timing strategy: Start the dough right after dinner, let it rise while you clean up, shape it during a commercial break, and bake it while you watch your show. By the time you’re ready for bed, you’ll have fresh pan de muerto waiting for breakfast. Or, you know, a midnight snack.
Variations & Adaptations
This recipe is forgiving, so feel free to make it your own. Here are some variations I’ve tried and loved:
Dairy-Free Version: Substitute the butter with vegan butter (I like Miyoko’s) and use oat milk instead of dairy milk. The texture is slightly less tender, but the flavor holds up beautifully. I made this for a friend with a dairy allergy and she couldn’t tell the difference.
Chocolate Orange Twist: Add ¼ cup of cocoa powder to the flour mixture and reduce the flour by ¼ cup. The chocolate-orange combination is absolutely killer. My kids request this version for every holiday, not just Day of the Dead.
Lemon-Anise Variation: Replace the orange zest with lemon zest and add 1 teaspoon of anise seeds to the dough. Swap the orange blossom water in the glaze for lemon juice. This version is less traditional but has a bright, licorice-tinged flavor that’s perfect for spring.
Gluten-Free Adaptation: Use a 1:1 gluten-free flour blend that contains xanthan gum. The dough will be stickier and harder to shape, so wet your hands frequently. The texture won’t be exactly the same—it’ll be a bit more cake-like—but the flavor is still wonderful.
Savory-Sweet Hybrid: Reduce the sugar to 2 tablespoons and add ½ teaspoon of black pepper and ¼ teaspoon of cayenne to the dough. The spicy-sweet combination with the orange glaze is unexpectedly addictive. I served this at a dinner party and people fought over the last piece.
Serving & Storage Suggestions
Pan de muerto is best served warm, when the glaze is still slightly soft and the bread is pillowy. Here’s how to make the most of it:
Serving: Slice it like you would a cake—wedges, not slices. Serve it alongside a cup of Mexican hot chocolate or café de olla for the full experience. For breakfast, it’s perfect with a simple cup of black coffee. The sweetness of the glaze means you don’t need any additional toppings, though a dollop of crema or whipped cream never hurts.
Storage: Store leftover bread in an airtight container at room temperature for up to 3 days. Do not refrigerate—it will dry out the bread and make the texture rubbery. If you live in a humid climate, skip the airtight container and use a paper bag instead to prevent the glaze from getting sticky.
Freezing: You can freeze the unglazed bread for up to 2 months. Wrap it tightly in plastic wrap, then foil. When you’re ready to serve, thaw it at room temperature, warm it in a 300°F oven for 5 minutes, then glaze it fresh. The glaze doesn’t freeze well, so always add it after thawing.
Reheating: Pop individual slices in the microwave for 10-15 seconds to get that fresh-from-the-oven softness. For a crispier exterior, reheat in a toaster oven at 350°F for 3-4 minutes. The glaze will melt slightly and create a beautiful caramelized effect.
Flavor development: Honestly, this bread is even better on day two. The orange blossom flavor deepens overnight, and the texture becomes more cohesive. If you can resist eating it all on day one, you’re in for a treat.
Nutritional Information & Benefits
Let’s be real—pan de muerto is a treat, not a health food. But here’s what you’re working with per slice (assuming 8 slices per loaf):
- Calories: Approximately 320 per slice with glaze
- Fat: 12g (mostly from butter and eggs)
- Carbohydrates: 48g
- Protein: 7g
- Fiber: 1g
- Sugar: 22g (including added sugar and glaze)
Health highlights: The eggs provide high-quality protein and choline for brain health. Oranges (zest and juice) offer vitamin C and antioxidants. The orange blossom water has been used in traditional medicine for its calming properties—whether that’s true or just placebo, I always feel more relaxed after eating this bread.
Dietary considerations: This recipe contains gluten, dairy, and eggs. For allergen-friendly versions, see the variations section above. If you’re watching your sugar intake, you can reduce the glaze sugar by half—the bread itself isn’t very sweet.
My perspective: I believe in eating real food, including treats like this. One slice of homemade pan de muerto is infinitely better for you than anything packaged from the store. You know exactly what’s in it, and the joy of sharing it with people you love is good for the soul. Balance, not deprivation.
Conclusion
This quick pan de muerto with orange blossom glaze is the recipe I never knew I needed. It takes a traditional bread that usually requires hours of patience and turns it into something achievable on a regular weeknight. The soft, citrus-scented crumb, the floral glaze that seeps into every crevice, the way it makes your kitchen smell like a Mexican bakery—it’s all worth the minimal effort.
I hope you make this recipe your own. Maybe you’ll add extra orange zest, or skip the bones and make it as a simple round loaf, or double the glaze like I always do. The beauty of this bread is that it’s forgiving. It doesn’t demand perfection. It just asks for a little time and a willingness to try something new.
When you make it—and I hope you do—let me know how it turns out. Did your husband catch you eating it at midnight? Did your kids ask for it every day for a week? Did you discover a variation that’s even better than the original? Drop a comment below and tell me about it. I read every single one, and honestly, your stories are my favorite part of this whole thing.
Now go preheat your oven. That orange blossom water isn’t going to use itself.
Frequently Asked Questions
Can I make this pan de muerto ahead of time?
Absolutely. You can prepare the dough through the first rise, punch it down, and refrigerate it overnight. The next day, let it come to room temperature for about 30 minutes before shaping and proceeding with the second rise. The flavor actually develops more during that cold fermentation.
What if I can’t find orange blossom water?
You can substitute with 2 tablespoons of fresh orange juice plus 1 teaspoon of orange extract. It won’t have that same floral note, but it’ll still taste delicious. Some grocery stores carry orange blossom water in the international aisle or near the rose water.
Why didn’t my dough rise?
Most likely your yeast was dead or your liquid was too hot. Check the expiration date on your yeast, and make sure your milk is around 110°F—hotter than 120°F kills the yeast. Also, cold kitchen temperatures can slow down rising. Try placing the bowl in a warm spot, like on top of your refrigerator or near a sunny window.
Can I freeze this bread?
Yes, but freeze it without the glaze. Wrap the cooled, unglazed loaf tightly in plastic wrap and then foil. It will keep for up to 2 months. When you’re ready to serve, thaw at room temperature, warm in a 300°F oven for 5 minutes, and then glaze it fresh.
How do I know when the bread is fully baked?
The top should be golden brown, and the loaf should sound hollow when you tap the bottom. If you have an instant-read thermometer, the internal temperature should read 190°F to 200°F. Start checking at 22 minutes—every oven runs a little differently.
Pin This Recipe!
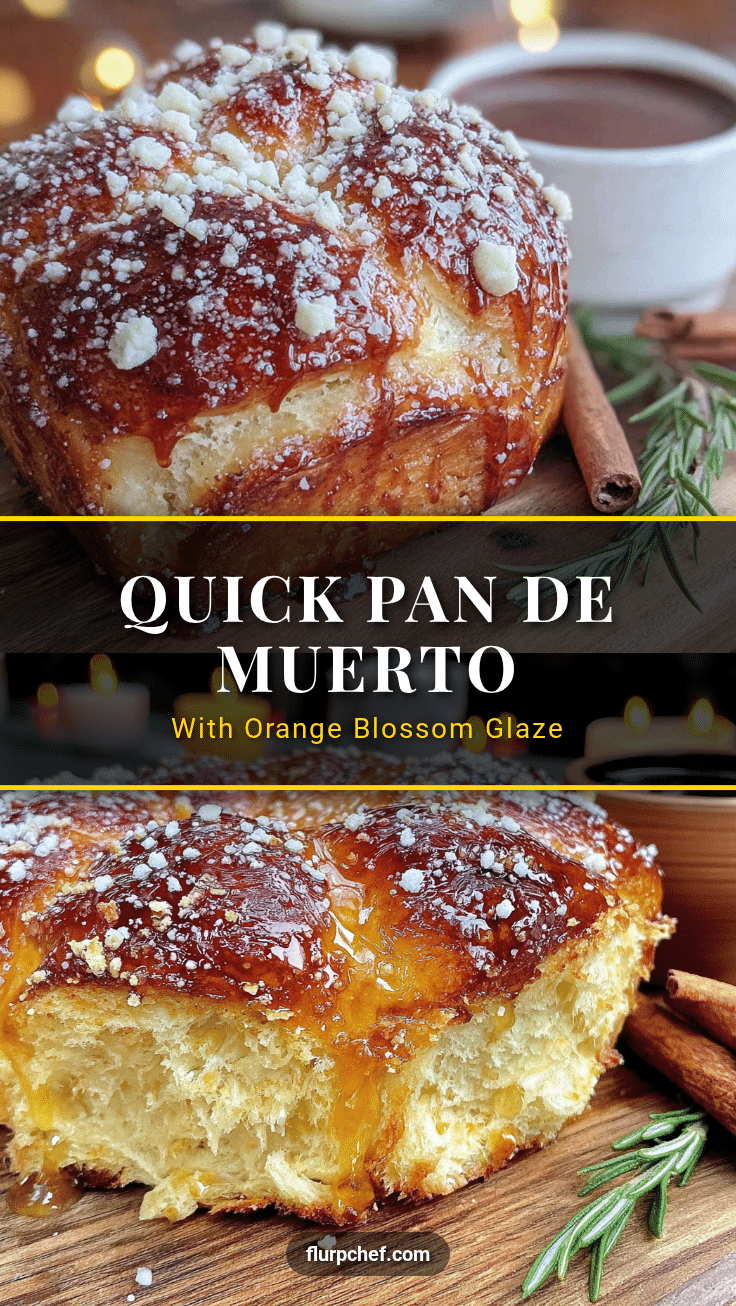
Quick Pan de Muerto with Easy Orange Blossom Glaze
A quick and easy version of the traditional Day of the Dead bread, featuring a soft, orange-scented crumb and a floral orange blossom glaze. Ready in about 90 minutes, this recipe is perfect for weeknights and delivers all the soul-soothing satisfaction of the classic without the all-day commitment.
- Prep Time: 20 minutes
- Cook Time: 25-30 minutes
- Total Time: 1 hour 30 minutes
- Yield: 8 servings 1x
- Category: Bread
- Cuisine: Mexican
Ingredients
- 3 ½ cups all-purpose flour (440g)
- ¼ cup granulated sugar (50g)
- 1 packet active dry yeast (2 ¼ teaspoons)
- ½ teaspoon salt
- 1 teaspoon orange zest
- 3 large eggs, room temperature
- ¼ cup unsalted butter (57g), melted and slightly cooled
- ½ cup warm milk (120ml), about 110°F
- 1 teaspoon vanilla extract
- 1 cup powdered sugar (120g)
- 2 tablespoons orange blossom water
- 1 tablespoon fresh orange juice
- 1 teaspoon orange zest (for garnish)
- 2 tablespoons melted butter (for brushing)
- 1 tablespoon granulated sugar mixed with ½ teaspoon cinnamon (optional)
Instructions
- Proof the yeast: In your mixing bowl, combine the warm milk (110°F), 1 tablespoon of the sugar, and the yeast. Let it sit for 5-10 minutes until foamy.
- Mix the dry ingredients: In a separate bowl, whisk together the flour, remaining sugar, salt, and orange zest.
- Combine wet ingredients: To the proofed yeast mixture, add the beaten eggs, melted butter, and vanilla extract. Whisk until combined.
- Form the dough: Gradually add the flour mixture to the wet ingredients, stirring until a shaggy dough forms. Knead with a dough hook for 8-10 minutes (or by hand for 12-15 minutes) until smooth, elastic, and slightly tacky.
- First rise: Shape the dough into a ball and place it in a lightly greased bowl. Cover with a clean kitchen towel and let it rise in a warm spot for 45-60 minutes, or until doubled in size.
- Shape the bread: Punch down the dough. Divide into two pieces—one larger piece (about two-thirds) for the base, and one smaller piece for the decorative bones and top. Shape the large piece into a round loaf on a parchment-lined baking sheet. From the smaller piece, roll four ‘bones’ (about 4 inches long) and one small round ball. Arrange the bones in an X pattern across the loaf and place the ball in the center.
- Second rise: Cover the shaped loaf and let it rise for another 30-40 minutes until puffy. Meanwhile, preheat oven to 350°F (175°C).
- Bake: Bake for 25-30 minutes until golden brown and the loaf sounds hollow when tapped. If browning too fast, tent with foil after 15 minutes.
- First glaze: As soon as the bread comes out of the oven, brush generously with melted butter. Let cool on the baking sheet for 10 minutes.
- Orange blossom glaze: Whisk together powdered sugar, orange blossom water, and fresh orange juice until smooth. Drizzle over the warm bread and sprinkle with remaining orange zest.
- Final rest: Let the glaze set for at least 15 minutes before slicing.
Notes
Don’t over-flour your surface; the dough should be slightly tacky. Temperature matters—use room temperature eggs and butter. Let the bread cool 10 minutes before glazing so the glaze sets properly. Double the glaze recipe if you want extra for dipping. The bread is even better on day two as the orange blossom flavor deepens.
Nutrition
- Serving Size: 1 slice (1/8 of loaf
- Calories: 320
- Sugar: 22
- Sodium: 180
- Fat: 12
- Saturated Fat: 7
- Carbohydrates: 48
- Fiber: 1
- Protein: 7
Keywords: pan de muerto, day of the dead bread, orange blossom glaze, quick bread, mexican sweet bread, weeknight baking


