It was 10:47 PM on a random Tuesday, and I had a very specific, almost desperate craving for something chocolatey, creamy, and a little bit spooky. Not like, full-on Halloween spooky, but that fun, “I want to make something that looks impressive but requires zero effort” kind of spooky. I was scrolling through my phone, half-watching some true crime documentary, and the idea just hit me. I didn’t have a full cheesecake recipe’s worth of ingredients, but I had a box of chocolate sandwich cookies, a block of cream cheese, and a stubborn determination to not leave the couch. That’s the thing about late-night baking—the rules are different. You’re not trying to impress anyone. You’re just trying to satisfy that itch with whatever you’ve got.
So, I grabbed a baking pan, crushed up those cookies (honestly, a Ziploc bag and a rolling pin works better than a food processor when you’re trying to be quiet), and started layering. The cheesecake filling came together in one bowl—no mixer required, just some serious elbow grease and a whisk. Then came the fun part: the spiderweb. I melted some chocolate, drizzled it over the top, and used a toothpick to drag it into that iconic web pattern. It took maybe two minutes, and I felt like a total kitchen wizard. I mean, it looked like something from a fancy bakery, but I was wearing pajamas and hadn’t brushed my teeth yet.
Maybe you’ve been there—you want a dessert that looks like you spent hours on it, but you’re running on fumes and the clock is ticking toward midnight. These quick spiderweb chocolate cheesecake bars are that recipe. They’re the kind of thing you make when you need a win, something beautiful and delicious that comes together in under 30 minutes. No water bath, no complicated steps, just pure, unadulterated chocolate cheesecake goodness with a creepy-cute topping that never gets old. I’ve been making them for every fall gathering since, and let me tell you, they disappear faster than anything else on the dessert table.
Why You’ll Love This Recipe
These quick spiderweb chocolate cheesecake bars aren’t just another dessert—they’re a lifesaver for the busy baker. I’ve tested this recipe more times than I can count, tweaking the crust-to-filling ratio and perfecting the web technique so you get it right on the first try. Here’s why this recipe is a total keeper:
- Quick & Easy: From start to finish, these bars are ready in about 30 minutes. That’s faster than ordering delivery and way more satisfying. Perfect for those “I need dessert NOW” moments.
- Simple Ingredients: You probably have most of these in your kitchen already. No fancy grocery store runs for obscure ingredients—just basic pantry staples that come together beautifully.
- Perfect for Last-Minute Gatherings: Whether it’s a Halloween party, a fall potluck, or just a Tuesday night that needs a little magic, these bars are your go-to. They look impressive but require almost zero effort.
- Crowd-Pleaser: I’ve served these to kids, adults, and picky eaters. Everyone loves the combination of a crunchy chocolate crust, creamy cheesecake filling, and that fun spiderweb top.
- Unbelievably Delicious: The texture is everything—crunchy on the bottom, silky smooth in the middle, and a slightly firm top that holds the web pattern perfectly. It’s comfort food at its finest.
What makes these bars different from other cheesecake recipes? It’s the technique. Instead of a complicated water bath or a fussy crust that requires blind baking, this recipe uses a simple press-in crust and a no-bake-style filling that sets up firm in the fridge. The spiderweb is pure artistry with zero stress—just melted chocolate and a toothpick. I’ve tried other versions, and honestly, this one wins every time because it respects your time and still delivers on flavor. It’s the kind of dessert that makes you close your eyes after the first bite, thinking, “I can’t believe I made this in half an hour.”
What Ingredients You Will Need
This recipe uses simple, wholesome ingredients to deliver that rich, creamy texture without any fuss. Most of these are pantry staples, so you can whip these up anytime the craving strikes. Here’s what you’ll need:
For the Crust
- Chocolate sandwich cookies, crushed — about 24 cookies (like Oreos), cream filling included. I recommend using a brand you love, but any chocolate wafer cookie will work. The crumbs should be fine but not powdery.
- Unsalted butter, melted — 5 tablespoons (70g). This binds the crust together and adds richness. Use salted butter if that’s all you have, just skip the added salt.
- Granulated sugar — 2 tablespoons (25g). Just a touch to balance the bitterness of the cookies. You can omit this if you’re using very sweet cookies.
For the Cheesecake Filling
- Full-fat cream cheese, softened — 16 ounces (450g), two standard blocks. This is non-negotiable for that creamy texture. Low-fat cream cheese will make the filling runny. Let it sit out for 30 minutes before starting.
- Granulated sugar — ½ cup (100g). Just enough sweetness to balance the tangy cream cheese. You can reduce to ⅓ cup if you prefer less sweet.
- Vanilla extract — 2 teaspoons (10ml). Pure vanilla extract makes a difference here. Skip the imitation stuff if you can.
- Large eggs — 2, at room temperature. They help the filling set up firm and smooth. Cold eggs can make the batter lumpy.
- Sour cream — ¼ cup (60g). This adds moisture and a slight tang that makes the cheesecake taste bakery-quality. Greek yogurt works as a substitute.
For the Spiderweb Topping
- Semi-sweet chocolate chips — ½ cup (85g). Use good quality chips for smooth melting. Dark chocolate or milk chocolate both work, depending on your preference.
- Coconut oil or vegetable oil — 1 teaspoon (5ml). This thins the chocolate slightly so it drizzles perfectly. Don’t skip it—it makes the web much easier to create.
That’s it! No fancy extracts, no unusual ingredients, just straightforward stuff you can find at any grocery store. If you’re dairy-free, you can use a plant-based cream cheese and butter substitute, though the texture will be slightly different. For a gluten-free version, use gluten-free chocolate sandwich cookies—they work just as well.
Equipment Needed
You don’t need a professional kitchen to make these bars. Here’s what you’ll need:
- 8×8-inch baking pan — This is the perfect size for these bars. A 9×9-inch pan works too, but the bars will be slightly thinner. Line it with parchment paper for easy removal.
- Mixing bowls — You’ll need a medium bowl for the crust and a large bowl for the filling. I prefer glass or stainless steel bowls because they don’t retain odors.
- Rolling pin or food processor — For crushing the cookies. A Ziploc bag and rolling pin works great if you’re trying to be quiet (late-night bakers, I see you). A food processor gives more consistent crumbs.
- Whisk — For mixing the filling. A hand mixer works too, but a whisk gives you more control and prevents overmixing.
- Spatula — For spreading the filling evenly. A rubber spatula is ideal for scraping every last bit of cheesecake goodness.
- Small microwave-safe bowl — For melting the chocolate. You can also use a double boiler if you prefer.
- Toothpick or skewer — For creating the spiderweb pattern. A toothpick is easiest, but a thin skewer works too.
- Piping bag or small Ziploc bag — For drizzling the melted chocolate. A small Ziploc bag with the corner snipped off works perfectly.
I’ve made these bars with just a whisk and a rolling pin, so don’t stress if you don’t have fancy equipment. The parchment paper is the only non-negotiable—trust me, it makes cleanup so much easier.
Preparation Method
Alright, let’s get to the fun part. Here’s how to make these quick spiderweb chocolate cheesecake bars step by step. I’ve included all the little details that make the difference between good and great.
Step 1: Prep Your Pan and Preheat
Preheat your oven to 325°F (160°C). Line your 8×8-inch baking pan with parchment paper, leaving some overhang on two sides. This creates “handles” that make it super easy to lift the bars out later. Lightly grease the parchment with cooking spray or butter.
Step 2: Make the Crust
Place your chocolate sandwich cookies in a Ziploc bag and crush them with a rolling pin until you have fine crumbs. You should end up with about 2 cups of crumbs. Transfer to a medium bowl, add the melted butter and sugar, and stir until the mixture looks like wet sand. Press this mixture firmly into the bottom of your prepared pan. Use the bottom of a measuring cup to really pack it down—this prevents the crust from crumbling when you cut the bars. Bake for 8 minutes, then set aside to cool slightly. The crust should be fragrant and slightly firm to the touch.
Step 3: Make the Cheesecake Filling
In a large bowl, beat the softened cream cheese with a whisk until smooth and creamy. Add the sugar and vanilla, and whisk until fully combined. Add the eggs one at a time, whisking gently after each addition. Don’t overmix—you want to incorporate the eggs without adding too much air, which can cause cracks. Finally, whisk in the sour cream until just combined. The mixture should be smooth, glossy, and free of lumps. If you see small lumps, let the cream cheese sit out a bit longer next time.
Step 4: Assemble and Bake
Pour the cheesecake filling over the warm crust and spread it evenly with a spatula. Give the pan a gentle tap on the counter to release any air bubbles. Bake for 25-28 minutes, or until the edges are set and the center is still slightly jiggly. It will look a bit underdone, but that’s exactly what you want—it continues to set as it cools. Overbaking leads to dry, cracked cheesecake.
Step 5: Create the Spiderweb
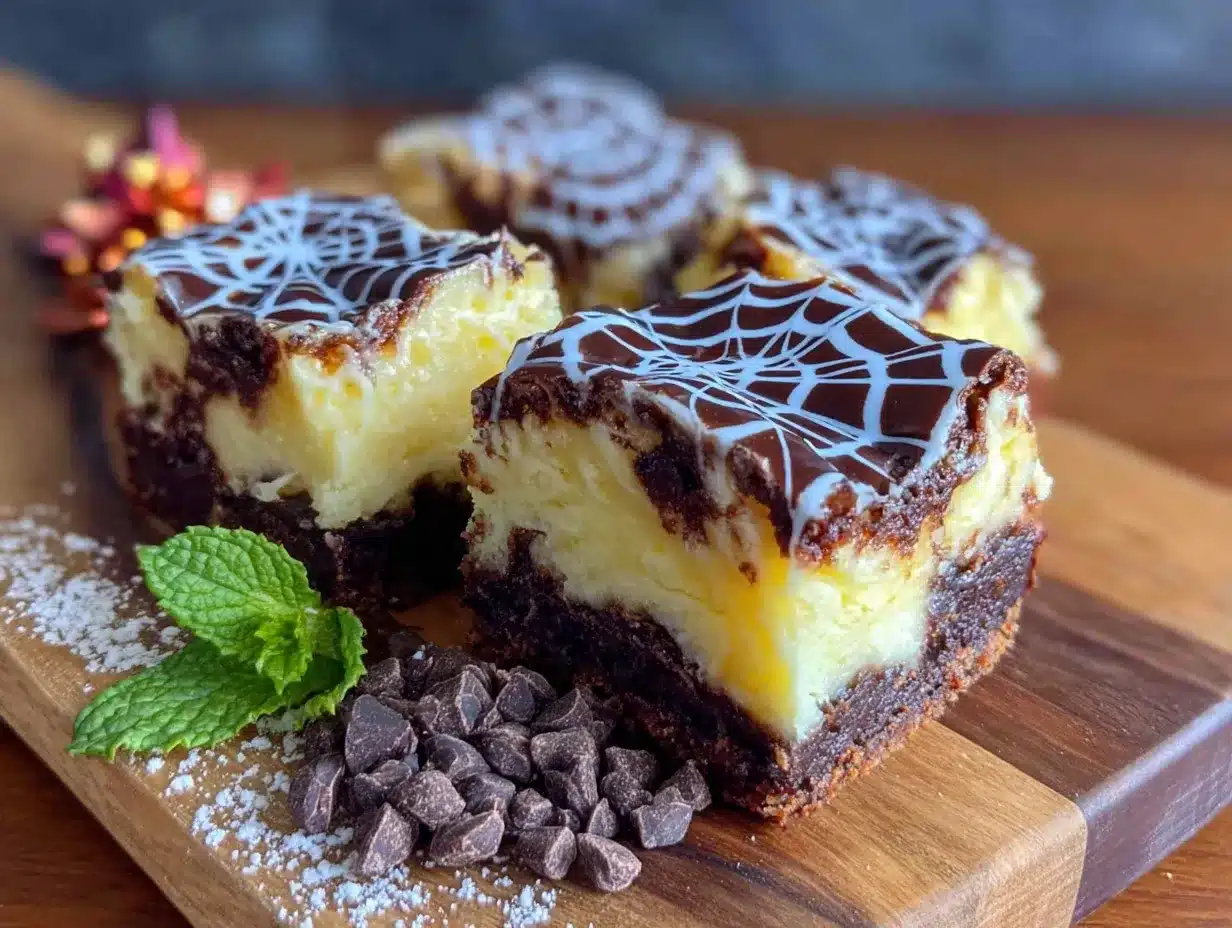
While the cheesecake bakes, melt your chocolate chips and coconut oil in a small microwave-safe bowl. Microwave in 30-second bursts, stirring between each, until smooth. Let it cool slightly while the cheesecake finishes baking. Once the cheesecake comes out of the oven, let it cool on a wire rack for 10 minutes. Then, transfer the melted chocolate to a small Ziploc bag, snip off a tiny corner, and pipe concentric circles over the top of the warm cheesecake. Start in the center and work your way out, leaving about 1 inch between each circle. Then, use a toothpick to drag lines from the center outward, creating the web pattern. Wipe the toothpick clean between each drag for clean lines.
Step 6: Chill and Serve
Let the cheesecake cool completely at room temperature, then refrigerate for at least 2 hours (overnight is even better). The chilling time is crucial—it allows the filling to set up firm and makes cutting clean slices much easier. Once chilled, use the parchment handles to lift the bars out of the pan and place them on a cutting board. Use a sharp knife to cut into 16 squares, wiping the knife clean between cuts for neat edges. Serve cold or at room temperature.
Cooking Tips & Techniques
After making these bars more times than I care to admit, I’ve picked up a few tricks that make the process smoother. Here are my best tips:
- Room temperature ingredients are key. Cold cream cheese creates lumps that are nearly impossible to whisk out. Let everything sit out for 30 minutes before you start. If you’re in a hurry, cut the cream cheese into small cubes and microwave it for 10 seconds.
- Don’t overmix the filling. I learned this the hard way. Overmixing incorporates too much air, which causes the cheesecake to puff up and then crack as it cools. Mix just until everything is combined—a few tiny lumps are better than a cracked surface.
- The toothpick trick. For the spiderweb, drag the toothpick from the center outward, then wipe it clean before the next drag. If you don’t wipe it, the chocolate smears and the web looks messy. Also, work quickly while the cheesecake is still warm—the chocolate spreads more easily.
- Use a hot knife for clean cuts. Run your knife under hot water, dry it off, then slice. Wipe the blade clean between each cut. This gives you those bakery-perfect edges that make the spiderweb pattern really pop.
- Patience with chilling. I know it’s hard to wait, but these bars really need at least 2 hours in the fridge. If you try to cut them too soon, the filling will be soft and the crust will crumble. Overnight is best for the cleanest slices.
One mistake I made early on was using low-fat cream cheese. It seemed like a good idea at the time, but the filling turned out watery and never set properly. Full-fat cream cheese is non-negotiable for that rich, creamy texture. Also, don’t skip the sour cream—it adds moisture and prevents the cheesecake from drying out.
Variations & Adaptations
These bars are incredibly versatile. Here are some ways to switch things up based on what you have or what you’re craving:
- Peanut Butter Spiderweb: Swap the chocolate chips for peanut butter chips in the topping. Drizzle melted peanut butter instead of chocolate for a different color contrast. It’s a Reese’s-inspired twist that’s absolutely divine.
- Pumpkin Spice Version: Add ½ cup pumpkin puree and 1 teaspoon pumpkin pie spice to the cheesecake filling. Reduce the sugar to ⅓ cup since pumpkin adds sweetness. This is perfect for fall gatherings.
- Gluten-Free Option: Use gluten-free chocolate sandwich cookies for the crust. The filling is naturally gluten-free, so this is an easy swap. Just make sure your vanilla extract is also gluten-free.
- White Chocolate Web: Use white chocolate chips for the spiderweb topping. The contrast against the dark chocolate crust is stunning. Add a drop of orange food coloring to the white chocolate for a Halloween-themed look.
- Mint Chocolate Chip: Add ½ teaspoon peppermint extract to the cheesecake filling and fold in ¼ cup mini chocolate chips. Top with the regular chocolate spiderweb. It’s like a Thin Mint in cheesecake form.
I’ve tried the pumpkin spice version for a fall potluck, and it was a huge hit. The pumpkin adds moisture, so the bars are even creamier. Just be careful not to overbake—the extra moisture can make the center seem underdone, but it sets perfectly in the fridge.
Serving & Storage Suggestions
These bars are best served cold, straight from the fridge. The firm texture makes them easy to handle, and the flavors are more pronounced when chilled. Here’s how to serve and store them:
Serving Temperature: I prefer them cold, but you can let them sit at room temperature for 10 minutes if you want a softer texture. For a dramatic presentation, serve them on a black or white plate to make the spiderweb pattern stand out. A dollop of whipped cream on the side is never a bad idea.
Complementary Dishes: These bars pair beautifully with a cup of hot coffee or a glass of cold milk. For a dessert spread, serve them alongside pumpkin pie, apple crisp, or chocolate truffles. They also work great as a make-ahead dessert for Halloween parties—just assemble and chill the day before.
Storage Instructions: Store leftover bars in an airtight container in the refrigerator for up to 5 days. The flavors actually improve after a day or two as they meld together. To freeze, wrap individual bars tightly in plastic wrap, then place them in a freezer-safe bag. They’ll keep for up to 3 months. Thaw in the refrigerator overnight before serving.
Reheating Tips: These bars are meant to be served cold, but if you prefer a slightly softer texture, microwave individual bars for 10-15 seconds. Be careful not to overheat, or the chocolate web will melt and lose its pattern.
Flavor Development: Honestly, these bars taste even better on day two. The crust softens slightly from the moisture of the filling, and the flavors become more cohesive. If you can resist eating them right away, you’re in for a treat.
Nutritional Information & Benefits
While these bars are definitely a treat, they do have some redeeming qualities. Here’s a rough estimate per bar (based on 16 servings):
Estimated Nutrition per Bar: Calories: 285 | Fat: 19g | Carbohydrates: 26g | Protein: 5g | Sugar: 18g | Fiber: 1g
Health Benefits: The cream cheese provides a good amount of calcium and protein, which helps keep you full. Dark chocolate is rich in antioxidants and can support heart health in moderation. The cookies add a bit of iron from the cocoa powder. While this isn’t a health food, it’s a more balanced dessert option than many store-bought alternatives.
Dietary Considerations: This recipe contains dairy, gluten, and eggs. For a dairy-free version, use plant-based cream cheese and butter. For gluten-free, use gluten-free cookies. The sugar can be reduced to ⅓ cup if you prefer less sweetness. Always check labels if you’re cooking for someone with allergies.
I personally love that these bars are portion-controlled—16 servings means you can enjoy one without going overboard. They satisfy that chocolate cheesecake craving without the commitment of a full-sized cheesecake. Plus, the protein from the cream cheese and eggs helps balance the sugar rush, so you don’t crash as hard.
Conclusion
These quick spiderweb chocolate cheesecake bars are proof that you don’t need hours in the kitchen to create something truly special. They’re the perfect blend of a crunchy chocolate crust, silky cheesecake filling, and a fun, festive topping that never fails to impress. Whether you’re making them for a Halloween party, a fall gathering, or just because you need a little midweek magic, they deliver every single time.
I love that this recipe is forgiving enough for beginners but impressive enough for experienced bakers. You can customize it endlessly, make it ahead of time, and feel like a kitchen rockstar with minimal effort. Honestly, it’s become my go-to dessert for every occasion because it’s just that reliable.
Now I want to hear from you! Have you tried making these bars? Did you add your own twist? Drop a comment below and let me know how they turned out. And if you loved this recipe, share it with a friend who needs a quick dessert win. Happy baking, and remember—sometimes the best recipes come from late-night cravings and a little bit of creativity.
Frequently Asked Questions
Can I make these bars without a food processor?
Absolutely! A Ziploc bag and a rolling pin work perfectly for crushing the cookies. You can also use a meat tenderizer or even a heavy-bottomed pan. The crumbs don’t need to be perfectly uniform—a few larger pieces add nice texture to the crust.
Why did my cheesecake filling crack?
Cracks usually happen from overmixing or overbaking. Mix the filling just until combined—don’t beat it vigorously. Also, take the cheesecake out of the oven when the center is still slightly jiggly. It continues to set as it cools. If cracks do appear, don’t worry—the spiderweb topping covers them beautifully.
Can I use a different pan size?
A 9×9-inch pan works, but the bars will be thinner and may bake a few minutes faster. A 7×11-inch pan also works, giving you slightly thicker bars. Adjust the baking time by a few minutes and check for doneness by the jiggle test. Avoid using a round pan unless you adjust the crust amount.
How far in advance can I make these?
You can make these bars up to 3 days in advance. Store them covered in the refrigerator. The flavors actually improve after a day or two. For longer storage, freeze individual bars for up to 3 months. Just wrap them tightly to prevent freezer burn.
Can I use a different type of chocolate for the web?
Definitely! White chocolate, milk chocolate, or even dark chocolate all work. If using white chocolate, add a drop of oil to thin it out. You can also use candy melts or colored chocolate for a festive look. Just make sure the chocolate is smooth and slightly warm when you pipe it.
Pin This Recipe!
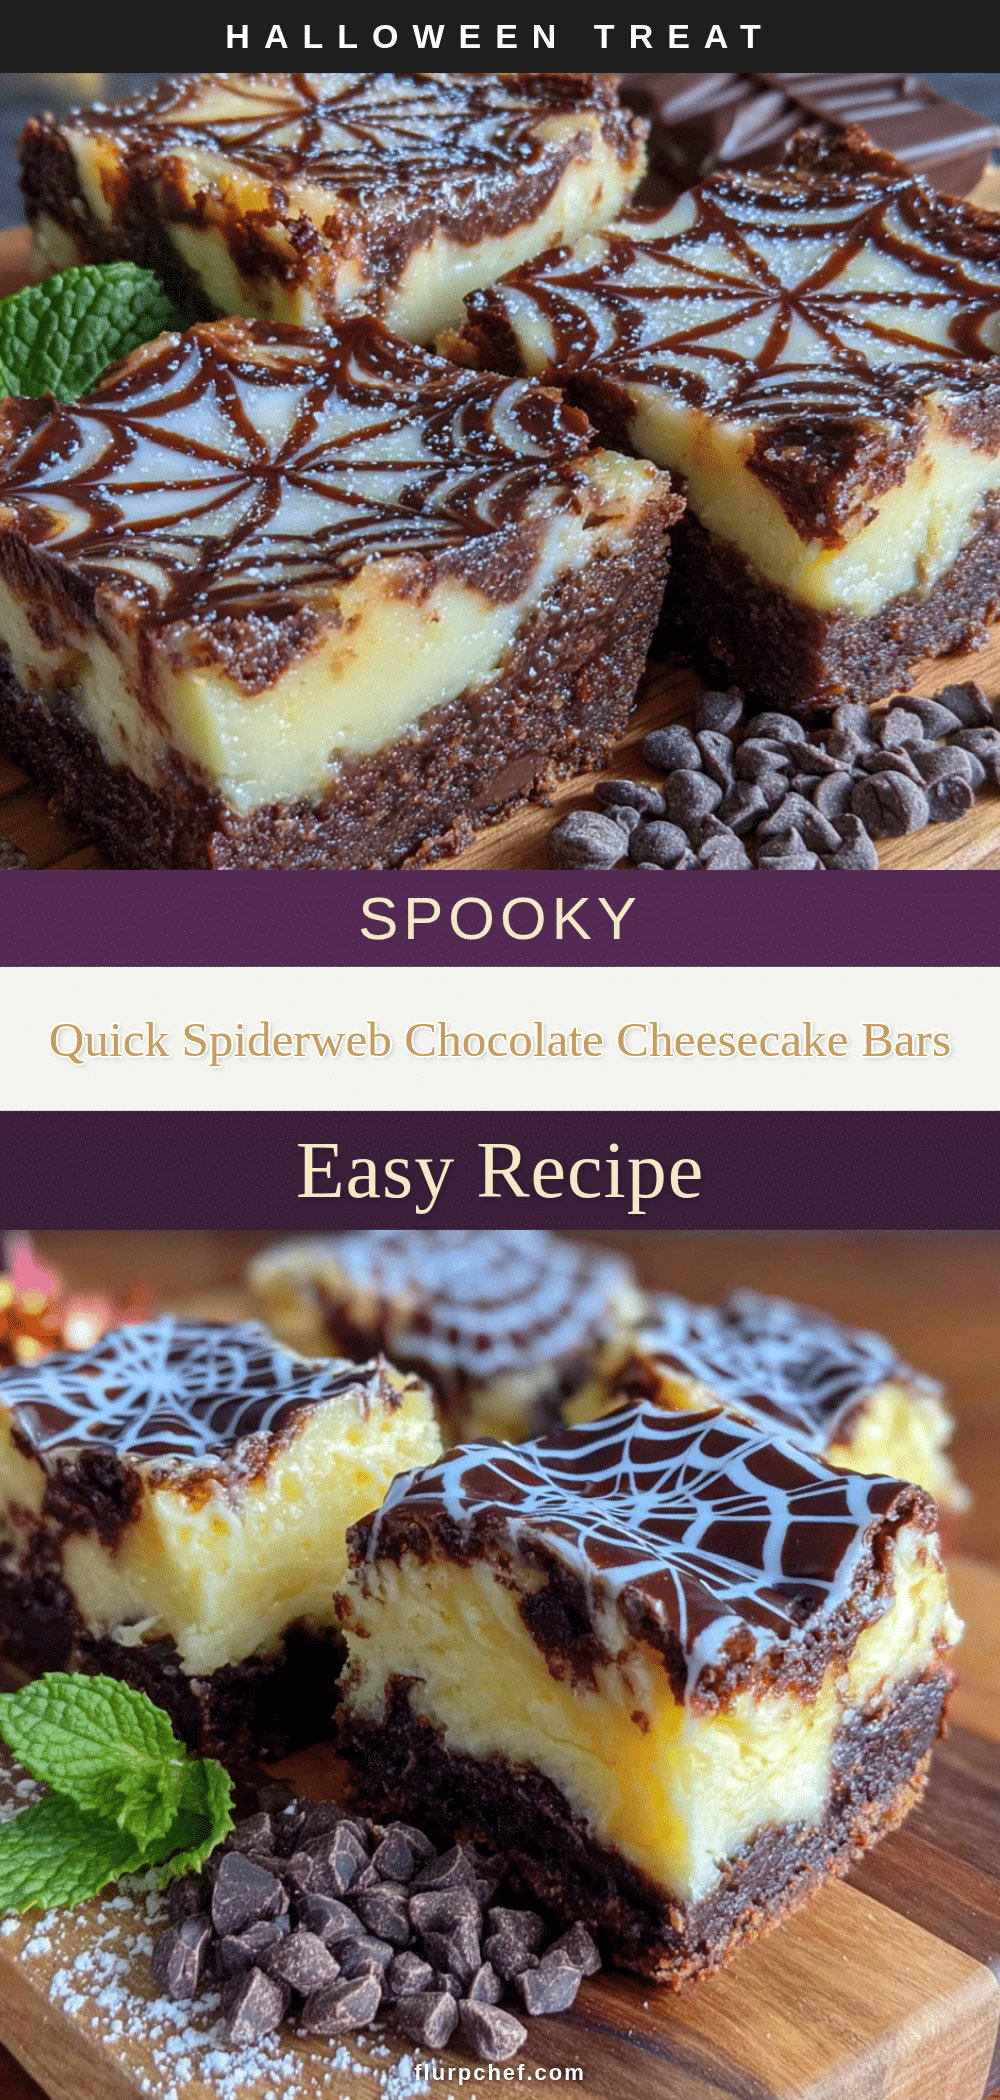
Quick Spiderweb Chocolate Cheesecake Bars: Easy 30-Minute Dessert
These quick spiderweb chocolate cheesecake bars are a lifesaver for the busy baker, combining a crunchy chocolate crust, silky cheesecake filling, and a fun spiderweb topping that comes together in under 30 minutes. Perfect for last-minute gatherings or a midweek treat.
- Prep Time: 15 minutes
- Cook Time: 28 minutes
- Total Time: 30 minutes
- Yield: 16 servings 1x
- Category: Dessert
- Cuisine: American
Ingredients
- 24 chocolate sandwich cookies (like Oreos), crushed
- 5 tablespoons unsalted butter, melted
- 2 tablespoons granulated sugar
- 16 ounces full-fat cream cheese, softened
- 1/2 cup granulated sugar
- 2 teaspoons vanilla extract
- 2 large eggs, at room temperature
- 1/4 cup sour cream
- 1/2 cup semi-sweet chocolate chips
- 1 teaspoon coconut oil or vegetable oil
Instructions
- Preheat oven to 325°F (160°C). Line an 8×8-inch baking pan with parchment paper, leaving overhang on two sides. Lightly grease the parchment.
- Place chocolate sandwich cookies in a Ziploc bag and crush with a rolling pin until fine crumbs form. Transfer to a medium bowl, add melted butter and 2 tablespoons sugar, and stir until mixture resembles wet sand. Press firmly into the bottom of the prepared pan. Bake for 8 minutes, then set aside to cool slightly.
- In a large bowl, beat softened cream cheese with a whisk until smooth. Add 1/2 cup sugar and vanilla, and whisk until combined. Add eggs one at a time, whisking gently after each addition. Whisk in sour cream until just combined.
- Pour cheesecake filling over the warm crust and spread evenly. Tap the pan gently on the counter to release air bubbles. Bake for 25-28 minutes, until edges are set and center is slightly jiggly.
- While cheesecake bakes, melt chocolate chips and coconut oil in a small microwave-safe bowl in 30-second bursts, stirring between each, until smooth. Let cool slightly.
- Once cheesecake is out of the oven, let cool on a wire rack for 10 minutes. Transfer melted chocolate to a small Ziploc bag, snip off a tiny corner, and pipe concentric circles over the top of the warm cheesecake, starting from the center and working outward. Use a toothpick to drag lines from the center outward to create a web pattern, wiping the toothpick clean between each drag.
- Let cheesecake cool completely at room temperature, then refrigerate for at least 2 hours (overnight is best). Use parchment handles to lift bars out of the pan, cut into 16 squares with a sharp knife, and serve cold.
Notes
Room temperature ingredients are key for a smooth filling. Don’t overmix the filling to avoid cracks. For clean cuts, use a hot knife and wipe between slices. These bars taste even better on day two.
Nutrition
- Serving Size: 1 bar
- Calories: 285
- Sugar: 18
- Sodium: 200
- Fat: 19
- Saturated Fat: 10
- Carbohydrates: 26
- Fiber: 1
- Protein: 5
Keywords: spiderweb cheesecake bars, quick dessert, chocolate cheesecake, Halloween dessert, easy cheesecake bars, 30-minute dessert


