Halloween was in six hours and I’d completely forgotten. My kid’s classroom party—the one with the sign-up sheet I’d signed three weeks ago and then promptly erased from my memory—was tomorrow morning. Everyone else would be bringing elaborate themed cupcakes, zombie Rice Krispie treats, and those creepy witch finger cookies that probably took them three days to perfect. I had a dozen eggs, a jar of olives, and a knot in my stomach the size of a pumpkin.
Honestly, I stood in my kitchen staring at the fridge like it might magically produce something impressive. The eggs stared back. The olives, sitting there all smug in their brine, seemed to mock me. I mean, I love deviled eggs, but for a Halloween party? They felt too simple. Too ordinary. But I was out of time and out of ideas, so I hard-boiled those eggs and figured I’d at least bring something edible, even if it wasn’t Pinterest-worthy.
Let me tell you what happened next. Those Spooky Halloween Deviled Eggs with Olive Spiders ended up being the first thing to disappear from the snack table. I’m not kidding. The elaborate cupcakes sat half-eaten while kids and parents alike kept circling back for “just one more” spider egg. My neighbor, Sarah, actually asked for the recipe before the party was even over. I stood there, slightly embarrassed, admitting they took me about twenty minutes to throw together while I was in a full panic. That’s the thing about this recipe—it looks like you spent hours planning it, but it’s really just a clever trick. And isn’t that exactly what Halloween is about?
Maybe you’ve been there, staring at a sign-up sheet with dread, wondering what on earth you’re going to bring that doesn’t involve a trip to three different stores. These deviled eggs are your answer. They’re spooky, they’re delicious, and they’re so ridiculously easy that you’ll wonder why you ever stressed about Halloween snacks. I’ve made them for four Halloweens now, and they never fail to get that delighted double-take when someone realizes the spiders are just olives. It’s the kind of simple magic that keeps me coming back to this recipe year after year.
Why You’ll Love This Recipe
Let me tell you why these Spooky Halloween Deviled Eggs with Olive Spiders have become my secret weapon for every Halloween gathering. After making these for countless parties, potlucks, and classroom celebrations, I’ve learned exactly what makes them so special.
- Quick & Easy: These come together in under 25 minutes start to finish. Perfect for those “oh no, I forgot” moments we all have.
- Simple Ingredients: You likely have everything already in your kitchen. Eggs, mayonnaise, mustard, and olives. That’s it. No specialty stores required.
- Perfect for Halloween Parties: Whether it’s a classroom celebration, office potluck, or neighborhood gathering, these fit every spooky occasion.
- Crowd-Pleaser: Kids love the creepy spider look, and adults genuinely enjoy the classic deviled egg flavor. Everyone wins.
- Naturally Gluten-Free: No special substitutions needed—these are already perfect for guests with gluten sensitivities.
What makes this recipe different from other Halloween snacks? It’s the clever use of ordinary ingredients to create something genuinely surprising. I’ve tried those elaborate Halloween recipes that require specialty cookie cutters and food coloring, and honestly, they rarely taste as good as they look. These deviled eggs taste amazing because they’re built on a classic, perfected recipe. The olive spiders aren’t just decoration—they add a briny, salty contrast to the creamy yolk filling that makes every bite interesting.
This recipe is the kind that makes people close their eyes after the first bite. It’s comfort food with a spooky twist—familiar enough to satisfy, but creative enough to impress. Perfect for impressing other parents without stressing yourself out, or turning a simple appetizer into the star of the Halloween snack table.
What Ingredients You Will Need
This recipe uses simple, everyday ingredients to create something that looks far more complicated than it actually is. The magic is all in the presentation, not the shopping list.
- 12 large eggs (room temperature works best for even cooking)
- 1/3 cup mayonnaise (I prefer Hellmann’s or Duke’s for the creamiest texture)
- 1 tablespoon yellow mustard (adds that classic tangy flavor)
- 1 tablespoon white vinegar (brightens the filling and cuts richness)
- 1/2 teaspoon salt (fine sea salt dissolves best)
- 1/4 teaspoon black pepper (freshly ground if you have it)
- 1/4 teaspoon paprika (plus extra for garnish)
- 1 can (6 ounces) large pitted black olives (look for extra-large olives for the best spider bodies)
- 1 jar (2.25 ounces) sliced pimento-stuffed green olives (for the spider eyes)
- 1 tablespoon olive oil (for brushing the olives to make them shine)
Let me share a few ingredient insights I’ve learned through trial and error. For the eggs, fresh eggs are actually harder to peel after hard-boiling. If your eggs are super fresh from the farmer’s market, let them sit in your fridge for about a week before using them for deviled eggs. The slight air pocket that develops makes peeling much easier.
For the mayonnaise, don’t skimp here. I’ve tried making these with reduced-fat mayo and the filling just isn’t as luxurious. Use the real stuff—it’s worth it for the texture alone. If you’re dairy-free, most standard mayonnaises are already dairy-free, but always check the label.
The olives are where the creativity comes in. You want large pitted black olives for the spider bodies. I’ve found that Lindsay brand large pitted black olives work perfectly. For the eyes, the pimento-stuffed green olives provide that perfect red dot that looks just like a spider’s eye. If you can’t find them, you can use sliced black olives with a tiny dot of red bell pepper or even ketchup for the eye effect.
For substitutions, you can use Greek yogurt in place of half the mayonnaise for a lighter version, though the texture will be slightly less creamy. Dijon mustard works beautifully if you want a more sophisticated flavor profile. And if you’re feeding a crowd that includes vegetarians, rest assured these are completely vegetarian-friendly.
Equipment Needed
You don’t need anything fancy for these Spooky Halloween Deviled Eggs with Olive Spiders. Here’s what I use every time:
- Medium saucepan for boiling the eggs (any pot will work, but a wider pan lets the eggs sit in a single layer)
- Large bowl of ice water for shocking the eggs after boiling
- Sharp paring knife for slicing the olives (a regular kitchen knife works too, just make sure it’s sharp)
- Small mixing bowl for the filling
- Fork or potato masher for mashing the yolks
- Piping bag or zip-top bag for filling the eggs (a small spoon works in a pinch)
- Serving platter (a black or dark-colored platter really makes the spiders pop)
- Small pastry brush for oiling the olives (optional, but gives them that nice sheen)
If you don’t have a piping bag, don’t worry. I’ve made these many times using a simple zip-top bag with the corner snipped off. It’s not fancy, but it works perfectly. For the olive carving, a small paring knife is ideal, but I’ve used a clean craft knife in a pinch. Just be careful!
Preparation Method
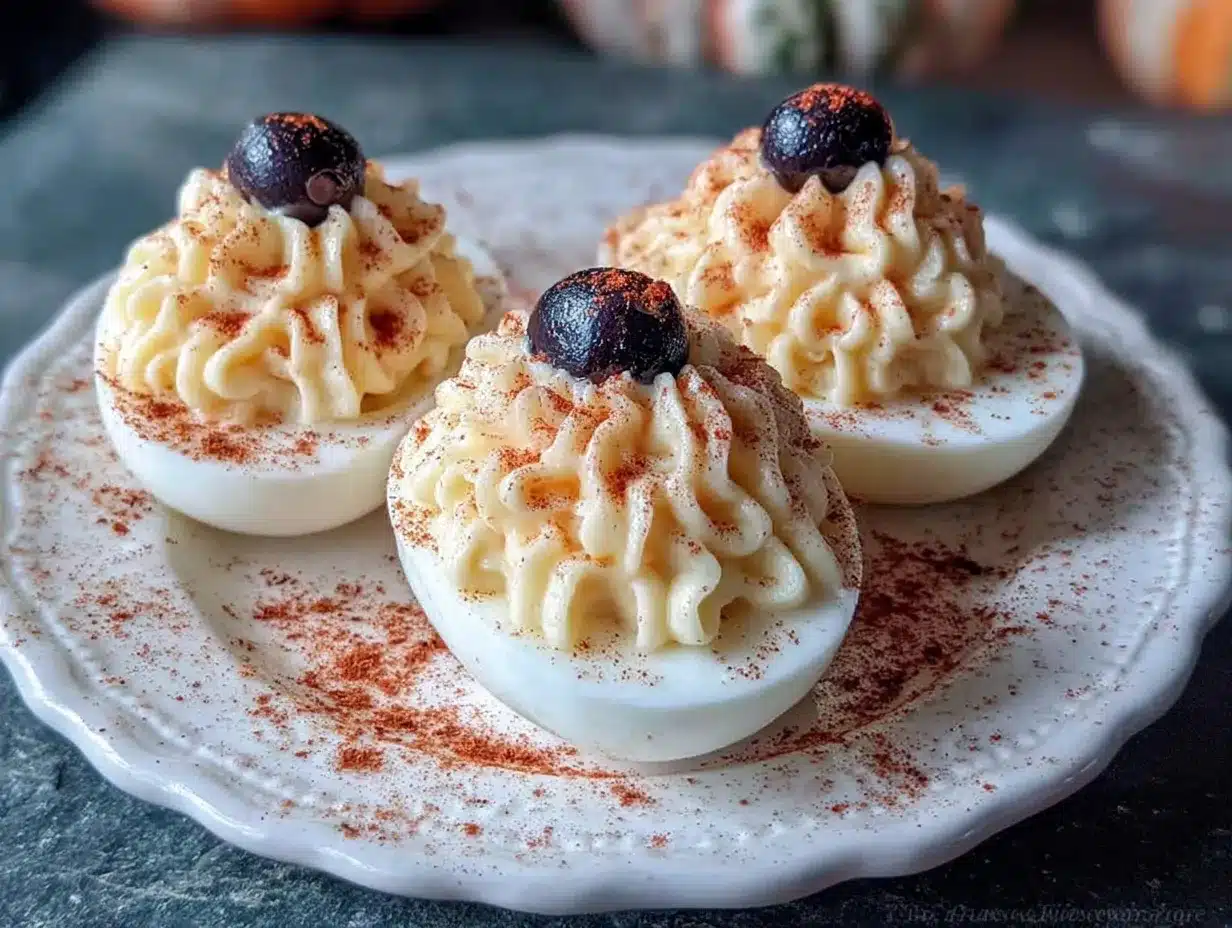
Let me walk you through exactly how to make these Spooky Halloween Deviled Eggs with Olive Spiders. I’ve refined this method over several Halloweens, so trust me on the details.
- Hard-boil the eggs. Place your 12 eggs in a single layer in your saucepan. Cover them with cold water by about an inch. Bring the water to a rolling boil over high heat. Once boiling, cover the pot, turn off the heat, and let the eggs sit for exactly 12 minutes. Set a timer—don’t guess!
- Ice bath time. While the eggs are cooking, prepare a large bowl of ice water. When the timer goes off, immediately transfer the eggs to the ice bath using a slotted spoon. Let them sit for at least 5 minutes. This stops the cooking and makes peeling so much easier.
- Peel carefully. Gently tap each egg on the counter to crack the shell, then roll it between your palms to loosen the shell. Start peeling from the wider end where the air pocket is. Running the eggs under cold water while peeling helps remove stubborn shell pieces. I’ve ruined a few eggs here by being impatient—take your time.
- Slice and scoop. Once peeled, slice each egg in half lengthwise. Gently pop out the yolks into your mixing bowl. Arrange the egg white halves on your serving platter, cut side up.
- Make the filling. Add the mayonnaise, mustard, vinegar, salt, pepper, and paprika to the yolks. Mash everything together with a fork until completely smooth. I like to press the mixture through a fine-mesh sieve for the silkiest texture, but honestly, a good mash with a fork works fine. Taste and adjust seasoning—you want it creamy and tangy with a hint of paprika warmth.
- Fill the eggs. Transfer the yolk mixture to your piping bag or zip-top bag. Snip off the corner (about 1/2 inch opening). Pipe the filling into each egg white half, mounding it slightly. You want a nice swirl on top—it looks more appetizing than flat filling.
- Prepare the olive spiders. This is where the magic happens. Drain your black olives and pat them dry. For each spider, you’ll need one whole black olive for the body and two green olive slices for the eyes. Using your paring knife, carefully slice the black olive lengthwise from top to bottom, creating legs. Make 4 cuts on each side, so you have 8 little legs. Don’t cut all the way through—leave the olive intact at the center. Gently fan out the legs so your spider looks like it’s crawling.
- Assemble the spiders. Place one prepared black olive spider on top of each filled deviled egg. For the eyes, take two green olive slices and press them gently into the top of the black olive body. The red pimento should face forward so it looks like two creepy little eyes staring at you.
- Final touches. Brush the olive spiders lightly with olive oil for a nice shine. Sprinkle a tiny bit of paprika over the exposed yolk filling around each spider. This adds color and makes the whole thing look more intentional.
- Chill before serving. Refrigerate the completed deviled eggs for at least 30 minutes before serving. This helps the filling set and makes the spiders stay in place. They can be made up to 24 hours ahead—just cover them loosely with plastic wrap.
A few sensory cues to watch for: Your egg yolks should be bright yellow with no green ring around the edge (that means they’re overcooked). The filling should be thick enough to hold its shape when piped but soft enough to be creamy. When you bite into one, the filling should be silky, not pasty.
Cooking Tips & Techniques
After making these Spooky Halloween Deviled Eggs with Olive Spiders more times than I can count, I’ve collected some hard-won wisdom. Let me share what I’ve learned the hard way so you don’t have to.
The biggest mistake I see people make is overcooking the eggs. I know, I know—everyone says that. But here’s the thing: a green ring around the yolk isn’t just ugly, it makes the filling taste sulfurous. That 12-minute rest method I mentioned? It’s not just me being fussy. It genuinely produces perfect yolks every time. I learned this after bringing a batch of gray-yolked eggs to a party and watching people politely take one and never come back for seconds.
For the olive spiders, use a very sharp knife. I once tried using a dull knife and ended up squashing half my olives into sad, mushy blobs. If your olives are too soft, pop them in the fridge for 15 minutes before cutting—they firm up and slice much cleaner. And don’t stress about making every spider perfect. Some of mine look more like slightly confused octopuses, and honestly, kids love them anyway.
Timing is everything. I like to boil and peel the eggs the day before, then assemble everything the morning of the party. The filling actually tastes better after resting overnight in the fridge—the flavors meld together beautifully. Just keep the filling and whites separate until you’re ready to serve, or the whites can get soggy.
For consistent results, use room temperature eggs for boiling and room temperature mayonnaise for the filling. Cold mayo makes the filling stiff and hard to pipe smoothly. I learned to set my eggs and mayo on the counter about 30 minutes before I start cooking.
Here’s a pro tip: If you’re transporting these to a party, arrange them on a platter with a sheet of damp paper towel underneath. It keeps the eggs from sliding around during the car ride. I learned this after arriving at a party with a platter of deviled eggs that looked like they’d been in a mosh pit.
Variations & Adaptations
One of the best things about this recipe is how easily it adapts. Here are some variations I’ve tried and loved.
Spicy Spider Eggs: Add 1/2 teaspoon of cayenne pepper and a dash of hot sauce to the yolk mixture. The heat pairs surprisingly well with the briny olives. I made these for a grown-up Halloween party and they were a hit with the spice lovers.
Avocado Deviled Spiders: Replace half the mayonnaise with mashed ripe avocado. Add a squeeze of lime juice to keep the avocado from browning. The green filling looks extra spooky and adds healthy fats. Just note that these don’t keep as well—serve them within a few hours.
Bacon-Wrapped Spiders: Cook 12 strips of bacon until crispy, then crumble them. Mix half the bacon into the yolk filling and sprinkle the rest on top before adding the olive spiders. The smoky, salty crunch is incredible. This version disappears fastest at parties.
Smoked Paprika Spiders: Swap regular paprika for smoked paprika in the filling. The smoky flavor adds depth and complexity. I use this version when I’m serving them alongside grilled meats or at a more sophisticated gathering.
Vegan Spider Eggs: Use silken tofu, black salt (for that eggy flavor), and vegan mayonnaise to create a plant-based version. The olive spiders are already vegan, so you’re just swapping the filling. I’ve made these for vegan friends and they were genuinely impressed.
Mini Spider Bites: For appetizer parties, use quail eggs instead of chicken eggs. They’re bite-sized and adorable. The olive spiders need to be cut smaller, but the effect is charming. Just adjust boiling time to 3 minutes for quail eggs.
Serving & Storage Suggestions
These Spooky Halloween Deviled Eggs with Olive Spiders are best served chilled, straight from the refrigerator. The cold temperature keeps the filling firm and the olives perky. I like to arrange them on a dark-colored platter—black, deep purple, or dark green—to make the white eggs and black spiders really stand out.
For presentation, arrange the eggs in a circular pattern like a spider web. You can even pipe a thin line of sour cream or cream cheese in a web pattern on the platter before placing the eggs. Add some fake spider web decorations around the platter for extra Halloween flair. I’ve also placed them on a bed of fresh parsley or arugula for a pop of green color.
What to serve alongside: These pair beautifully with other Halloween appetizers like mummy hot dogs, pumpkin-shaped cheese balls, or ghost-shaped cucumber sandwiches. For drinks, a crisp white wine or sparkling cider complements the creamy, tangy filling. For kids’ parties, serve with apple cider or grape juice.
Storage instructions: Store any leftovers in an airtight container in the refrigerator for up to 2 days. The olive spiders may start to soften after 24 hours, so they’re best eaten fresh. Do not freeze deviled eggs—the texture becomes watery and unpleasant upon thawing.
Reheating: These are served cold, so no reheating needed! Just take them out of the fridge about 15 minutes before serving to take the chill off. The flavors actually develop more as they sit, so day-old deviled eggs often taste even better.
Make-ahead tips: You can hard-boil and peel the eggs up to 3 days in advance. Store the peeled eggs in a bowl of cold water in the refrigerator, changing the water daily. The filling can be made 2 days ahead and stored in a piping bag in the fridge. Assemble the spiders and fill the eggs no more than 24 hours before serving for the best texture.
Nutritional Information & Benefits
Per serving (2 deviled eggs with one olive spider):
- Calories: 180
- Protein: 12g
- Fat: 14g
- Carbohydrates: 2g
- Fiber: 0g
- Sugar: 1g
- Sodium: 420mg
These Spooky Halloween Deviled Eggs with Olive Spiders offer some surprising nutritional benefits. Eggs are a complete protein source, meaning they contain all nine essential amino acids your body needs. They’re also rich in choline, which supports brain health and memory function—perfect for keeping your mind sharp during the Halloween chaos.
The olives provide healthy monounsaturated fats and are a good source of vitamin E, an antioxidant that supports skin health. The pimentos in the green olives add a small dose of vitamin C. While this isn’t exactly health food, it’s a much better option than most Halloween party snacks that are loaded with refined sugar and artificial ingredients.
Dietary considerations: This recipe is naturally gluten-free, nut-free, and low-carb. For those watching their cholesterol, eggs contain dietary cholesterol but current research shows that dietary cholesterol has minimal impact on blood cholesterol for most people. If you’re concerned, you can use 6 whole eggs and 6 egg whites for a lower-cholesterol version.
Potential allergens: Eggs and mayonnaise (which contains eggs) are the primary allergens. Olives are generally safe for most allergy diets. Always check your mayonnaise label if serving to someone with egg allergies—some brands use egg-free alternatives.
Conclusion
These Spooky Halloween Deviled Eggs with Olive Spiders have honestly become my most-requested party recipe. Every year, someone asks me to bring them, and every year, I watch the same delighted surprise spread across people’s faces when they realize how simple they are. There’s something genuinely satisfying about creating something that looks so impressive with just a few clever tricks.
I encourage you to make these your own. Maybe your spiders have longer legs, or you add a dash of your favorite hot sauce to the filling. Maybe you arrange them in a different pattern or serve them on a different platter. The beauty of this recipe is that it’s forgiving—it wants you to play with it and make it yours.
If you make these Spooky Halloween Deviled Eggs with Olive Spiders, I’d love to hear how they turned out. Drop a comment below and tell me about your Halloween party, or share a photo of your spider creations. And if you’ve got your own twist on these, please share it—I’m always looking for new ideas to try. Happy Halloween, and happy cooking!
Frequently Asked Questions
Can I make these deviled eggs a day ahead?
Absolutely! These are perfect for making ahead. Boil and peel the eggs up to 3 days in advance, and prepare the filling up to 2 days ahead. For best results, assemble the spiders and fill the eggs no more than 24 hours before serving. Store them covered in the refrigerator.
How do I keep the olive spiders from falling apart?
The key is using a very sharp knife and not cutting all the way through the olive. Leave about 1/4 inch intact in the center of the olive. If your olives are very soft, refrigerate them for 15 minutes before cutting to firm them up. You can also use a toothpick inserted through the center of the olive to help stabilize it on the egg.
Can I use different types of olives for the spiders?
Yes! Large pitted black olives work best because they’re big enough to carve and have a classic spider look. However, you can use kalamata olives for a more intense flavor, or even green olives for a different color spider. Just note that smaller olives are harder to carve and may not look as spider-like.
How do I get perfectly peeled hard-boiled eggs every time?
Use eggs that are at least a week old (fresh eggs are harder to peel). After boiling, immediately transfer them to an ice bath. Crack the shell gently all over by tapping on the counter, then roll between your palms. Start peeling from the wider end where the air pocket is. Peeling under running cold water helps remove stubborn pieces.
Can I make these without mayonnaise?
Yes! You can substitute the mayonnaise with mashed avocado for a creamy, dairy-free version. Greek yogurt also works well, though the filling will be slightly tangier. For a vegan version, use silken tofu blended with a little lemon juice, mustard, and black salt for that eggy flavor.
Pin This Recipe!
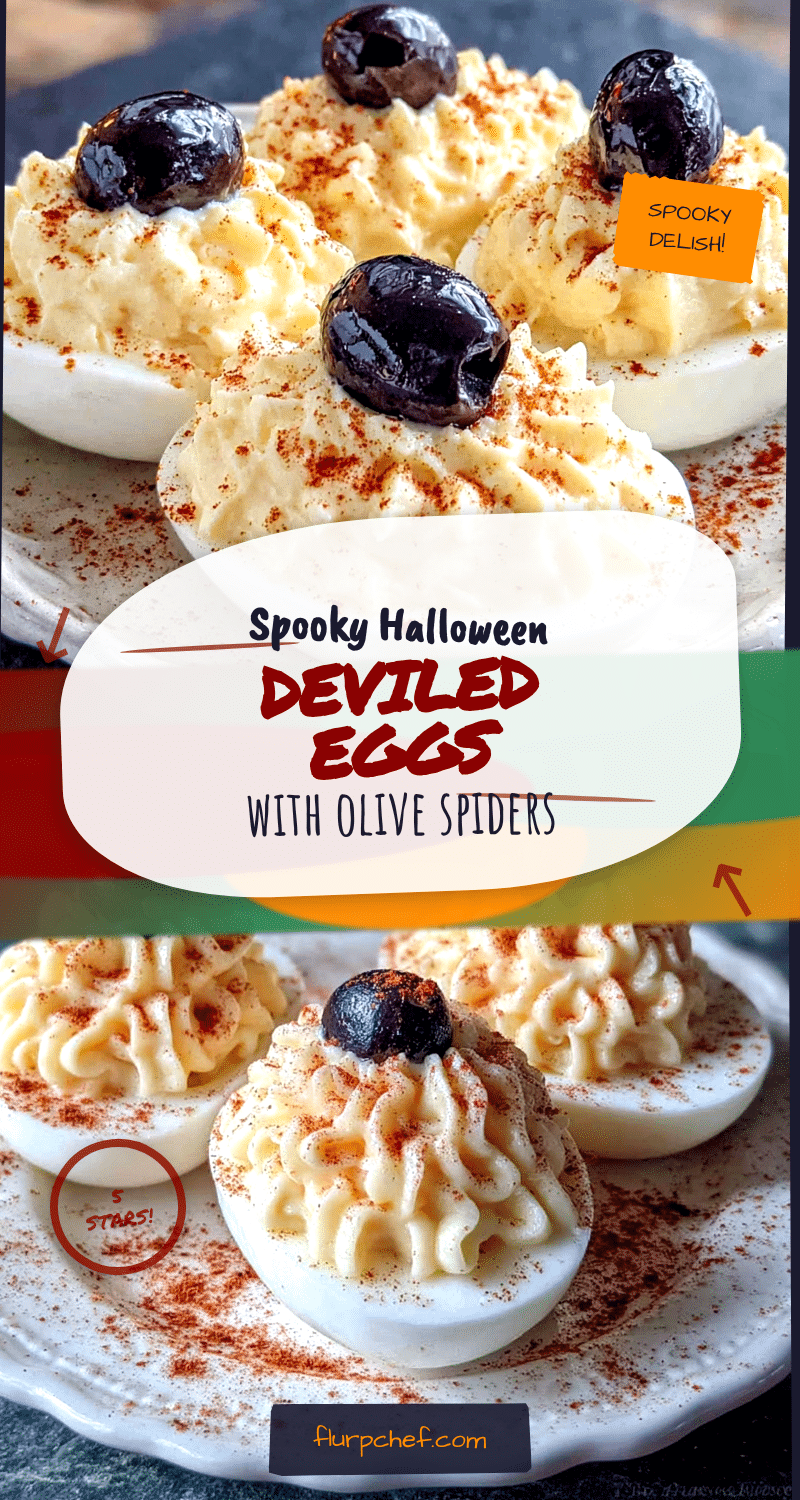
Spooky Halloween Deviled Eggs with Olive Spiders
These spooky deviled eggs topped with olive spiders are a quick and easy Halloween party appetizer that looks impressive but comes together in under 25 minutes. Perfect for last-minute celebrations, they’re naturally gluten-free and always a crowd-pleaser.
- Prep Time: 15 minutes
- Cook Time: 12 minutes
- Total Time: 27 minutes
- Yield: 24 deviled eggs (12 servings of 2 eggs each) 1x
- Category: Appetizer
- Cuisine: American
Ingredients
- 12 large eggs (room temperature)
- 1/3 cup mayonnaise (Hellmann’s or Duke’s recommended)
- 1 tablespoon yellow mustard
- 1 tablespoon white vinegar
- 1/2 teaspoon fine sea salt
- 1/4 teaspoon freshly ground black pepper
- 1/4 teaspoon paprika (plus extra for garnish)
- 1 can (6 ounces) large pitted black olives
- 1 jar (2.25 ounces) sliced pimento-stuffed green olives
- 1 tablespoon olive oil (for brushing olives)
Instructions
- Hard-boil the eggs: Place eggs in a single layer in a saucepan, cover with cold water by 1 inch. Bring to a rolling boil over high heat, then cover, turn off heat, and let sit for exactly 12 minutes.
- Prepare an ice bath: While eggs cook, fill a large bowl with ice and water. Transfer eggs to ice bath using a slotted spoon and let sit for at least 5 minutes.
- Peel eggs: Gently tap each egg to crack the shell, roll between palms, and peel starting from the wider end. Rinse under cold water if needed.
- Slice and scoop: Slice each egg in half lengthwise. Remove yolks to a mixing bowl. Arrange egg white halves on a serving platter, cut side up.
- Make the filling: Add mayonnaise, mustard, vinegar, salt, pepper, and paprika to the yolks. Mash with a fork until smooth. Taste and adjust seasoning.
- Fill the eggs: Transfer filling to a piping bag or zip-top bag. Snip off a 1/2-inch corner and pipe filling into each egg white half, mounding slightly.
- Prepare olive spiders: Drain black olives and pat dry. For each spider, slice a black olive lengthwise from top to bottom, making 4 cuts on each side to create 8 legs, leaving the center intact. Fan out the legs.
- Assemble spiders: Place one black olive spider on each filled egg. Press two green olive slices into the top of the black olive for eyes, with pimento facing forward.
- Final touches: Brush olive spiders lightly with olive oil for shine. Sprinkle paprika over exposed yolk filling around each spider.
- Chill before serving: Refrigerate for at least 30 minutes before serving. Can be made up to 24 hours ahead; cover loosely with plastic wrap.
Notes
Use eggs that are at least a week old for easier peeling. For the olive spiders, use a very sharp knife and refrigerate olives for 15 minutes before cutting if they are too soft. The filling can be made 2 days ahead and stored in a piping bag in the fridge. Assemble spiders and fill eggs no more than 24 hours before serving for best texture.
Nutrition
- Serving Size: 2 deviled eggs with
- Calories: 180
- Sugar: 1
- Sodium: 420
- Fat: 14
- Saturated Fat: 3
- Carbohydrates: 2
- Protein: 12
Keywords: Halloween deviled eggs, spider deviled eggs, spooky appetizer, Halloween party food, easy Halloween recipe, gluten-free appetizer, olive spiders


