My sister called me two days before her annual Halloween party. “I need something disgusting,” she said. Not scary. Not creepy. Disgusting. She wanted cookies that made people hesitate before taking a bite. I hung up and stared at my pantry, thinking about what actually makes someone pause at a dessert table. It isn’t the blood-red punch or the fake spiderwebs. It’s when food looks like something it shouldn’t be. That’s when I remembered these witch finger cookies I’d seen years ago in an old magazine. I thought they were silly at first — too gimmicky, too much effort for a cookie that’s just a shape. But my sister’s request stuck in my head, and I figured I’d give them a shot. Honestly, I thought the almond sliver fingernails would fall off and the red jam would look more like ketchup than blood. I was wrong. The first batch came out of the oven looking genuinely unsettling — knobby knuckles, wrinkled skin, little red nails catching the light. My niece refused to touch one. That’s when I knew I had something. These Spooky Witch Finger Cookies with Red Jam Nails aren’t just a Halloween novelty. They’re the kind of treat that makes adults laugh nervously and kids squeal with delight. And the best part? They come together in about 30 minutes, which means you can whip up a batch between answering the doorbell and refilling the candy bowl.
Why You’ll Love This Recipe
I’ve tested these witch finger cookies four times to get the texture right. The first batch cracked in all the wrong places. The second tasted great but looked like sad breadsticks. By the third attempt, I had a cookie that was crisp on the outside, tender on the inside, and creepy enough to make my mailman do a double take. Here’s why these are worth your time:
- Quick & Easy: From mixing bowl to oven in under 30 minutes. No chilling required, no complicated shaping tools. Just your hands and a little patience.
- Simple Ingredients: Butter, sugar, flour, eggs, almond extract, and jam. You probably have everything except the almond slivers sitting in your kitchen right now.
- Perfect for Halloween Parties: These are the star of any dessert table. People photograph them, share them, and ask for the recipe before they’ve even taken a bite.
- Crowd-Pleaser: Kids love the gross factor. Adults love the buttery shortbread flavor. Everyone wins.
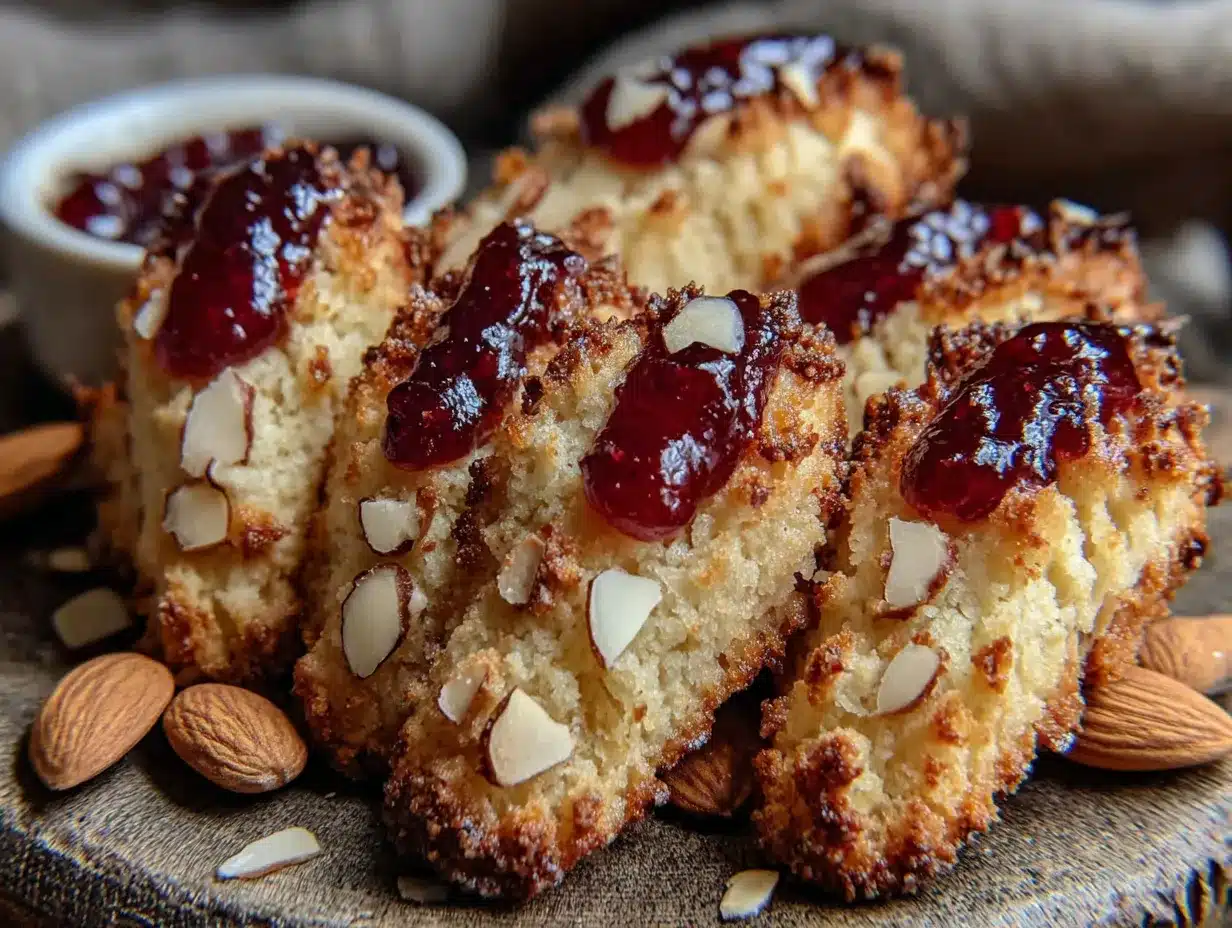
- Unbelievably Realistic: The trick is in the knuckle indentations and the jam nails. When done right, these cookies look disturbingly like actual witch fingers. I’ve had guests refuse to eat them — which, honestly, is the highest compliment.
What makes these different from other witch finger recipes is the texture. I use a higher butter-to-flour ratio than most shortbread recipes, which gives the cookies a tender crumb that doesn’t crumble apart when you bite into them. The almond extract adds that subtle marzipan flavor that makes people think of something slightly otherworldly. And the red jam — I use strawberry, but raspberry works beautifully — creates that glossy, blood-like sheen that makes the nails look real. This isn’t just another Halloween cookie. It’s the one people remember.
What Ingredients You Will Need
This recipe uses simple, pantry-friendly ingredients to create cookies that look complicated but aren’t. The magic is in how you shape them, not what’s in the bowl.
- 1 cup unsalted butter, softened to room temperature (I prefer Land O’Lakes for consistent results — the butter quality really matters here)
- 1 cup powdered sugar (confectioners’ sugar gives the cookies a melt-in-your-mouth texture that granulated sugar can’t match)
- 1 large egg, room temperature
- 1 teaspoon vanilla extract
- 1 teaspoon almond extract (this is the secret ingredient — it gives the cookies that eerie, slightly floral flavor that screams “witch finger”)
- 2 ½ cups all-purpose flour, plus more for dusting
- ½ teaspoon salt
- ½ teaspoon baking powder (just enough to give them a tiny lift without puffing up)
- Whole blanched almonds or almond slivers (for the fingernails — slivers work better for realistic nail shapes)
- Red jam or jelly (strawberry, raspberry, or cherry — anything that looks like blood when it sets)
- Green or purple food coloring (optional, but it really sells the witchy look)
For the jam, I recommend Bonne Maman Strawberry Preserves. It has that deep red color and glossy finish that photographs beautifully. If you’re using a seedless jam, even better — the nails look cleaner. You can also use red gel food coloring mixed with corn syrup if you want a more theatrical blood effect, but jam tastes better and holds up longer on the cookie.
Equipment Needed
You don’t need fancy equipment for these cookies. Here’s what you’ll want on hand:
- Mixing bowls (one large, one medium)
- Electric hand mixer or stand mixer (a wooden spoon works too, but your arm will get tired)
- Baking sheets (two, so you can rotate batches)
- Parchment paper or silicone baking mats (parchment is easier for cleanup)
- Small offset spatula or butter knife (for spreading the jam)
- Toothpick or skewer (for making knuckle indentations)
- Pastry brush (for the egg wash, optional but helpful)
- Cooling rack
If you don’t have a stand mixer, a hand mixer works perfectly. I’ve made these cookies in a tiny apartment kitchen with just a whisk and a bowl — it’s doable, just takes more elbow grease. For the almond slivers, you can use whole almonds and split them lengthwise with a knife. It’s a little tedious but gives you more control over the nail shape.
Preparation Method
Preheat your oven to 325°F (165°C). Line two baking sheets with parchment paper.
- Cream the butter and sugar: In a large mixing bowl, beat the softened butter and powdered sugar together until light and fluffy — about 3 minutes with an electric mixer on medium speed. You want the mixture to look pale and airy, like whipped frosting. Scrape down the sides of the bowl halfway through.
- Add the wet ingredients: Beat in the egg, vanilla extract, and almond extract until fully combined. The mixture might look slightly curdled at this point — that’s totally normal. Don’t panic. If you’re using food coloring, add it now. I use about 10 drops of green gel coloring for a sickly witchy tint, but you can skip this step entirely.
- Mix the dry ingredients: In a separate bowl, whisk together the flour, salt, and baking powder. Gradually add the dry mixture to the wet mixture, mixing on low speed until a soft dough forms. The dough should be pliable but not sticky — if it sticks to your fingers, add another tablespoon of flour.
- Shape the fingers: Scoop about 1 tablespoon of dough and roll it into a log shape about 3 inches long. Place it on the prepared baking sheet. Gently taper one end to look like a fingertip, leaving the other end slightly thicker to resemble the base of a finger. Use the back of a butter knife to create knuckle indentations — press gently across the finger at two points to create three segments. Don’t press too hard or you’ll cut through the cookie.
- Add the nails: Press an almond sliver into the tapered end of each finger, angled slightly upward like a real fingernail. The almond should sit about ¼ inch into the dough so it stays put during baking.
- Create the wrinkles: Use the tip of a toothpick to draw tiny lines across the knuckles and along the sides of the fingers. These little details make the cookies look genuinely creepy. I also press the toothpick into the fingertip around the nail to create a cuticle effect — it sounds weird, but it makes a huge difference.
- Bake: Bake for 12-14 minutes, or until the cookies are set and the edges are just barely golden. The bottoms should be light brown. Don’t overbake — these cookies continue to set as they cool. Let them rest on the baking sheet for 5 minutes, then transfer to a cooling rack.
- Add the jam nails: While the cookies are still warm, use a small offset spatula or butter knife to spread a thin layer of red jam over the almond sliver. The warmth of the cookie will melt the jam slightly, giving it that glossy, blood-like sheen. Let the cookies cool completely before serving — the jam will set into a sticky, realistic nail coating.
If the dough gets too soft while you’re shaping, pop it in the fridge for 10 minutes. Warm hands can make the dough greasy, which affects the texture. I keep a small bowl of flour nearby to dust my fingers when things get sticky.
Cooking Tips & Techniques
I learned the hard way that these cookies require a light touch. My first batch looked like deformed sausages because I pressed too hard on the knuckles. Here’s what I wish I’d known from the start:
Keep your hands cool: Warm hands melt the butter in the dough, which makes the cookies spread too much in the oven. If your kitchen is warm, chill the shaped cookies on the baking sheet for 10 minutes before baking. This keeps the fingers slender and defined.
Don’t skip the almond extract: The almond flavor is what makes these cookies taste like something from a fairy tale — slightly bitter, slightly sweet, completely unsettling. If you don’t have almond extract, use an extra teaspoon of vanilla, but the flavor won’t be the same.
Vary the finger shapes: Real fingers aren’t all the same size. Make some thicker, some thinner, some with more knuckles, some with crooked tips. The variety makes the batch look more realistic and less like a factory-produced cookie.
Watch the bake time: My oven runs hot, so I check the cookies at 11 minutes. You want them set but not browned — browned fingers look like they’ve been in the oven too long, which breaks the illusion. The bottoms should be golden, but the tops should stay pale.
Jam application trick: If the jam is too thick to spread, microwave it for 10 seconds. It should be syrupy but not hot. Apply it with a small brush for a more controlled, realistic nail shape. I’ve also used red gel icing for the nails when I wanted a more dramatic effect — it dries shinier than jam.
One of my biggest failures was using salted butter. The cookies came out flat and greasy because salted butter has a higher water content. Stick with unsalted — you control the salt, and the texture is much better.
Variations & Adaptations
These cookies are surprisingly versatile. Here are a few ways I’ve adapted them over the years:
Gluten-Free Version: Substitute the all-purpose flour with a 1:1 gluten-free baking flour blend. I’ve used Bob’s Red Mill with good results — just add an extra tablespoon of flour if the dough feels too sticky. The texture will be slightly more crumbly, but the creepy factor is still there.
Vegan Version: Use vegan butter (I recommend Earth Balance) and a flax egg (1 tablespoon ground flaxseed mixed with 3 tablespoons water, let sit for 5 minutes). The cookies will be a little less tender, but they still shape beautifully. Use a plant-based jam for the nails.
Different Jam Colors: For a more dramatic effect, use blackberry jam for dark, bruised-looking nails, or apricot jam for a sickly yellow-green nail. I once made a batch with blueberry jam that looked like something from an alien autopsy — my nephew loved it.
Chocolate Witch Fingers: Add ¼ cup cocoa powder to the dry ingredients and reduce the flour by 2 tablespoons. The chocolate version looks like dirt-crusted witch fingers, and the flavor pairs surprisingly well with raspberry jam nails.
Spiced Version: Add 1 teaspoon pumpkin pie spice and ½ teaspoon cinnamon to the dough for a fall-flavored witch finger. This works beautifully if you’re making these for a Halloween party that leans more cozy than creepy. I made a batch for a pumpkin patch event and they disappeared in 10 minutes.
If you’re feeling extra ambitious, you can make these into witch hat chocolate sugar cookies instead — same creepy vibe, different shape. Both recipes use similar dough techniques, so you can batch them together for a full Halloween spread.
Serving & Storage Suggestions
These cookies are best served at room temperature, arranged on a platter like a severed hand. I like to place them in a fan pattern with the nails pointing outward — it makes people do a double take before they grab one. For an extra spooky presentation, arrange them around a bowl of graveyard brownie trifle for a full Halloween dessert table.
Storage: Store the cookies in an airtight container at room temperature for up to 5 days. The jam nails will stay glossy for about 2 days, then start to dry out slightly. If you’re making them ahead for a party, add the jam the morning of the event for the best visual effect.
Freezer Instructions: You can freeze the unbaked shaped cookies on a baking sheet for 2 hours, then transfer them to a freezer bag. Bake directly from frozen, adding 2-3 minutes to the bake time. The texture is slightly less tender, but they still look great. I’ve also frozen baked cookies (without the jam) for up to 3 months — just thaw at room temperature and add fresh jam before serving.
Reheating: These cookies don’t really need reheating, but if you want that just-baked warmth, pop them in a 300°F oven for 3 minutes. Don’t microwave them — the jam will melt and run off the nails.
The flavors actually develop over time. Day-old cookies taste more almond-forward, with a deeper buttery flavor. I actually prefer them on day two, when the texture has settled into a perfect shortbread consistency.
Nutritional Information & Benefits
Let’s be honest — these are Halloween cookies, not health food. But here’s the breakdown per cookie (based on 24 cookies):
- Calories: 145
- Fat: 8g
- Carbohydrates: 17g
- Protein: 2g
- Sugar: 8g
- Sodium: 55mg
The almond slivers provide a small amount of vitamin E and healthy fats. The butter contains vitamin A and butyrate, which supports gut health in small amounts. The jam adds a trace of vitamin C from the fruit. But really — these are a treat. They’re meant to be enjoyed in moderation, especially around Halloween when indulgence is part of the fun.
If you’re watching your sugar intake, you can reduce the powdered sugar to ¾ cup without affecting the texture too much. The cookies will be slightly less sweet, but the almond flavor will shine through more. For a lower-carb option, try using almond flour instead of all-purpose flour — just note that the texture will be more crumbly and delicate.
These cookies are naturally nut-free if you omit the almond extract and use a different nail (like a slivered date or a piece of dried apricot). They’re also egg-free if you use a flax egg. The jam can be swapped for sugar-free preserves if needed.
Conclusion
These Spooky Witch Finger Cookies with Red Jam Nails are the Halloween treat that keeps on giving. They’re easy enough for a weeknight baking session, impressive enough for a party, and creepy enough to make your guests talk about them all night. I’ve made these for four Halloweens straight now, and every year someone asks for the recipe before they’ve even finished their first cookie. The best part? Watching kids’ faces light up when they realize the “disgusting fingers” are actually delicious buttery shortbread. My sister’s party was a hit, and these cookies were the star of the dessert table. If you make them, tag me in your photos — I want to see your creepiest creations. And if you come up with a variation I haven’t tried, drop it in the comments. I’m always looking for new ways to make these cookies even more unsettling. Happy Halloween, and happy baking!
Frequently Asked Questions
Can I make these cookies without almond extract?
Yes, but the flavor won’t have that signature marzipan quality that makes these cookies taste so witchy. Substitute with an extra teaspoon of vanilla extract, or try using amaretto liqueur for a boozy adult version.
Why did my cookies spread too much?
Your dough was probably too warm. Chill the shaped cookies for 10-15 minutes before baking. Also, make sure your butter is softened but not melted — if it’s too soft, the cookies will spread into flat blobs instead of staying finger-shaped.
Can I use a different type of jam?
Absolutely. Strawberry, raspberry, and cherry jams give the best red color. Blackberry works for a darker, more bruised look. Apricot or peach jam creates a sickly yellow-green nail that’s also very creepy. Avoid jelly — it’s too thin and will run off the almond sliver.
How far in advance can I make these cookies?
You can make the dough up to 3 days ahead and keep it wrapped in the fridge. Shape and bake the day before your event, but add the jam the morning of serving for the glossiest nails. Baked cookies (without jam) freeze beautifully for up to 3 months.
Can I make these cookies with kids?
Yes — this is a great recipe for kids. They love shaping the fingers and adding the knuckle lines. Just supervise the almond sliver placement, as they can be sharp. I’ve made these with my niece and nephew, and they had more fun with the shaping than the eating.
Pin This Recipe!
Spooky Witch Finger Cookies with Red Jam Nails

These Spooky Witch Finger Cookies with Red Jam Nails are a quick and easy Halloween treat that looks genuinely unsettling. Made with buttery shortbread dough and almond sliver fingernails coated in glossy red jam, they come together in about 30 minutes and are perfect for parties.
- Prep Time: 15 minutes
- Cook Time: 14 minutes
- Total Time: 29 minutes
- Yield: 24 servings 1x
- Category: Dessert
- Cuisine: American
Ingredients
- 1 cup unsalted butter, softened to room temperature
- 1 cup powdered sugar
- 1 large egg, room temperature
- 1 teaspoon vanilla extract
- 1 teaspoon almond extract
- 2 ½ cups all-purpose flour, plus more for dusting
- ½ teaspoon salt
- ½ teaspoon baking powder
- Whole blanched almonds or almond slivers (for fingernails)
- Red jam or jelly (strawberry, raspberry, or cherry)
- Green or purple food coloring (optional)
Instructions
- Preheat oven to 325°F (165°C). Line two baking sheets with parchment paper.
- In a large mixing bowl, beat the softened butter and powdered sugar together until light and fluffy, about 3 minutes with an electric mixer on medium speed.
- Beat in the egg, vanilla extract, and almond extract until fully combined. If using food coloring, add it now.
- In a separate bowl, whisk together the flour, salt, and baking powder. Gradually add the dry mixture to the wet mixture, mixing on low speed until a soft dough forms.
- Scoop about 1 tablespoon of dough and roll it into a log shape about 3 inches long. Place on prepared baking sheet. Taper one end to look like a fingertip, leaving the other end thicker. Use the back of a butter knife to create knuckle indentations.
- Press an almond sliver into the tapered end of each finger, angled slightly upward like a real fingernail.
- Use the tip of a toothpick to draw tiny lines across the knuckles and along the sides of the fingers for wrinkles. Press around the nail to create a cuticle effect.
- Bake for 12-14 minutes, until set and edges are just barely golden. Let rest on baking sheet for 5 minutes, then transfer to a cooling rack.
- While still warm, spread a thin layer of red jam over the almond sliver. Let cool completely before serving.
Notes
Keep hands cool to prevent dough from spreading. Don’t skip the almond extract for the signature flavor. Vary finger shapes for realism. Check cookies at 11 minutes if oven runs hot. If jam is too thick, microwave for 10 seconds before applying.
Nutrition
- Serving Size: 1 cookie
- Calories: 145
- Sugar: 8
- Sodium: 55
- Fat: 8
- Saturated Fat: 5
- Carbohydrates: 17
- Protein: 2
Keywords: Halloween cookies, witch finger cookies, shortbread cookies, spooky cookies, easy Halloween dessert, 30-minute recipe


