The crunch of the first fry hitting my teeth—that perfect shatter giving way to a soft, steamy middle—is still the sound I associate with the best tailgates. It was late September, the air had that first real chill, and our crew was huddled around a folding table in the parking lot of the stadium. Someone had brought a slow cooker full of chili, another had a bag of frozen fries, and in that moment of hungry desperation, the Ultimate Loaded Chili Cheese Fries for Tailgating were born. No one planned it. It just happened, like the best ideas usually do.
We piled the crispy fries onto a disposable tin tray, ladled that smoky, meaty chili right over the top, and then came the avalanche of shredded cheddar. A quick trip to the microwave in the RV, and we had a molten, glorious mess. I remember the silence that fell over the group—the kind of quiet that only happens when everyone is too busy eating to talk. That first bite was a revelation. It wasn’t just food; it was a warm, cheesy, spicy hug on a cold day.
That’s the thing about this dish. It’s not fancy, and it’s not trying to be. It’s the kind of recipe that feels like a secret handshake between friends. It’s the reason you show up early and stay late. I’ve been making this version for years now, tweaking the spice blend and perfecting the cheese melt, and it’s become the non-negotiable centerpiece of every game day spread. Honestly, once you try it, you’ll understand why it’s earned its spot.
Why You’ll Love This Recipe
This isn’t just another snack. These Ultimate Loaded Chili Cheese Fries for Tailgating are the dish that turns a good party into a legendary one. I’ve tested this recipe more times than I can count, tweaking everything from the chili’s simmer time to the optimal fry crispness, and I can tell you with confidence: this is the version you want.
- Quick & Easy: The chili comes together in about 30 minutes on the stove, and the fries are done in 20. You can even make the chili a day ahead, which is a lifesaver on game day.
- Simple Ingredients: No crazy grocery store runs. Ground beef, canned tomatoes, beans, cheese, and frozen fries. You probably have most of this in your pantry right now.
- Perfect for Tailgating: This is the ultimate crowd-pleaser. It’s hearty, shareable, and travels surprisingly well. Just keep the components separate until you’re ready to assemble.
- Unbelievably Delicious: The combination of crispy, salty fries, rich, smoky chili, and gooey, melted cheese is pure comfort food magic. It’s the kind of dish that makes you close your eyes after the first bite.
What makes this recipe different from the rest? It’s the little things. A pinch of smoked paprika in the chili for depth, a splash of Worcestershire for umami, and the crucial step of baking the fries until they’re extra crispy so they can handle the weight of the toppings. It’s not just another version—it’s the best version.
What Ingredients You Will Need
This recipe uses simple, pantry-friendly ingredients to deliver maximum flavor with minimal fuss. Each component plays a specific role, from the hearty base of the chili to the final, glorious melt of the cheese.
For the Chili
- 1 tablespoon olive oil – For browning the meat and aromatics.
- 1 large yellow onion, diced – Adds a sweet, savory foundation.
- 3 cloves garlic, minced – Because garlic makes everything better.
- 1 pound ground beef (80/20) – I prefer 80/20 for the best flavor and texture. The fat renders down and adds richness.
- 1 can (15 oz) diced tomatoes, undrained – Fire-roasted adds a nice smoky note.
- 1 can (15 oz) tomato sauce – Creates the perfect saucy base.
- 1 can (15 oz) kidney beans, drained and rinsed – Or black beans, if that’s what you have.
- 1 tablespoon chili powder – The backbone of the flavor.
- 1 teaspoon ground cumin – Adds warmth and depth.
- 1/2 teaspoon smoked paprika – This is my secret weapon. It gives the chili that subtle campfire taste.
- 1/2 teaspoon garlic powder – For an extra layer of savory goodness.
- 1 tablespoon Worcestershire sauce – Adds umami and a little tang.
- Salt and black pepper, to taste – Season as you go.
For the Fries & Assembly
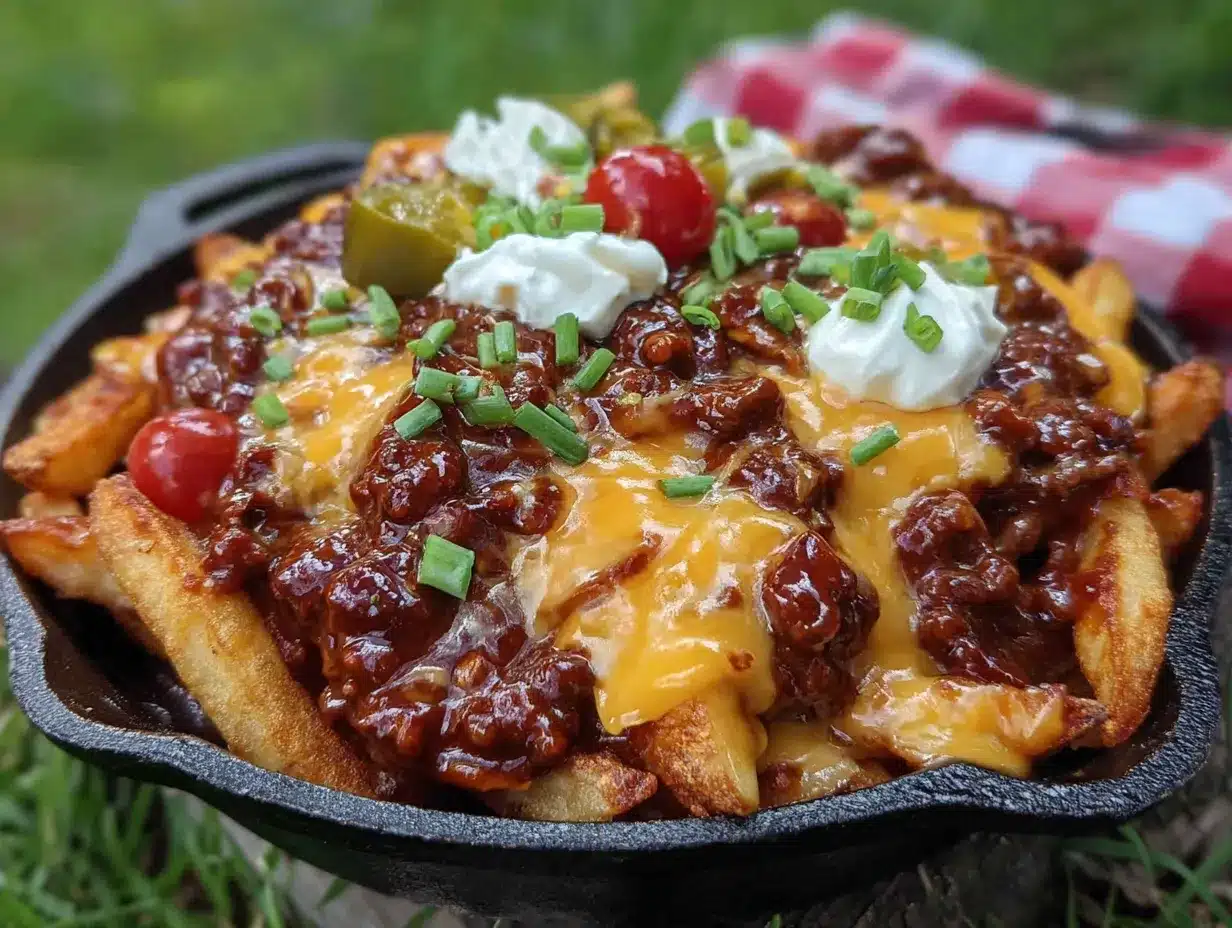
- 1 bag (28 oz) frozen crinkle-cut or straight-cut fries – Crinkle-cut are classic and hold up really well. I recommend Ore-Ida for consistent crispiness.
- 2 cups shredded sharp cheddar cheese – Sharp cheddar melts beautifully and has a bold flavor that stands up to the chili.
- 1/2 cup sour cream – For a cool, creamy finish.
- 1/4 cup sliced green onions – Adds a fresh, peppery bite and a pop of color.
- 1/4 cup pickled jalapeños (optional) – For those who like a little heat.
Equipment Needed
You don’t need a ton of fancy gear for this one, which is part of the beauty. Here’s what you’ll need:
- Large skillet or Dutch oven – For making the chili. A Dutch oven is great for even heat distribution.
- Baking sheet – For the fries. A half-sheet pan is perfect.
- Parchment paper or aluminum foil – For easy cleanup. Trust me on this one.
- Wooden spoon or spatula – For breaking up the ground beef.
- Measuring cups and spoons – Precision helps, but you can eyebit the spices.
- Oven-safe serving dish or cast iron skillet – For the final bake. A 9×13 baking dish works great.
Preparation Method
Alright, let’s get to the good stuff. Follow these steps, and you’ll have a tray of heaven in no time.
- Preheat your oven to 425°F (220°C). Spread your frozen fries in a single layer on a baking sheet lined with parchment paper. Bake according to package directions, but add 3-4 extra minutes. You want them extra crispy so they don’t get soggy under the chili. While the fries are baking, start the chili.
- Cook the aromatics. In a large skillet or Dutch oven over medium-high heat, warm the olive oil. Add the diced onion and cook for 4-5 minutes, until softened and translucent. Add the minced garlic and cook for another 30 seconds, until fragrant. Don’t let the garlic burn—it gets bitter.
- Brown the beef. Add the ground beef to the skillet. Break it apart with your spoon and cook until it’s no longer pink, about 6-8 minutes. If there’s a lot of excess fat, drain most of it off, leaving about a tablespoon for flavor.
- Build the chili. Stir in the chili powder, cumin, smoked paprika, and garlic powder. Cook for 1 minute, stirring constantly, to toast the spices. This wakes up their flavors.
- Add the liquids and beans. Pour in the diced tomatoes (with their juices), tomato sauce, and Worcestershire sauce. Add the drained kidney beans. Stir everything together and bring the chili to a simmer.
- Simmer and season. Reduce the heat to low and let the chili simmer for 15-20 minutes, stirring occasionally. This allows the flavors to meld and the chili to thicken slightly. Taste it and add salt and pepper as needed. I usually start with 1/2 teaspoon of salt and 1/4 teaspoon of pepper, then adjust.
- Assemble. Once the fries are done, carefully transfer them to your oven-safe serving dish. Ladle the hot chili evenly over the fries. Sprinkle the shredded cheddar cheese generously over the top.
- Melt the cheese. Return the dish to the oven (still at 425°F) for 5-7 minutes, or until the cheese is fully melted and bubbly. Keep an eye on it so the edges of the fries don’t burn.
- Finish and serve. Remove from the oven. Dollop with sour cream, sprinkle with sliced green onions, and add pickled jalapeños if you’re using them. Serve immediately while everything is hot and glorious.
Cooking Tips & Techniques
I’ve made this recipe more times than I can count, and I’ve learned a few things the hard way. Here are my best tips to make sure yours turns out perfect.
- Don’t skip the extra fry time. Frozen fries are designed to be crispy, but they’ll soften quickly under the hot chili. Baking them a few extra minutes gives them a fighting chance. I’ve made the mistake of under-cooking them before, and it results in a sad, soggy mess.
- Season the chili in layers. Don’t just dump all the salt in at the end. Season the beef as it browns, and then taste and adjust after the chili simmers. This builds a more complex flavor profile.
- Make the chili ahead of time. This is a game-changer for tailgating. The chili actually tastes better the next day after the flavors have had a chance to meld. Just reheat it on the stove or in a slow cooker before you assemble the fries.
- Use a hot oven for the final melt. A hot oven (425°F) melts the cheese quickly without turning the fries into mush. If you use a lower temperature, the fries will steam and lose their crunch.
Variations & Adaptations
This recipe is incredibly flexible. Here are a few ways to make it your own.
- Make it vegetarian: Swap the ground beef for a plant-based ground meat alternative or an extra can of black beans. The chili will still be hearty and delicious.
- Spice it up: Add a diced jalapeño with the onions, or stir in a teaspoon of cayenne pepper with the other spices. For a smoky heat, try a chipotle pepper in adobo sauce, minced.
- Try a different cheese: Monterey Jack, pepper jack, or a Mexican blend all work beautifully. For an ultra-gooey texture, mix in some shredded mozzarella.
- Go for sweet potato fries: For a slightly healthier twist, swap the regular fries for frozen sweet potato fries. They pair surprisingly well with the smoky chili.
- Add bacon. Because everything is better with bacon. Crumble some crispy bacon over the top right before serving for an extra layer of salty, smoky crunch.
Serving & Storage Suggestions
This dish is best enjoyed immediately, right out of the oven, while the cheese is still stretchy and the fries are crisp. Serve it family-style in a big dish, and let everyone dig in with forks.
If you have leftovers (which is rare in my house), store the chili and fries separately in airtight containers in the refrigerator. The chili will keep for up to 4 days. The fries will lose their crispness, so they’re best eaten the same day. To reheat the chili, just warm it in a saucepan over medium heat or in the microwave. If you’re feeling brave, you can reheat the assembled dish in a 400°F oven for about 10 minutes, but the fries will be softer.
For a full tailgating spread, pair these fries with some savory loaded pulled pork nachos for a double dose of cheesy goodness. Or, if you want to keep things a little lighter, serve a side of creamy slow cooker Tuscan ravioli soup alongside for a comforting meal. And don’t forget the drinks—these are perfect alongside a cold beer or a cozy spiced pumpkin apple cider mocktail.
Nutritional Information & Benefits
Let’s be real—this is indulgent food. But it’s also made with whole ingredients that offer some nutritional value. Here’s an approximate breakdown per serving (based on 6 servings):
- Calories: ~650
- Protein: 30g
- Fat: 35g
- Carbohydrates: 55g
- Fiber: 8g
The kidney beans are a great source of fiber and plant-based protein, and the beef provides iron and B vitamins. The cheese and sour cream add calcium. This is a meal that will keep you full and satisfied through the fourth quarter. Plus, it’s naturally gluten-free if you use certified gluten-free fries and check your spice labels.
Conclusion
These Ultimate Loaded Chili Cheese Fries for Tailgating are more than just a recipe—they’re a tradition in the making. They’re the dish that brings people together, that sparks conversation, and that makes a cold day feel warm. I hope you make them for your next game day, your next party, or just a random Tuesday when you need a little comfort.
I’d love to hear how they turn out! Leave a comment below and tell me your favorite variation. Did you add bacon? Extra jalapeños? Did you use sweet potato fries? Share your creation and tag me on social media. And if you’re planning a whole tailgating menu, don’t miss these easy football charcuterie board ideas for a perfect appetizer spread. Happy cooking, and go team!
Frequently Asked Questions
Can I make this recipe in a slow cooker?
Absolutely! Brown the beef and onions in a skillet first, then transfer everything to a slow cooker. Cook on low for 4-6 hours or on high for 2-3 hours. Assemble the fries and cheese as directed, then bake in the oven for that final melt.
Can I use leftover chili for this recipe?
Yes, this is a fantastic way to use up leftover chili. Just reheat it on the stove or in the microwave before assembling the fries. The flavors will be even more developed.
What are the best fries to use?
Crinkle-cut fries are the classic choice because they’re sturdy and have lots of surface area for the toppings. Straight-cut fries work too, but they may get a little softer. For the crispiest results, I recommend Ore-Ida or another reputable brand.
Can I make this recipe dairy-free?
Yes! Use a dairy-free shredded cheese alternative (like Follow Your Heart or Daiya) and a dairy-free sour cream. The rest of the recipe is naturally dairy-free. Just double-check your Worcestershire sauce, as some brands contain anchovies.
How do I keep the fries from getting soggy?
The key is to bake the fries until they’re extra crispy, and then assemble everything right before serving. Don’t let the chili sit on the fries for too long before you eat. Also, make sure the chili is thick, not watery. Let it simmer until it reaches a hearty consistency.
Pin This Recipe!
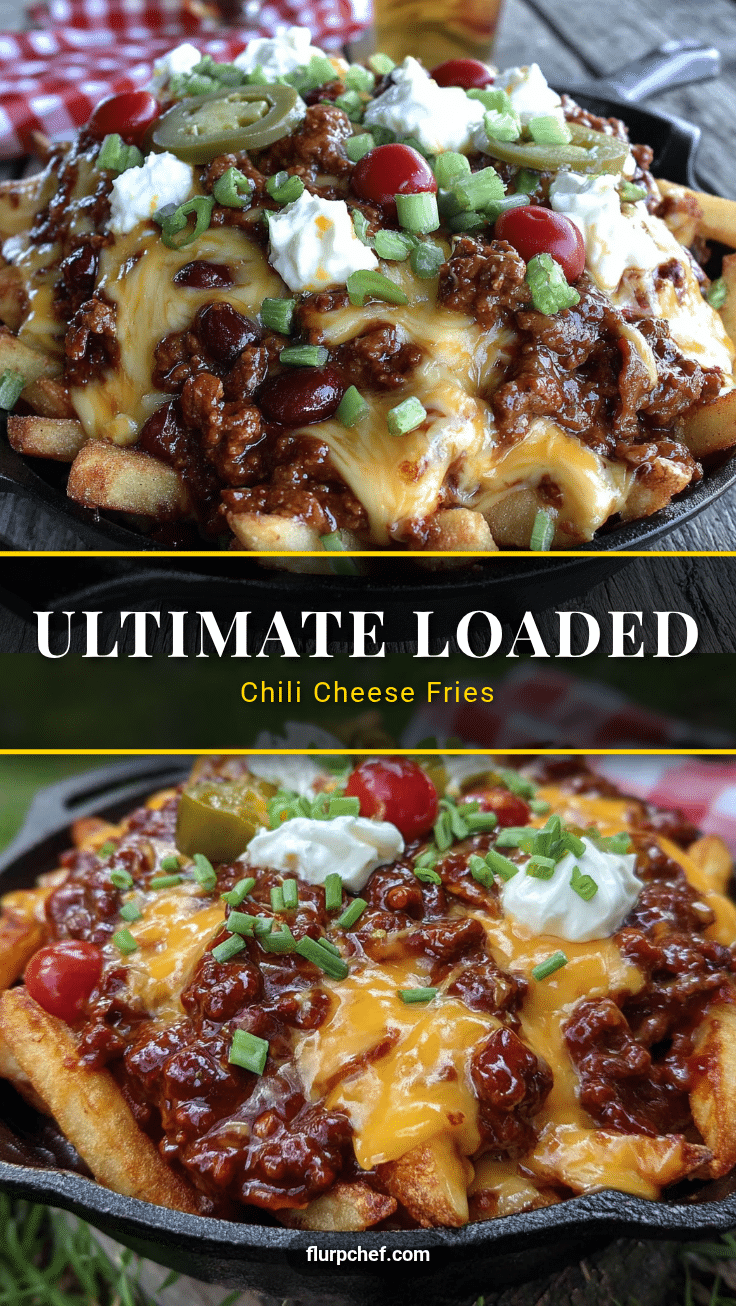
Ultimate Loaded Chili Cheese Fries: Easy Tailgating Recipe
Crispy fries topped with smoky, meaty chili and gooey melted cheddar cheese, this ultimate loaded chili cheese fries recipe is the perfect tailgating comfort food that brings people together.
- Prep Time: 15 minutes
- Cook Time: 30 minutes
- Total Time: 45 minutes
- Yield: 6 servings 1x
- Category: Main Course
- Cuisine: American
Ingredients
- 1 tablespoon olive oil
- 1 large yellow onion, diced
- 3 cloves garlic, minced
- 1 pound ground beef (80/20)
- 1 can (15 oz) diced tomatoes, undrained
- 1 can (15 oz) tomato sauce
- 1 can (15 oz) kidney beans, drained and rinsed
- 1 tablespoon chili powder
- 1 teaspoon ground cumin
- 1/2 teaspoon smoked paprika
- 1/2 teaspoon garlic powder
- 1 tablespoon Worcestershire sauce
- Salt and black pepper, to taste
- 1 bag (28 oz) frozen crinkle-cut or straight-cut fries
- 2 cups shredded sharp cheddar cheese
- 1/2 cup sour cream
- 1/4 cup sliced green onions
- 1/4 cup pickled jalapeños (optional)
Instructions
- Preheat your oven to 425°F (220°C). Spread frozen fries in a single layer on a baking sheet lined with parchment paper. Bake according to package directions, adding 3-4 extra minutes for extra crispiness.
- In a large skillet or Dutch oven over medium-high heat, warm the olive oil. Add diced onion and cook for 4-5 minutes until softened. Add minced garlic and cook for 30 seconds until fragrant.
- Add ground beef to the skillet. Break it apart and cook until no longer pink, about 6-8 minutes. Drain excess fat, leaving about 1 tablespoon for flavor.
- Stir in chili powder, cumin, smoked paprika, and garlic powder. Cook for 1 minute, stirring constantly, to toast the spices.
- Pour in diced tomatoes (with juices), tomato sauce, and Worcestershire sauce. Add drained kidney beans. Stir and bring to a simmer.
- Reduce heat to low and let chili simmer for 15-20 minutes, stirring occasionally. Season with salt and pepper to taste.
- Once fries are done, transfer them to an oven-safe serving dish. Ladle hot chili evenly over the fries. Sprinkle shredded cheddar cheese generously on top.
- Return the dish to the oven (still at 425°F) for 5-7 minutes, until cheese is melted and bubbly.
- Remove from oven. Dollop with sour cream, sprinkle with sliced green onions, and add pickled jalapeños if using. Serve immediately.
Notes
For extra crispy fries, bake them a few minutes longer than package directions. Make the chili a day ahead for even better flavor. Use a hot oven (425°F) for the final cheese melt to avoid soggy fries.
Nutrition
- Serving Size: 1 serving (about 1/6
- Calories: 650
- Fat: 35
- Carbohydrates: 55
- Fiber: 8
- Protein: 30
Keywords: loaded chili cheese fries, tailgating recipe, game day food, chili cheese fries, easy tailgating snack


