I figured setting up a nacho bar was just a matter of dumping chips on a tray and melting some cheese. It took about fifteen minutes of watching a sad, congealed platter get ignored at a party for that illusion to fall apart completely. That first attempt was a lesson in what not to do—soggy chips, rubbery cheese, and a sad little pile of jarred jalapeños that somehow made everything taste like vinegar.
The thing is, nachos are supposed to be the life of the party, the thing everyone crowds around. But a bad nacho bar? That’s just a plate of disappointment. I wanted that energy back—the kind where people are actually excited to build their own plate, where the queso stays silky and warm, and every single chip gets a fair shot at being loaded. So I started over. Not with a recipe, but with a system. I tested different melting methods for the cheese (shredded your own block, folks—it matters), figured out the perfect chip-to-topping ratio, and realized that timing is everything when you’re serving a crowd.
This Ultimate Loaded Nacho Bar with Creamy Queso is the result of that stubborn tinkering. It’s the kind of spread that makes people stop and take a picture before they even grab a plate. The queso is smooth, not gloppy. The toppings are varied and fresh, not an afterthought. And honestly? It’s the most fun I’ve had feeding a group of people without breaking a sweat. You set it out, let everyone go wild, and suddenly you’re the host who nailed it.
Why You’ll Love This Recipe
This isn’t just another tray of nachos. It’s a build-your-own adventure that practically runs itself. Here’s why it’s a winner every single time:
- Perfect for Parties: Whether it’s game day, a casual get-together, or a birthday party, this nacho bar is a guaranteed crowd-pleaser. Everyone gets to customize their plate, which means no one’s picking around onions or complaining about the beans.
- Easy to Set Up: Most of the work is in the prep, and you can do it all ahead of time. The queso comes together in about 15 minutes on the stove or in a slow cooker, and the rest is just chopping veggies and opening cans.
- Completely Customizable: From the protein to the toppings, you control everything. It’s naturally gluten-free if you choose the right chips, and you can easily make it vegetarian or even vegan with a few simple swaps.
- That Creamy Queso: The star of the show is undeniably the queso. It’s velvety, rich, and perfectly spiced. No Velveeta here—we’re using real cheese and a little trick to keep it from breaking. It’s the kind of queso you’ll want to eat with a spoon (no judgment).
- Stress-Free Hosting: The beauty of a nacho bar is that you’re not stuck in the kitchen. You set everything out, and your guests do the work. That means you get to actually enjoy your own party.
This recipe has become my go-to for any occasion where I want to feed a crowd without a fuss. It’s forgiving, it’s flexible, and it’s genuinely delicious. Plus, the leftovers (if there are any) make a fantastic breakfast the next day.
What Ingredients You Will Need
The magic of this Ultimate Loaded Nacho Bar comes from a combination of fresh, flavorful ingredients and a few pantry staples. Here’s what you’ll need to build the perfect spread.
For the Creamy Queso
- 2 tablespoons unsalted butter (for richness and to prevent the cheese from seizing)
- 2 tablespoons all-purpose flour (creates the roux that thickens the queso smoothly)
- 1 cup whole milk (adds creaminess; you can use 2% but avoid skim)
- 1/2 cup heavy cream (the secret to that ultra-luxurious texture)
- 8 ounces sharp cheddar cheese, freshly grated (please, please grate your own—pre-shredded has anti-caking agents that ruin the texture)
- 4 ounces Monterey Jack cheese, freshly grated (adds incredible meltability and a mild, buttery flavor)
- 1 (4-ounce) can diced green chiles (for a gentle, earthy heat)
- 1/2 teaspoon cumin (adds warmth and depth)
- 1/4 teaspoon smoked paprika (for a subtle smoky note)
- 1/4 teaspoon garlic powder (not fresh garlic, which can make queso grainy)
- Salt to taste
For the Protein
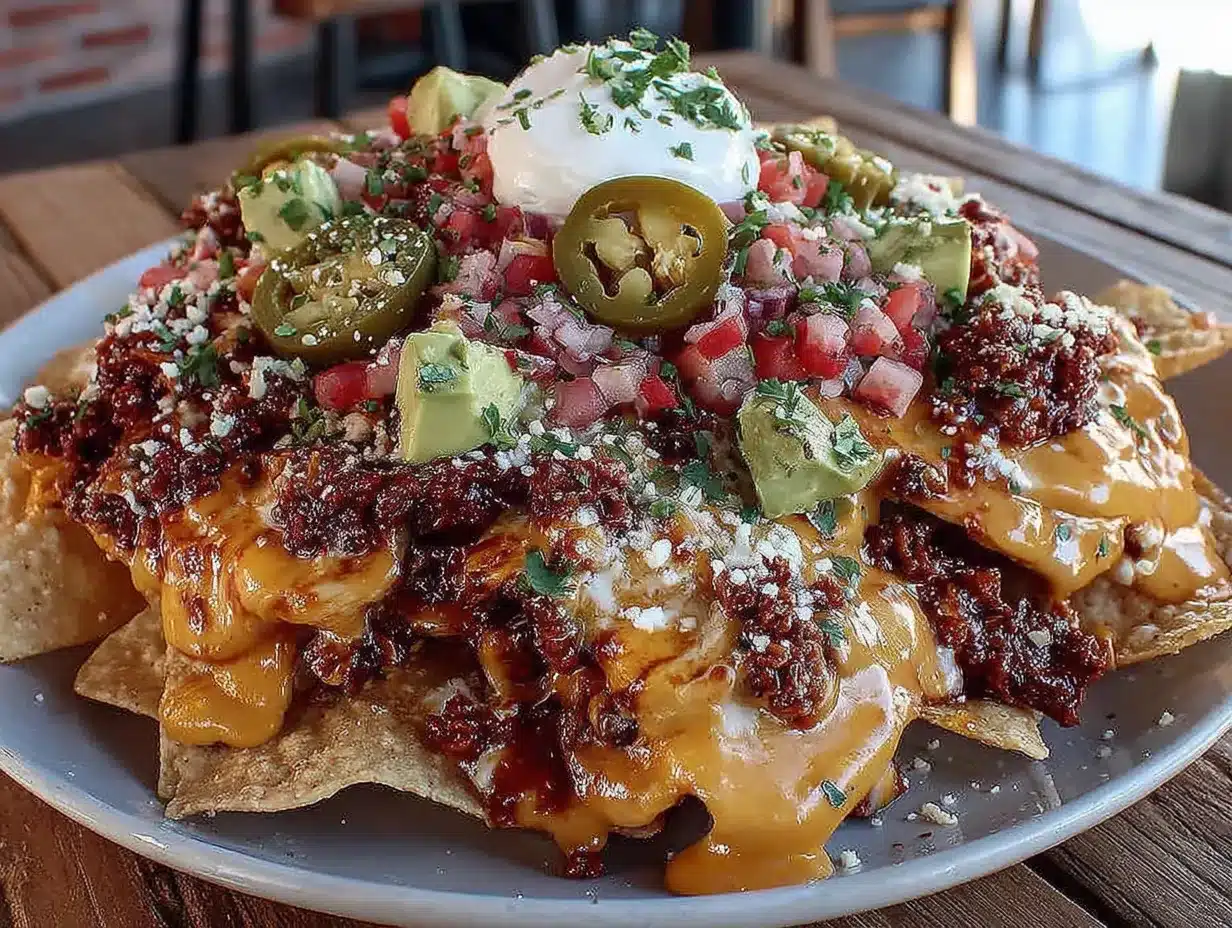
- 1 pound ground beef (80/20 works great for flavor)
- 1 tablespoon chili powder
- 1 teaspoon cumin
- 1/2 teaspoon onion powder
- 1/2 teaspoon salt
- 1/4 teaspoon black pepper
- Optional: 1 can (15 ounces) black beans or pinto beans, drained and rinsed (for a vegetarian option or to stretch the meat)
For the Nacho Bar Toppings
- 1 large bag (about 13-16 ounces) restaurant-style tortilla chips (look for sturdy chips that can hold up to toppings)
- 1 cup shredded lettuce (iceberg or romaine, finely chopped)
- 1 large tomato, diced
- 1/2 cup pico de gallo or salsa
- 1/2 cup sour cream
- 1/2 cup guacamole (store-bought is fine, but homemade is better)
- 1/4 cup sliced black olives
- 1/4 cup pickled jalapeños (for those who like heat)
- 1/4 cup chopped fresh cilantro
- 1/2 cup diced red onion
- Lime wedges, for serving
I always recommend using a block of good-quality cheddar and grating it yourself. It makes a world of difference in the queso. Also, don’t skip the heavy cream—it’s what gives the queso that restaurant-quality silkiness.
Equipment Needed
You don’t need a ton of fancy equipment for this, but having the right tools makes the process smoother. Here’s what you’ll need:
- Large skillet or sauté pan (for browning the ground beef)
- Medium saucepan (for making the queso on the stovetop)
- Small slow cooker or fondue pot (optional, but highly recommended for keeping the queso warm during serving)
- Box grater or food processor with grating disc (for shredding your own cheese)
- Wooden spoon or silicone spatula (for stirring the queso)
- Cutting board and sharp knife (for prepping all the toppings)
- Small serving bowls and spoons (for each topping)
- Large platter or sheet pan (for arranging the chips)
- Measuring cups and spoons
If you don’t have a slow cooker, you can absolutely make the queso and serve it straight from the saucepan. Just reheat it gently on the stove if it starts to cool down. I’ve also used a small cast-iron skillet set over a tea light warmer, which looks really rustic and cute.
Preparation Method
Let’s get cooking. This method is broken down into steps so you can multitask like a pro.
- Prep all your toppings first. Dice the tomato, chop the lettuce, slice the olives, and dice the red onion. Place each topping in its own small bowl. This is your mise en place, and it makes the whole process so much less stressful. Set the sour cream, guacamole, salsa, and pickled jalapeños out as well.
- Cook the ground beef. Heat a large skillet over medium-high heat. Add the ground beef and cook, breaking it up with a wooden spoon, until browned and cooked through, about 6-8 minutes. Drain off any excess fat. Return the beef to the skillet and stir in the chili powder, cumin, onion powder, salt, and pepper. Cook for 1 minute more until fragrant. If you’re using beans, stir them in now and let them heat through. Transfer the seasoned beef to a serving bowl.
- Make the creamy queso. In a medium saucepan, melt the butter over medium heat. Whisk in the flour and cook for 1 minute, stirring constantly—this cooks out the raw flour taste. Slowly pour in the milk and heavy cream, whisking continuously to prevent lumps. Cook for 2-3 minutes, until the mixture is thickened and just starting to bubble around the edges.
- Add the cheese. Reduce the heat to low. Add the grated cheddar and Monterey Jack cheese in handfuls, stirring constantly in a figure-eight motion until each addition is fully melted before adding the next. This gentle, low-heat method is the key to a smooth, non-grainy queso. Once all the cheese is melted, stir in the diced green chiles, cumin, smoked paprika, and garlic powder. Season with salt to taste. The queso should be thick, smooth, and velvety. If it seems too thick, you can whisk in a splash more milk.
- Keep the queso warm. Transfer the queso to a small slow cooker set to “warm” or a fondue pot. This is the best way to keep it perfectly dippable for the entire party. If you don’t have either, just leave it in the saucepan and reheat it gently over low heat, stirring occasionally, as needed.
- Assemble the nacho bar. Arrange the tortilla chips on a large platter or sheet pan. You can also set out a basket of chips and let everyone build their own plate. Arrange all the serving bowls with the toppings and the warm queso around the chips. Don’t forget the lime wedges!
- Build your nachos. Here’s the pro tip: don’t just pile everything on top of the chips. Start with a layer of chips, add a drizzle of queso and some seasoned beef. Add another layer of chips, more queso and beef, and then finish with all the cold toppings. This ensures every single chip gets some love.
The queso will look a little loose when it’s hot, but it will thicken beautifully as it cools slightly. Don’t be tempted to crank up the heat to melt the cheese faster—low and slow is the only way to avoid a grainy mess.
Cooking Tips & Techniques
I’ve made more mediocre nachos than I care to admit, so I’ve learned a few things the hard way. Here are my best tips for nailing this nacho bar every time.
- Grate your own cheese. I cannot stress this enough. Pre-shredded cheese is coated in cellulose and starches to prevent clumping, and those additives also prevent it from melting into a smooth, cohesive sauce. A block of good cheddar will give you a silky, delicious queso that doesn’t break.
- Low heat is your friend. When making the queso, keep the heat on low after you add the cheese. High heat will cause the proteins in the cheese to tighten up and become rubbery, and the sauce will separate into a greasy mess. Patience is a virtue here.
- Don’t overload the chips. It’s tempting to pile everything on at once, but that’s how you get a sad, soggy bottom layer. Build in layers, and serve the queso and meat warm while the cold toppings stay crisp and fresh. For the best texture, let everyone build their own plate.
- Keep the queso warm. A slow cooker or fondue pot is a game-changer. Queso thickens as it cools, so keeping it warm (not hot) ensures it stays perfectly dippable for the duration of your party. If it does thicken too much, just whisk in a splash of warm milk or cream.
- Season your meat well. The beef is a key flavor component, so don’t be shy with the spices. Taste it and adjust. It should be boldly flavored so it stands up to all the other toppings and the creamy queso.
I once tried to rush the queso by cranking the heat, and I ended up with a grainy, oily separation that I had to throw out. It was a sad, expensive lesson. Now, I always take my time, and the results are consistently perfect.
Variations & Adaptations
The beauty of a nacho bar is its flexibility. Here are some of my favorite ways to change it up.
- Vegetarian Nacho Bar: Skip the ground beef and double up on the black beans or pinto beans. You can also add sautéed bell peppers and onions, roasted corn, or even some crumbled queso fresco for a different texture. This version is just as hearty and satisfying.
- Spicy Chorizo Nachos: Swap the ground beef for Mexican chorizo. Cook it in a skillet, breaking it up, until it’s browned and cooked through. The spicy, paprika-laced oil from the chorizo adds an incredible depth of flavor that pairs perfectly with the creamy queso.
- Chicken or Pulled Pork Nachos: Use shredded rotisserie chicken or leftover savory loaded pulled pork nachos for the protein. Toss the chicken or pork with a little of your favorite BBQ sauce or some taco seasoning for extra flavor. It’s a fantastic way to use up leftovers.
- Add Some Heat: If you like things spicy, add a finely diced jalapeño (seeds and ribs included) to the queso while it’s melting. You can also offer a bowl of hot sauce or some sliced serrano peppers for those who want an extra kick.
- Change the Cheese: While cheddar and Monterey Jack are my favorites, you can experiment. Pepper Jack adds a lovely spicy kick. A little smoked Gouda adds a whole new layer of smoky flavor. Just make sure you’re still using a good melting cheese as the base.
My personal favorite variation is using leftover cozy crockpot Mississippi pot roast shredded up as the protein. The tangy, buttery, pepperoncini-infused beef is absolutely incredible on nachos. It’s a little unconventional, but it works so well.
Serving & Storage Suggestions
This nacho bar is designed to be served immediately, but here’s how to handle it from start to finish.
Serving: Set up the nacho bar on a large counter or table. Place the chips in a big basket or on a platter. Arrange all the toppings in small bowls around the chips, and keep the queso warm in its slow cooker. Provide small plates or individual platters so everyone can build their own. Serve immediately while the chips are still crunchy and the queso is warm and dippable. A squeeze of fresh lime juice over the top of each plate right before eating really brightens everything up.
Storage: Nachos are best enjoyed fresh, but you can store the components separately. Store any leftover seasoned beef in an airtight container in the refrigerator for up to 3 days. The queso can also be stored in the fridge for up to 4 days—it will solidify, but that’s fine. Store all the cold toppings in separate containers.
Reheating: To reheat the queso, place it in a saucepan over very low heat. Add a splash of milk or cream and whisk constantly until it’s smooth and warm again. You can also reheat it in the microwave in 30-second bursts, stirring well between each interval. The beef can be reheated in a skillet or microwave. Do not reheat assembled nachos—the chips will be a sad, soggy mess.
The flavors of the queso actually deepen and meld together overnight, so don’t be surprised if the leftovers taste even better the next day. It’s perfect for dipping chips or even spooning over a baked potato.
Nutritional Information & Benefits
Please note that these are estimates and will vary based on the specific ingredients and quantities you use. This recipe is meant to be a fun, indulgent treat, but it does have some redeeming qualities.
Estimated Nutritional Values (per serving, about 1/8 of the recipe):
- Calories: ~450-550
- Fat: ~30g
- Carbohydrates: ~35g
- Protein: ~20g
- Fiber: ~5g
Health Benefits:
- The black beans (if used) are an excellent source of plant-based protein and fiber, which helps with satiety and blood sugar regulation.
- Tomatoes are rich in lycopene, a powerful antioxidant.
- Avocados in the guacamole provide healthy monounsaturated fats and potassium.
- Using real cheese provides calcium and protein, which is a better option than processed cheese products.
Dietary Considerations: This recipe can be made gluten-free by ensuring your chips and all other ingredients are certified gluten-free. To make it vegetarian, simply omit the ground beef and double the beans. For a lighter version, use lean ground turkey or chicken, and reduce the amount of cheese in the queso (though it won’t be as creamy). This recipe contains dairy (milk, cream, cheese) and gluten (depending on the chips).
I’m all for balance. This isn’t a health food, but it’s made with real ingredients, and that counts for a lot. Enjoy it with friends, and don’t overthink it.
Conclusion
This Ultimate Loaded Nacho Bar with Creamy Queso is more than just a party appetizer—it’s an experience. It’s the kind of spread that gets people talking, laughing, and building their perfect plate. The creamy, homemade queso is the undeniable star, but the real magic is in how easy it is to set up and how much everyone loves it.
I’ve made this for game days, casual dinners, and even a small birthday party, and it’s never failed to impress. It’s forgiving, it’s flexible, and it’s genuinely delicious. Don’t be afraid to experiment with the toppings or the protein—make it your own. That’s the whole point.
So go ahead, set up your bar, and watch everyone dig in. And when they ask for the recipe (they will), you can tell them you’ve got it right here. I’d love to hear how yours turns out! Drop a comment below and let me know your favorite topping combination, or share a photo of your nacho bar. Happy hosting!
Frequently Asked Questions
Can I make the queso ahead of time?
Absolutely! You can make the queso up to 2 days in advance. Store it in an airtight container in the refrigerator. To reheat, place it in a saucepan over very low heat, adding a splash of milk or cream and whisking until smooth. A slow cooker is perfect for keeping it warm for serving.
How do I keep my nachos from getting soggy?
The key is to not assemble the fully loaded nachos too far in advance. Set up the bar and let everyone build their own plates. If you’re making a big tray, build it in layers and serve immediately. Using sturdy restaurant-style chips also helps them hold up better to the toppings.
Can I use pre-shredded cheese for the queso?
I really don’t recommend it. Pre-shredded cheese is coated with anti-caking agents that prevent it from melting smoothly, resulting in a grainy or clumpy queso. Grating your own cheese from a block takes just a few extra minutes and makes a huge difference in the final texture.
What can I use instead of ground beef?
This recipe is very flexible. You can use shredded chicken, pulled pork, ground turkey, chorizo, or even just extra beans for a vegetarian version. For a fun twist, try using leftover easy honey garlic glazed boneless chicken thighs, chopped up small—the sweet and savory flavor is amazing with the queso.
How do I make this recipe gluten-free?
To make this nacho bar gluten-free, ensure you use certified gluten-free tortilla chips. The queso itself is naturally gluten-free as long as you use a gluten-free all-purpose flour blend for the roux, or you can skip the flour entirely and use a cornstarch slurry (mix 2 tablespoons cornstarch with 3 tablespoons cold milk) to thicken the queso instead. Always double-check your spice labels to ensure they are certified gluten-free.
Pin This Recipe!
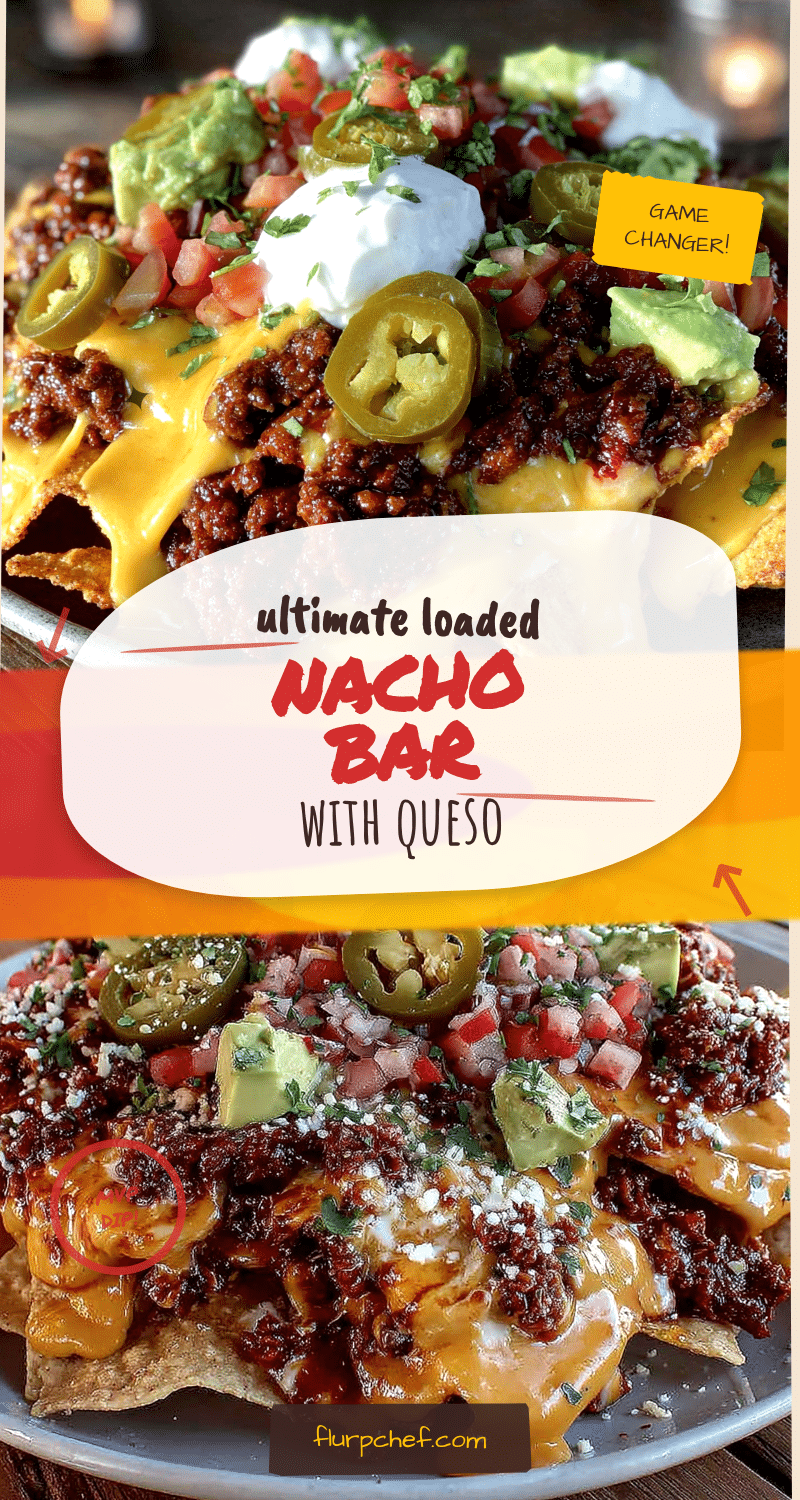
Ultimate Loaded Nacho Bar with Creamy Queso

This build-your-own nacho bar features a silky, homemade queso made with real cheese, seasoned ground beef, and a variety of fresh toppings. Perfect for parties, it’s easy to set up and completely customizable.
- Prep Time: 20 minutes
- Cook Time: 20 minutes
- Total Time: 40 minutes
- Yield: 8 servings 1x
- Category: Appetizer
- Cuisine: Mexican
Ingredients
- 2 tablespoons unsalted butter
- 2 tablespoons all-purpose flour
- 1 cup whole milk
- 1/2 cup heavy cream
- 8 ounces sharp cheddar cheese, freshly grated
- 4 ounces Monterey Jack cheese, freshly grated
- 1 (4-ounce) can diced green chiles
- 1/2 teaspoon cumin
- 1/4 teaspoon smoked paprika
- 1/4 teaspoon garlic powder
- Salt to taste
- 1 pound ground beef (80/20)
- 1 tablespoon chili powder
- 1 teaspoon cumin
- 1/2 teaspoon onion powder
- 1/2 teaspoon salt
- 1/4 teaspoon black pepper
- 1 can (15 ounces) black beans or pinto beans, drained and rinsed (optional)
- 1 large bag (13–16 ounces) restaurant-style tortilla chips
- 1 cup shredded lettuce (iceberg or romaine)
- 1 large tomato, diced
- 1/2 cup pico de gallo or salsa
- 1/2 cup sour cream
- 1/2 cup guacamole
- 1/4 cup sliced black olives
- 1/4 cup pickled jalapeños
- 1/4 cup chopped fresh cilantro
- 1/2 cup diced red onion
- Lime wedges, for serving
Instructions
- Prep all your toppings first. Dice the tomato, chop the lettuce, slice the olives, and dice the red onion. Place each topping in its own small bowl. Set the sour cream, guacamole, salsa, and pickled jalapeños out as well.
- Cook the ground beef. Heat a large skillet over medium-high heat. Add the ground beef and cook, breaking it up with a wooden spoon, until browned and cooked through, about 6-8 minutes. Drain off any excess fat. Return the beef to the skillet and stir in the chili powder, cumin, onion powder, salt, and pepper. Cook for 1 minute more until fragrant. If you’re using beans, stir them in now and let them heat through. Transfer the seasoned beef to a serving bowl.
- Make the creamy queso. In a medium saucepan, melt the butter over medium heat. Whisk in the flour and cook for 1 minute, stirring constantly. Slowly pour in the milk and heavy cream, whisking continuously to prevent lumps. Cook for 2-3 minutes, until the mixture is thickened and just starting to bubble around the edges.
- Add the cheese. Reduce the heat to low. Add the grated cheddar and Monterey Jack cheese in handfuls, stirring constantly in a figure-eight motion until each addition is fully melted before adding the next. Once all the cheese is melted, stir in the diced green chiles, cumin, smoked paprika, and garlic powder. Season with salt to taste. The queso should be thick, smooth, and velvety. If it seems too thick, whisk in a splash more milk.
- Keep the queso warm. Transfer the queso to a small slow cooker set to ‘warm’ or a fondue pot. If you don’t have either, leave it in the saucepan and reheat it gently over low heat, stirring occasionally, as needed.
- Assemble the nacho bar. Arrange the tortilla chips on a large platter or sheet pan. You can also set out a basket of chips and let everyone build their own plate. Arrange all the serving bowls with the toppings and the warm queso around the chips. Don’t forget the lime wedges!
- Build your nachos. Start with a layer of chips, add a drizzle of queso and some seasoned beef. Add another layer of chips, more queso and beef, and then finish with all the cold toppings.
Notes
Grate your own cheese for the smoothest queso. Keep the heat low when melting cheese to avoid graininess. Build nachos in layers to prevent sogginess. The queso can be made up to 2 days ahead and reheated gently.
Nutrition
- Serving Size: 1/8 of recipe
- Calories: 500
- Sugar: 5
- Sodium: 800
- Fat: 30
- Saturated Fat: 15
- Carbohydrates: 35
- Fiber: 5
- Protein: 20
Keywords: nacho bar, loaded nachos, creamy queso, party appetizer, game day food, build your own nachos


