Last spring, I was stuck in a three-hour car ride with my brother-in-law, who is an accountant. Not just any accountant—the kind who brings his own Tupperware of pre-cut vegetables to holiday dinners and tracks his water intake on a spreadsheet. We were driving back from a family thing, and I was desperately craving caffeine. He casually mentioned he’d been making his own iced coffee at home. I nodded politely, expecting to hear about some sad, watery pour-over situation.
But then he started describing this drink. Brown sugar syrup, oat milk, espresso shaken until frothy. He said he’d been tweaking it for months, trying to get it just right without all the sugar. My brother-in-law. The man who color-codes his sock drawer. And honestly? He was onto something big.
I pulled over at the next rest stop, grabbed a napkin from the glove compartment, and made him write it all down. The proportions, the shaking technique, the exact brand of oat milk he swore by. It was the most unlikely recipe handoff I’ve ever experienced—right there between a gas station and a billboard for a roadside diner. But I’ve been making this lighter copycat Starbucks brown sugar oat milk shaken espresso ever since, and let me tell you, it’s become my morning ritual. Maybe you’ve been there—craving that coffee shop experience without the drive-through line or the sugar crash. This one’s for you.
Why You’ll Love This Recipe
This isn’t just another coffee recipe. After testing this about a dozen times (my kitchen counter looked like a tiny coffee lab), I can confidently say this version hits that sweet spot between indulgence and feeling good about what you’re drinking.
- Quick & Easy: Comes together in under 5 minutes. Faster than waiting in the Starbucks drive-through, I promise.
- Simple Ingredients: You probably have most of this in your pantry right now. No fancy syrups or special equipment needed.
- Perfect for Busy Mornings: Shake it up while your toast is popping. It’s that fast.
- Crowd-Pleaser: I’ve served this to coffee snobs and casual drinkers alike. Everyone asks for the recipe.
- Unbelievably Delicious: The shaking creates this beautiful frothy layer on top that feels fancy, but it’s so simple.
What makes this different from every other copycat recipe out there? I spent time figuring out how to cut the sugar without cutting the flavor. Most versions use a heavy brown sugar syrup that packs nearly as many calories as the original. My version uses a smarter sweetener blend that still gives you that deep, molasses-y brown sugar taste. It’s comfort coffee reimagined—healthier, faster, but with the same soul-soothing satisfaction that makes you close your eyes after that first sip.
What Ingredients You Will Need
This recipe uses simple, wholesome ingredients to deliver that bold coffee shop flavor without the fuss. Most of these are pantry staples or easy to find at any grocery store.
- Brewed espresso, 2 shots (about 2 ounces) – I use a stovetop moka pot or a basic espresso machine. Strong coffee works in a pinch.
- Brown sugar, 1 tablespoon – Light or dark works. Dark gives a deeper molasses flavor.
- Maple syrup, 1 teaspoon – This is my secret for cutting sugar without losing sweetness. It blends beautifully with the brown sugar.
- Unsweetened oat milk, ¾ cup – I recommend Oatly or Califia Farms for the creamiest texture. Barista blends work best.
- Ice cubes, about 1 cup – Large cubes melt slower and keep your drink from getting watery.
- Vanilla extract, ¼ teaspoon (optional) – Adds a lovely warmth. I add it when I’m feeling fancy.
- Pinch of sea salt – Trust me on this. It balances the sweetness and makes the flavors pop.
Ingredient Selection Tips: For the oat milk, look for one labeled “barista blend” if you can find it. It froths better and doesn’t separate in hot coffee. If you’re dairy-free, this is already perfect—just double-check your oat milk is certified gluten-free if that matters to you. I’ve also tried this with almond milk, and honestly, it’s not the same. Oat milk has that creamy mouthfeel that makes this drink special.
Equipment Needed
You don’t need a fancy coffee setup for this. Here’s what I use:
- Airtight jar or cocktail shaker – A mason jar with a tight lid works perfectly. I use a 16-ounce Ball jar.
- Espresso maker or moka pot – I have a basic stovetop Bialetti that cost me $25. It’s been going strong for years.
- Measuring spoons – For getting the sweetener just right.
- Tall glass – A 12-ounce glass works well. I use an old pasta sauce jar sometimes—no judgment here.
- Straw – Optional, but it makes sipping that frothy top layer extra satisfying.
Budget-Friendly Options: If you don’t have an espresso maker, brew a very strong cup of coffee using twice the normal amount of grounds. It won’t be exactly the same, but it’s still delicious. I’ve done this on camping trips with instant espresso powder, and it worked surprisingly well.
Preparation Method
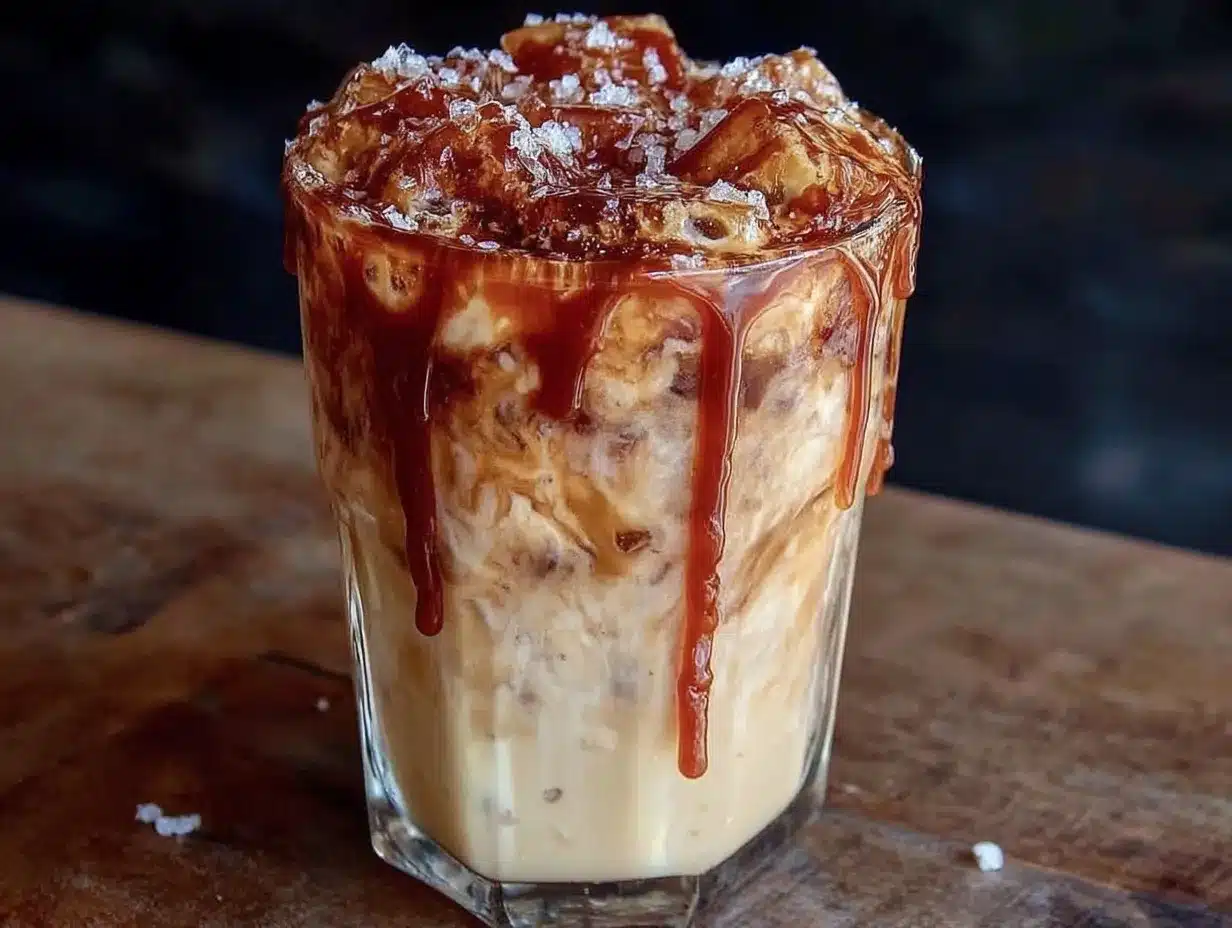
- Brew your espresso – Start by brewing 2 shots of espresso. If using a moka pot, this takes about 3-4 minutes. Let it cool for just 30 seconds—you want it hot enough to dissolve the sugar but not so hot that it melts the ice immediately.
- Mix the sweeteners – In your jar or shaker, combine the brown sugar and maple syrup. The maple syrup helps the brown sugar dissolve faster. I learned this after my first attempt left gritty sugar at the bottom of my glass. Not ideal.
- Add the hot espresso – Pour the hot espresso directly over the sweeteners. Stir gently with a spoon until the brown sugar is completely dissolved. This should take about 15 seconds. You’ll see the mixture turn a beautiful deep amber color.
- Add vanilla and salt – Stir in the vanilla extract and a tiny pinch of sea salt. The salt doesn’t make it salty—it just makes everything taste more like itself. Trust the process.
- Shake it up – Add a handful of ice cubes (about 5-6) to the jar. Secure the lid tightly. Shake vigorously for about 15-20 seconds. You’re looking for a nice frothy layer to form on top. The sound changes as it gets frothy—it goes from sloshy to creamy-sounding.
- Prepare your glass – Fill your serving glass with fresh ice cubes. Don’t use the ice from the shaker—it’s already starting to melt and will water down your drink.
- Pour and finish – Pour the shaken espresso mixture over the fresh ice. It should be beautifully frothy on top. Slowly add the oat milk, pouring it over the back of a spoon to help it layer nicely. Give it a gentle stir if you want, or leave it layered for a pretty presentation.
- Taste and adjust – Take a sip. Need it sweeter? Add a tiny drizzle of maple syrup. Want it stronger? Next time, use an extra shot of espresso. This is your drink now—make it yours.
Sensory Cues: When you shake the espresso, listen for the change in sound. It starts sounding like ice cubes hitting glass, then becomes a smoother, creamier sound as the froth develops. The color should be a warm caramel brown with a lighter, almost golden foam on top.
Cooking Tips & Techniques
I messed up this recipe more times than I’d like to admit. Here’s what I learned so you don’t have to repeat my mistakes.
The Shaking Technique: Don’t be shy with the shaking. I used to give it a few gentle shakes and wonder why my drink wasn’t frothy. You need to really go for it—15 seconds of vigorous shaking. I’ve dropped the jar twice (thankfully on carpet), so make sure that lid is on tight. I now do a test shake over the sink first, just in case.
Temperature Matters: If your espresso is too cold, the sugar won’t dissolve properly. Too hot, and it melts all the ice. Let it sit for about 30-45 seconds after brewing. You want it hot but not scalding. I burned my tongue on my first attempt because I was too impatient.
The Ice Situation: Never use the shaken ice in your final drink. It’s already partially melted and will make your coffee taste watery. I learned this the hard way when my first few attempts tasted like sad, diluted coffee. Fresh ice is non-negotiable.
Multitasking Strategy: While your espresso is brewing, measure out your sweeteners and get your jar ready. This drink comes together so fast that having everything prepped makes it feel effortless. I do this while my oatmeal is cooking in the morning.
Variations & Adaptations
This recipe is flexible. Here are some ways I’ve adapted it when I wanted something different:
Dairy-Free Variation: This is already dairy-free with oat milk, but try coconut milk for a tropical twist. It’s thinner but has a lovely natural sweetness. I did this on a whim during a summer heatwave, and it was surprisingly refreshing.
Vanilla Brown Sugar Version: Add an extra ¼ teaspoon of vanilla extract and use vanilla oat milk. It tastes like a fancy bakery coffee. My sister-in-law requests this version every time she visits.
Iced Latte Style: Skip the shaking and just stir everything together in a glass. It’s less frothy but still delicious. I do this when I’m running late and don’t have time for the shaking ritual.
Pumpkin Spice Adaptation: Add 1 tablespoon of pumpkin puree and ¼ teaspoon of pumpkin pie spice to the shaker before adding the espresso. This is my fall obsession. It’s like drinking a cozy sweater.
Lower Sugar Option: Use 1 tablespoon of maple syrup and skip the brown sugar entirely. It won’t have that exact brown sugar flavor, but it’s still really good. I’ve done this when I was watching my sugar intake, and honestly, I didn’t miss it much.
Serving & Storage Suggestions
This drink is best enjoyed immediately—that frothy top layer doesn’t last forever. Serve it over fresh ice in a tall glass. I like to use a clear glass so I can see the beautiful layers: the dark espresso at the bottom, the creamy oat milk swirling in, and the frothy top.
Perfect Pairings: This coffee pairs beautifully with something simple—a slice of banana bread, a buttery croissant, or even just a handful of almonds. The sweetness of the drink complements savory breakfasts like eggs and avocado toast. I’ve also enjoyed it alongside a healthy oatmeal raspberry bar for a balanced morning treat.
Storage: You can make the sweetener mixture ahead of time. Combine the brown sugar and maple syrup in a small jar and keep it in the fridge for up to a week. When you’re ready for coffee, just add hot espresso to a spoonful of the mixture. I do this on Sunday evenings so my mornings are even faster.
Reheating: This is an iced drink, so reheating isn’t really a thing. But if you want it warm, skip the ice and shake the espresso with just the sweeteners and a splash of oat milk. Pour it into a mug and top with warm oat milk. It’s a completely different experience, but still lovely on a cold morning.
Nutritional Information & Benefits
Here’s the breakdown for one serving using the recipe as written:
| Nutrient | Amount |
|---|---|
| Calories | ~120 |
| Total Fat | 3g |
| Carbohydrates | 22g |
| Added Sugar | 14g |
| Protein | 2g |
| Caffeine | ~150mg |
For comparison, a standard Starbucks brown sugar oat milk shaken espresso has about 26g of sugar and 190 calories. This lighter version cuts the sugar by almost half while keeping all the flavor. The oat milk provides some fiber and calcium, and the espresso gives you that clean energy boost without the jitters you might get from sugary energy drinks.
Dietary Considerations: This recipe is naturally vegan, dairy-free, and nut-free (if using oat milk). It’s also lower in sugar than the original, making it a better choice if you’re watching your intake. The maple syrup adds trace minerals like zinc and manganese—small benefits, but every little bit counts.
Conclusion
Honestly, I never thought I’d be taking coffee advice from my brother-in-law, the man who alphabetizes his spice rack. But this lighter copycat Starbucks brown sugar oat milk shaken espresso has become such a staple in my kitchen that I’ve made it for friends, neighbors, and even my coffee-snob cousin who only drinks single-origin pour-overs. He asked for the recipe. That’s when I knew it was legit.
This drink is proof that you don’t need a coffee shop to get that cafe experience. You just need a jar, a few simple ingredients, and about five minutes. I hope you make this your own—tweak the sweetness, try different milks, experiment with flavors. That’s the beauty of homemade. And if you come up with a variation I haven’t tried, please share it in the comments. I’m always looking for my next coffee adventure.
So go ahead—shake things up a little. Your morning coffee will thank you.
Frequently Asked Questions
Can I use regular coffee instead of espresso?
Yes! Brew a very strong cup of coffee using twice the amount of grounds you normally would. It won’t be as concentrated, but it will still taste great. I’ve done this many times when my espresso maker was packed away.
What’s the best oat milk for frothing?
Barista blends are your best bet. Oatly Barista Edition and Califia Farms Barista Blend both froth beautifully and don’t separate in hot coffee. Regular oat milk works too, but the froth won’t be as thick.
How can I make this even lower in sugar?
Use 1 tablespoon of maple syrup and skip the brown sugar. You’ll lose a bit of that molasses flavor, but it’s still delicious. You can also use a monk fruit sweetener blend that measures like brown sugar.
Can I make this ahead of time for meal prep?
The sweetener mixture can be made ahead and stored in the fridge for up to a week. But the actual drink is best made fresh—the froth doesn’t hold up well overnight. I prep the sweetener on Sundays for easy weekday mornings.
Why does my drink taste watery?
Two common mistakes: using the ice from the shaker in your final drink, or not letting your espresso cool slightly before shaking. Always use fresh ice for serving, and let your espresso sit for 30-45 seconds after brewing before adding it to the shaker.
Pin This Recipe!
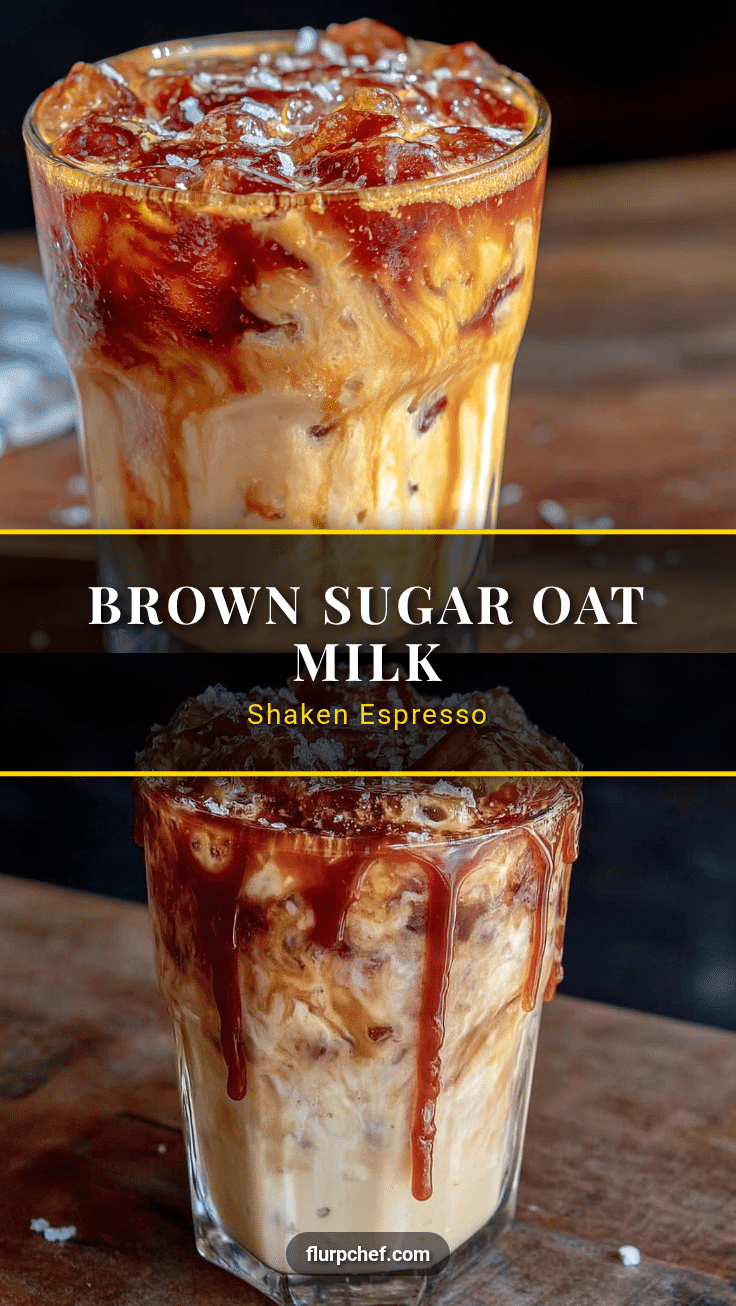
5 Easy Lighter Starbucks Brown Sugar Oat Milk Shaken Espresso

A lighter copycat Starbucks brown sugar oat milk shaken espresso that cuts sugar by almost half while keeping all the flavor. Quick, easy, and made with simple ingredients for a perfect morning ritual.
- Prep Time: 5 minutes
- Cook Time: 0 minutes
- Total Time: 5 minutes
- Yield: 1 serving 1x
- Category: Beverages
- Cuisine: American
Ingredients
- 2 shots brewed espresso (about 2 ounces)
- 1 tablespoon brown sugar (light or dark)
- 1 teaspoon maple syrup
- 3/4 cup unsweetened oat milk (barista blend recommended)
- 1 cup ice cubes (large cubes preferred)
- 1/4 teaspoon vanilla extract (optional)
- Pinch of sea salt
Instructions
- Brew 2 shots of espresso. Let cool for 30-45 seconds.
- In a jar or shaker, combine brown sugar and maple syrup.
- Pour hot espresso over sweeteners and stir until brown sugar is completely dissolved (about 15 seconds).
- Stir in vanilla extract and a tiny pinch of sea salt.
- Add a handful of ice cubes (about 5-6) to the jar. Secure lid tightly and shake vigorously for 15-20 seconds until frothy.
- Fill a serving glass with fresh ice cubes.
- Pour shaken espresso mixture over fresh ice. Slowly add oat milk, pouring over the back of a spoon to layer.
- Taste and adjust sweetness or strength as desired.
Notes
For best froth, use barista blend oat milk. Never use the shaken ice in the final drink—it will make it watery. Let espresso cool slightly before shaking to avoid melting all the ice. The sweetener mixture can be made ahead and stored in the fridge for up to a week.
Nutrition
- Serving Size: 1 drink (about 12 ou
- Calories: 120
- Sugar: 14
- Sodium: 100
- Fat: 3
- Carbohydrates: 22
- Fiber: 1
- Protein: 2
Keywords: brown sugar oat milk shaken espresso, Starbucks copycat, iced coffee, healthy coffee, vegan coffee, dairy-free coffee, low sugar coffee


