The neighborhood block party was in three hours and I’d completely forgotten I signed up to bring the main dish. Everyone else would be bringing their signature potluck showstoppers—slow-smoked brisket that had been marinating for two days, elaborate pasta salads with hand-chopped herbs, and those perfectly layered desserts that look like they belong on a magazine cover. I had a pack of chicken thighs in the fridge, a brand new air fryer I barely knew how to use, and about forty-five minutes of actual cooking time before I had to walk out the door. Honestly, I almost just grabbed a rotisserie chicken from the grocery store and called it a day. But something made me stop—maybe it was stubbornness, or maybe it was the memory of those perfectly crispy chicken thighs my grandmother used to make in a cast iron skillet, the skin so crackly you could hear it across the table. I figured, why not try? I mean, what was the worst that could happen? I’d end up at the store anyway.
So I fired up that air fryer, crossed my fingers, and threw those thighs in with a simple seasoning blend I threw together from whatever was in my spice cabinet. Let me tell you, the sizzle when they hit the hot basket was the first good sign. The smell that filled my kitchen—garlic, paprika, a little bit of cayenne—was the second. By the time I pulled them out, golden brown and impossibly crispy, I knew I had something special. I walked into that block party feeling like I was bringing a secret weapon.
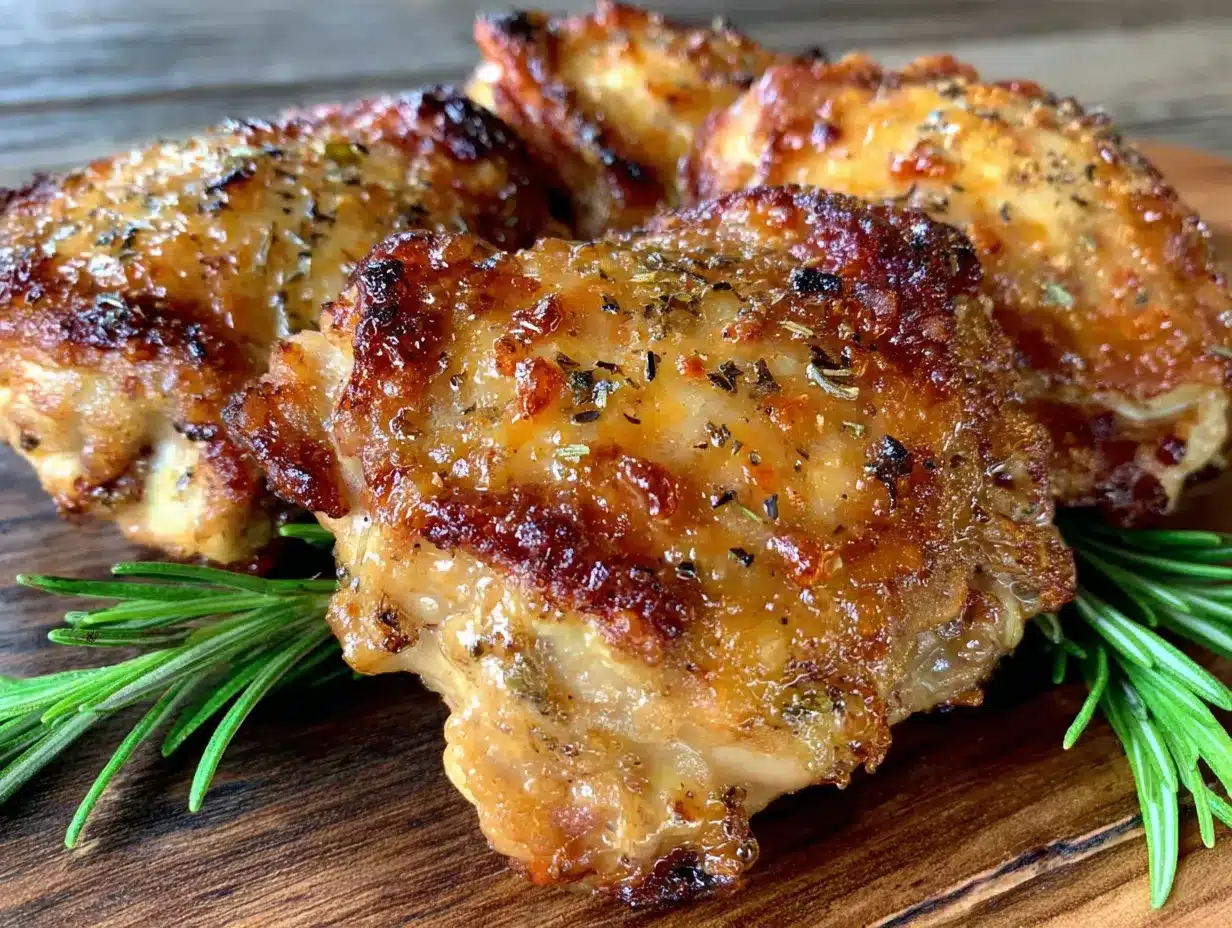
And you know what happened? Those crispy air fryer chicken thighs disappeared in ten minutes flat. People kept coming back for seconds, asking for the recipe, and giving me that look—you know the one—like I’d pulled off some kind of culinary magic trick. The brisket guy even asked for my secret. I just smiled and said, “Air fryer and a little bit of desperation.” Maybe you’ve been there too—needing to feed a crowd with limited time and even less prep. If you have, then you already know the relief of finding a recipe that saves the day. These chicken thighs are that recipe. They’re the ones that made me believe in the air fryer, and they’re the ones I still make every time I need to feed a hungry group without breaking a sweat.
Why You’ll Love These Crispy Air Fryer Chicken Thighs
I’ve tested this recipe about a dozen times now—for family dinners, game day parties, even a casual backyard wedding reception. Each time, the result is the same: perfectly crispy skin, juicy meat, and zero complaints. Here’s why this recipe works so well for hosts like you:
- Quick & Easy: From fridge to table in under 40 minutes. No marinating overnight, no complicated techniques. Just simple seasoning and air fryer magic.
- Simple Ingredients: You probably have everything in your pantry right now. Garlic powder, paprika, salt, pepper—that’s basically it. No fancy grocery runs needed.
- Perfect for a Crowd: Most air fryers can handle 6-8 thighs in one batch. Double or triple the recipe easily, and keep them warm in a low oven while you cook the rest.
- Crowd-Pleaser: I’ve served these to picky eaters, health-conscious friends, and serious foodies. Everyone agrees—they’re addictive. The crispy skin is non-negotiable.
- Unbelievably Delicious: The texture is what gets people every time. That crackly, golden-brown skin gives way to tender, juicy meat that’s perfectly seasoned all the way through. It’s comfort food at its finest, but faster and healthier than frying.
What makes this version different from all the other air fryer chicken recipes out there? It’s the technique. I spent weeks perfecting the temperature and timing to get that skin impossibly crispy without drying out the meat. Most recipes either overcook the chicken or leave the skin flabby. Not this one. The secret is a two-temperature method—high heat to start, then a gentle finish—that locks in moisture while rendering every bit of fat from the skin. Plus, I use bone-in, skin-on thighs because they’re the most forgiving cut of chicken. They stay juicy even if you get distracted by your guests.
This recipe isn’t just good—it’s the kind that makes you close your eyes after the first bite. It’s comfort food reimagined for the air fryer era: faster, healthier, but with the same soul-soothing satisfaction. Perfect for impressing guests without stress, or turning a simple weeknight dinner into something memorable.
What Ingredients You Will Need
This recipe uses simple, wholesome ingredients to deliver bold flavor and satisfying texture without the fuss. Most of these are pantry staples, so you can whip up a batch anytime the craving hits.
For the Chicken
- 8 bone-in, skin-on chicken thighs (about 3 pounds total) — Bone-in thighs are the star here. The bone keeps the meat moist during cooking, and the skin gets that irresistible crunch. I prefer thighs from Bell & Evans or Mary’s Free Range Chicken for the best flavor and texture.
- 2 tablespoons olive oil — Helps the seasoning stick and promotes browning. You can also use avocado oil for a higher smoke point.
For the Dry Rub
- 2 teaspoons garlic powder — Not garlic salt! Pure garlic powder gives you that savory depth without extra sodium.
- 2 teaspoons smoked paprika — This is the secret to that gorgeous color and subtle smoky flavor. Regular paprika works too, but smoked adds something special.
- 1 teaspoon onion powder — Balances the garlic and adds a sweet, savory note.
- 1 teaspoon dried thyme — Optional, but I love the earthy, herbal undertone it brings. You can substitute dried oregano or rosemary.
- 1 teaspoon salt — I use fine sea salt. If you’re using kosher salt, you might need a bit more—about 1.5 teaspoons.
- 1/2 teaspoon black pepper — Freshly ground is always better, but pre-ground works in a pinch.
- 1/4 teaspoon cayenne pepper — Just a hint of heat. Skip it if you’re serving kids or spice-averse guests, or double it if you like things fiery.
For Serving (Optional but Recommended)
- Fresh parsley or cilantro, chopped — A sprinkle of green makes the dish pop visually.
- Lemon wedges — A squeeze of fresh lemon juice right before serving cuts through the richness beautifully.
- Flaky sea salt — A final pinch of Maldon or similar salt adds a lovely crunch and burst of flavor.
Ingredient Tips & Substitutions
If you’re feeding a smaller crowd, you can easily halve the recipe—just keep the cooking time the same. For a larger group, cook in batches and keep the finished thighs warm in a 200°F oven on a wire rack set over a baking sheet (this prevents the skin from getting soggy).
Want to switch up the flavor profile? Try swapping the smoked paprika for chipotle powder for a smoky-spicy kick, or use a pre-made seasoning blend like Lawry’s Seasoned Salt or Trader Joe’s Everything But the Bagel Seasoning for a shortcut. I’ve also made these with a simple lemon-pepper rub, and they were fantastic.
For a gluten-free option, this recipe is naturally gluten-free—just double-check your spice blends if you’re highly sensitive. For a dairy-free version, you’re already there. No dairy needed!
Equipment Needed
You don’t need a lot of fancy gear to make these chicken thighs, but having the right tools makes the process smoother. Here’s what I use every time:
- Air Fryer — Any brand works, but I’ve had the best results with a Cosori Pro II 5.8-quart or the Ninja Air Fryer Max XL. Both have enough capacity for 6-8 thighs in a single layer. If your air fryer is smaller, just cook in batches.
- Instant-Read Thermometer — This is non-negotiable for me. Chicken thighs are done at 175-185°F, but an instant-read thermometer takes the guesswork out. I use a Thermapen ONE, but even a $10 digital thermometer from Amazon works fine.
- Tongs — A good pair of locking tongs makes flipping the thighs easy without burning your fingers. Silicone-tipped tongs won’t scratch the air fryer basket.
- Large Bowl — For tossing the chicken with oil and seasoning. A glass or stainless steel bowl works best.
- Paper Towels — Patting the chicken dry before seasoning is crucial for crispy skin. Don’t skip this step!
- Wire Rack Set Over a Baking Sheet — If you’re cooking in batches, this setup keeps the cooked thighs warm and crispy in the oven while you finish the rest.
If you don’t have an air fryer, you can still make this recipe in a convection oven or even a regular oven at 425°F. Just place the thighs on a wire rack over a baking sheet and bake for 35-40 minutes, flipping halfway through. The skin won’t be quite as crackly, but it’ll still be delicious.
Preparation Method
Alright, let’s get cooking. Here’s exactly how I make these crispy air fryer chicken thighs for a crowd. I’ve broken it down step by step so you can follow along without any guesswork.
- Pat the Chicken Dry — This is the most important step for crispy skin. Take the chicken thighs out of the package and pat them thoroughly with paper towels. I mean really dry—you want to remove as much moisture as possible. Moisture is the enemy of crispiness. If you have time, let the chicken sit uncovered in the fridge for 30 minutes to air-dry even more. I rarely have that luxury, so I just pat them extra well.
- Preheat the Air Fryer — Set your air fryer to 400°F and let it preheat for 3-5 minutes. Most air fryers preheat quickly, but giving it that extra time ensures the basket is hot when the chicken goes in. A hot start means better browning.
- Season the Chicken — In a small bowl, mix together the garlic powder, smoked paprika, onion powder, dried thyme, salt, black pepper, and cayenne pepper. Place the dried chicken thighs in a large bowl, drizzle with the olive oil, and toss to coat evenly. Then sprinkle the seasoning mixture over the chicken and toss again until every thigh is well coated. Don’t be shy—rub the seasoning into the skin with your hands if needed.
- Arrange in the Air Fryer Basket — Place the seasoned chicken thighs in the air fryer basket in a single layer, skin side down. Make sure they’re not touching—crowding the basket will steam the chicken instead of crisping it. Depending on your air fryer size, you’ll fit 4-8 thighs per batch. I usually do 6 in my 5.8-quart model.
- Cook at 400°F for 12 Minutes — Start cooking at 400°F for 12 minutes. This high heat renders the fat and starts crisping the skin. You’ll hear a satisfying sizzle—that’s the sound of success.
- Flip and Reduce Heat — After 12 minutes, carefully flip the chicken thighs using tongs. They should be golden brown on the skin side. Reduce the air fryer temperature to 375°F and cook for another 10-12 minutes. The lower temperature allows the meat to cook through without burning the skin.
- Check Internal Temperature — The chicken is done when the internal temperature reaches 175-185°F when measured at the thickest part of the thigh (avoiding the bone). I always use my instant-read thermometer to check. If they need more time, cook in 2-minute increments until done.
- Rest Before Serving — Let the chicken thighs rest on a cutting board or wire rack for 5 minutes before serving. This allows the juices to redistribute, ensuring every bite is moist and flavorful.
- For a Crowd: Keep Warm in the Oven — If you’re cooking multiple batches, place the finished thighs on a wire rack set over a baking sheet and keep them warm in a 200°F oven. The wire rack prevents the skin from getting soggy. I’ve kept them like this for up to an hour, and they stayed perfectly crispy.
- Garnish and Serve — Just before serving, sprinkle with fresh parsley or cilantro and a pinch of flaky sea salt. Serve with lemon wedges on the side for squeezing. Watch them disappear!
Cooking Tips & Techniques
After making these chicken thighs more times than I can count, I’ve picked up a few tricks that make a real difference. Here are the ones I swear by:
Don’t Skip the Drying Step. I learned this the hard way. The first time I made these, I was in a hurry and skipped patting the chicken dry. The skin came out chewy and pale instead of crispy and golden. Moisture is the enemy of crispiness—period. Take the extra 30 seconds to really dry those thighs.
Use Bone-In, Skin-On Thighs. I know boneless, skinless thighs are convenient, but they just don’t get the same results. The bone keeps the meat juicy, and the skin is what makes this recipe special. If you only have boneless thighs, reduce the cooking time by about 5 minutes and expect less crispy skin.
Don’t Overcrowd the Basket. This is the most common mistake people make with air fryers. If the thighs are touching, they’ll steam instead of crisp. Cook in batches if you need to—it’s worth the extra time. Trust me, your guests will thank you.
Flip Carefully. When you flip the thighs after the first 12 minutes, be gentle. The skin is already starting to crisp, and you don’t want to tear it. Use tongs and lift from underneath, or use a thin spatula if you have one.
Let Them Rest. I know it’s tempting to serve immediately, especially when hungry guests are hovering. But resting for 5 minutes makes a huge difference. The juices settle, the skin stays crispy, and the meat stays tender. It’s a small wait for a big payoff.
My Biggest Failure: One time, I tried to speed things up by cooking at 425°F the whole time. The skin burned before the meat was done. Lesson learned—the two-temperature method is non-negotiable for perfect results.
Variations & Adaptations
This recipe is incredibly versatile. Here are some of my favorite ways to change it up:
Spicy Honey Garlic
After the chicken is cooked, whisk together 2 tablespoons honey, 1 tablespoon soy sauce, 1 teaspoon sriracha, and 2 minced garlic cloves. Brush the mixture over the hot thighs and return to the air fryer for 2 minutes at 375°F. The glaze caramelizes beautifully and adds a sweet-spicy kick that’s absolutely addictive.
Lemon Herb
Swap the smoked paprika for 2 teaspoons dried oregano and add the zest of 1 lemon to the dry rub. After cooking, squeeze fresh lemon juice over the thighs and sprinkle with fresh parsley. This version is bright, fresh, and perfect for summer gatherings.
BBQ Style
Skip the dry rub and instead toss the chicken with 1/4 cup of your favorite BBQ sauce mixed with 1 tablespoon olive oil. Cook as directed, then brush with additional BBQ sauce during the last 5 minutes of cooking. Serve with extra sauce on the side for dipping.
Dietary Adaptations
For a keto-friendly version, this recipe is already low-carb—just skip any honey-based glazes. For a dairy-free option, you’re all set. For a gluten-free version, double-check your spice blends, but most are naturally gluten-free.
Different Cooking Methods
If you don’t have an air fryer, bake the thighs on a wire rack over a baking sheet at 425°F for 35-40 minutes, flipping halfway through. The skin won’t be quite as crispy, but it’s still delicious. You can also grill them over medium-high heat for 6-8 minutes per side—just watch for flare-ups from the dripping fat.
Serving & Storage Suggestions
These chicken thighs are incredibly versatile when it comes to serving. Here’s how I like to present them for a crowd:
Serving Temperature: Serve the chicken thighs hot, straight from the air fryer or oven. The skin is at its crispiest within the first 15 minutes. If you’re serving buffet-style, keep them warm on a wire rack over a baking sheet in a 200°F oven—this keeps the skin crispy for up to an hour.
Presentation Tips: Arrange the thighs on a large platter, slightly overlapping, with the crispy skin facing up. Garnish with fresh herbs and lemon wedges for a pop of color. For a casual gathering, serve directly on a wooden cutting board for a rustic look. For a more formal dinner, plate individually with a drizzle of pan juices and a sprinkle of flaky salt.
What to Serve Alongside: These thighs pair beautifully with almost any side dish. My go-to combinations are:
- Simple green salad with lemon vinaigrette (the acidity cuts through the richness)
- Roasted vegetables like asparagus, broccoli, or Brussels sprouts
- Mashed potatoes or roasted sweet potatoes
- Rice pilaf or quinoa
- Coleslaw for a crunchy, tangy contrast
- Warm crusty bread to soak up any juices
Beverage Pairings: A crisp white wine like Sauvignon Blanc or a light red like Pinot Noir works beautifully. For beer drinkers, a cold lager or pilsner is perfect. For non-alcoholic options, try sparkling water with lemon or a fruity iced tea.
Storage Instructions: Leftover chicken thighs keep well in the refrigerator for up to 4 days. Store them in an airtight container. To reheat, place them back in the air fryer at 375°F for 3-4 minutes until heated through and the skin crisps up again. You can also reheat in a 375°F oven for 10 minutes. Avoid microwaving—it will make the skin soggy.
Freezing: Cooked chicken thighs freeze beautifully for up to 3 months. Let them cool completely, then wrap individually in plastic wrap and place in a freezer bag. To reheat, thaw in the refrigerator overnight, then reheat in the air fryer at 375°F for 5-6 minutes.
Flavor Development: These chicken thighs taste even better the next day. The seasoning melds with the meat, and the skin stays surprisingly crispy if reheated properly. I often make a double batch just for leftovers—they’re perfect for salads, sandwiches, or just snacking cold from the fridge.
Nutritional Information & Benefits
Here’s the approximate nutritional breakdown for one chicken thigh (based on 8 servings):
- Calories: 280-320
- Protein: 25-28g
- Fat: 18-22g (including healthy monounsaturated and polyunsaturated fats)
- Carbohydrates: 1-2g
- Fiber: 0g
- Sugar: 0g
- Sodium: 450-550mg (varies with salt amount)
Health Benefits: Chicken thighs are an excellent source of high-quality protein, which supports muscle repair and keeps you feeling full. They’re also rich in B vitamins (especially B6 and B12), which help with energy metabolism. The skin contains healthy fats, and the dark meat provides more iron and zinc than chicken breast. Plus, cooking with an air fryer significantly reduces the fat content compared to traditional frying—you get that crispy texture with much less oil.
Dietary Considerations: This recipe is naturally low-carb, keto-friendly, gluten-free, and dairy-free. It’s also Whole30-compliant if you use a compliant oil and skip any non-compliant seasonings. The main allergen to note is the chicken itself—obviously not suitable for vegetarians or vegans.
My Personal Take: I love that this recipe lets me serve something indulgent-tasting without the guilt of deep frying. It’s a win-win for hosting—your guests get that crave-worthy crispy chicken, and you get to feel good about what you’re serving. Plus, the protein keeps everyone satisfied without that heavy, sluggish feeling after a big meal.
Conclusion
Honestly, these crispy air fryer chicken thighs have become my secret weapon for every gathering. They’re the recipe I turn to when I need to feed a crowd without spending all day in the kitchen, and they never let me down. The combination of that impossibly crispy skin, the juicy meat, and the simple but bold seasoning is just unbeatable. I’ve made them for block parties, birthday dinners, game days, and casual weeknights, and every single time, people ask for the recipe.
What I love most about this recipe is how forgiving it is. You don’t need to be a professional chef to get perfect results. Just follow the steps, don’t skip the drying step, and let the air fryer do the hard work. Whether you’re hosting a big gathering or just feeding your family on a busy Tuesday, these chicken thighs deliver every time.
I’d love to hear how they turn out for you! Did you try any of the variations? Did you serve them with something unexpected? Drop a comment below and let me know—I read every single one. And if you loved this recipe, share it with a friend who needs a new go-to for hosting. Trust me, they’ll thank you later.
Happy cooking, and here’s to many more crispy, juicy, crowd-pleasing meals!
Frequently Asked Questions
Can I use boneless, skinless chicken thighs instead?
Yes, but the results won’t be as crispy. Boneless, skinless thighs cook faster (about 15-18 minutes total) and won’t develop that crackly skin. If you use them, reduce the cooking time and check the internal temperature early. They’re still tasty, just different.
How do I prevent the chicken skin from getting soggy when keeping it warm?
Place the cooked thighs on a wire rack set over a baking sheet, not directly on the pan. This allows air to circulate around the chicken, keeping the skin crispy. Keep them in a 200°F oven for up to an hour without losing quality.
Can I marinate the chicken overnight?
Absolutely! If you have time, marinate the chicken in the olive oil and seasoning for 2-8 hours in the refrigerator. Just pat the chicken dry again before cooking—the marinade can add moisture that prevents crisping. For best results, marinate, then pat dry, then proceed with the recipe.
My air fryer is small. Can I cook the thighs in batches?
Yes, and I recommend it! Overcrowding the basket is the biggest mistake people make. Cook in batches, keeping the finished thighs warm in a 200°F oven on a wire rack. The extra time is worth it for perfectly crispy results.
What’s the best way to reheat leftover chicken thighs?
The air fryer is your best friend here. Reheat at 375°F for 3-4 minutes until the skin crisps up and the meat is hot all the way through. You can also use a 375°F oven for 10 minutes. Avoid the microwave—it will make the skin soggy and the meat rubbery.
PrintBest Crispy Air Fryer Chicken Thighs for a Crowd (Easy!)

Perfectly crispy air fryer chicken thighs with juicy meat and bold seasoning, ready in under 40 minutes. Ideal for feeding a crowd with minimal effort.
- Prep Time: 10 minutes
- Cook Time: 22-24 minutes
- Total Time: 32-34 minutes
- Yield: 8 servings 1x
- Category: Main Course
- Cuisine: American
Ingredients
- 8 bone-in, skin-on chicken thighs (about 3 pounds total)
- 2 tablespoons olive oil
- 2 teaspoons garlic powder
- 2 teaspoons smoked paprika
- 1 teaspoon onion powder
- 1 teaspoon dried thyme
- 1 teaspoon fine sea salt
- 1/2 teaspoon black pepper
- 1/4 teaspoon cayenne pepper
- Fresh parsley or cilantro, chopped (for serving)
- Lemon wedges (for serving)
- Flaky sea salt (for serving)
Instructions
- Pat the chicken thighs dry with paper towels to remove as much moisture as possible.
- Preheat the air fryer to 400°F for 3-5 minutes.
- In a small bowl, mix garlic powder, smoked paprika, onion powder, dried thyme, salt, black pepper, and cayenne pepper.
- Place dried chicken thighs in a large bowl, drizzle with olive oil, and toss to coat. Sprinkle seasoning mixture over chicken and toss until evenly coated.
- Arrange seasoned thighs in the air fryer basket in a single layer, skin side down, without touching.
- Cook at 400°F for 12 minutes.
- Flip the chicken thighs carefully using tongs. Reduce temperature to 375°F and cook for another 10-12 minutes.
- Check internal temperature with an instant-read thermometer; it should reach 175-185°F at the thickest part.
- Let chicken thighs rest on a cutting board or wire rack for 5 minutes before serving.
- For multiple batches, keep finished thighs warm on a wire rack over a baking sheet in a 200°F oven.
- Garnish with fresh herbs, flaky sea salt, and lemon wedges before serving.
Notes
Pat chicken dry thoroughly for crispy skin. Do not overcrowd the air fryer basket. Use bone-in, skin-on thighs for best results. The two-temperature method (400°F then 375°F) ensures crispy skin without burning. Leftovers can be reheated in the air fryer at 375°F for 3-4 minutes.
Nutrition
- Serving Size: 1 chicken thigh
- Calories: 300
- Sodium: 500
- Fat: 20
- Saturated Fat: 5
- Carbohydrates: 1
- Protein: 26
Keywords: air fryer chicken thighs, crispy chicken thighs, chicken thighs for a crowd, easy chicken recipe, air fryer recipe, party food, gluten-free chicken, keto chicken


