“This is the best thing you’ve ever made.” My brother said it with a mouthful of warm apple crisp, crumbs falling onto his plate, and honestly, I didn’t even care about the mess. It was the first cool weekend of October, the kind where the air smells like damp leaves and you start craving something baked, something with butter and cinnamon. I had pulled a bag of Honeycrisp apples from the fridge, grabbed some oats from the back of the pantry, and just started throwing things together. No recipe. No plan. Just a feeling that a classic apple crisp was exactly what we needed. And that moment—that messy, buttery, golden-brown bite—is why this recipe has become my go-to for every single fall gathering since.
There’s something about a classic apple crisp with buttery oat crumble topping that just feels like a hug in a dish. It’s not fussy or complicated, and it doesn’t require a pastry blender or a rolling pin. You don’t have to worry about a crust getting soggy or a lattice top falling apart. It’s just tender, cinnamon-spiced apples under a blanket of crunchy, buttery oats. It’s the dessert you make when you want to impress people without actually trying that hard. And honestly, that’s my favorite kind of recipe to share.
Why You’ll Love This Classic Apple Crisp
This isn’t just another apple crisp recipe. I’ve tested this one about six times to get the topping-to-apple ratio exactly right. You know how some crisps have a sad, thin layer of crumble? Not here. This one has a thick, generous blanket of buttery oat topping that gets perfectly golden and crunchy. The apples underneath turn soft and jammy, but they don’t turn into complete mush. It’s the kind of texture that makes you go back for seconds—and maybe thirds.
- Quick & Easy : From start to oven in about 15 minutes. No complicated steps, no special equipment.
- Simple Ingredients : You probably have most of these in your pantry right now. Oats, flour, butter, sugar, cinnamon—the basics.
- Perfect for Fall : This is the ultimate dessert for Thanksgiving, potlucks, or a cozy Sunday night at home.
- Crowd-Pleaser : I’ve served this to kids, grandparents, and picky eaters. It disappears every single time.
- Unbelievably Delicious : The combination of tender, spiced apples and a crunchy, buttery topping is pure comfort food magic.
What makes this version different is the method. I don’t pre-cook the apples, which keeps them from turning into applesauce. And I use melted butter in the topping instead of cold, cubed butter. It sounds weird, but it creates these gorgeous, clumpy oat clusters that get incredibly crispy. It’s not just another apple crisp—it’s the one you’ll keep coming back to.
What Ingredients You Will Need
This recipe uses simple, honest ingredients that work together to create something truly special. No fancy extracts or hard-to-find spices. Just real, comforting flavors.
For the Apple Filling
- Apples – 6 medium apples (about 2 ½ pounds), peeled, cored, and sliced into ¼-inch thick pieces. I prefer a mix of Granny Smith and Honeycrisp for the perfect balance of tart and sweet. The Granny Smiths hold their shape well, while the Honeycrisps break down slightly to create a natural syrup.
- Granulated Sugar – ¼ cup (50g). Just enough to sweeten the apples without making them overly sugary.
- Light Brown Sugar – 2 tablespoons (25g), packed. Adds a subtle molasses depth that pairs beautifully with the cinnamon.
- All-Purpose Flour – 2 tablespoons (16g). This helps thicken the juices released by the apples as they bake, preventing a watery filling.
- Ground Cinnamon – 1 ½ teaspoons. The heart of the spice blend. Use a good quality cinnamon for the best flavor.
- Lemon Juice – 1 tablespoon (15ml). Freshly squeezed is best. It brightens the apples and prevents them from browning.
- Vanilla Extract – 1 teaspoon. Pure vanilla, not imitation. It rounds out all the flavors beautifully.
For the Buttery Oat Crumble Topping
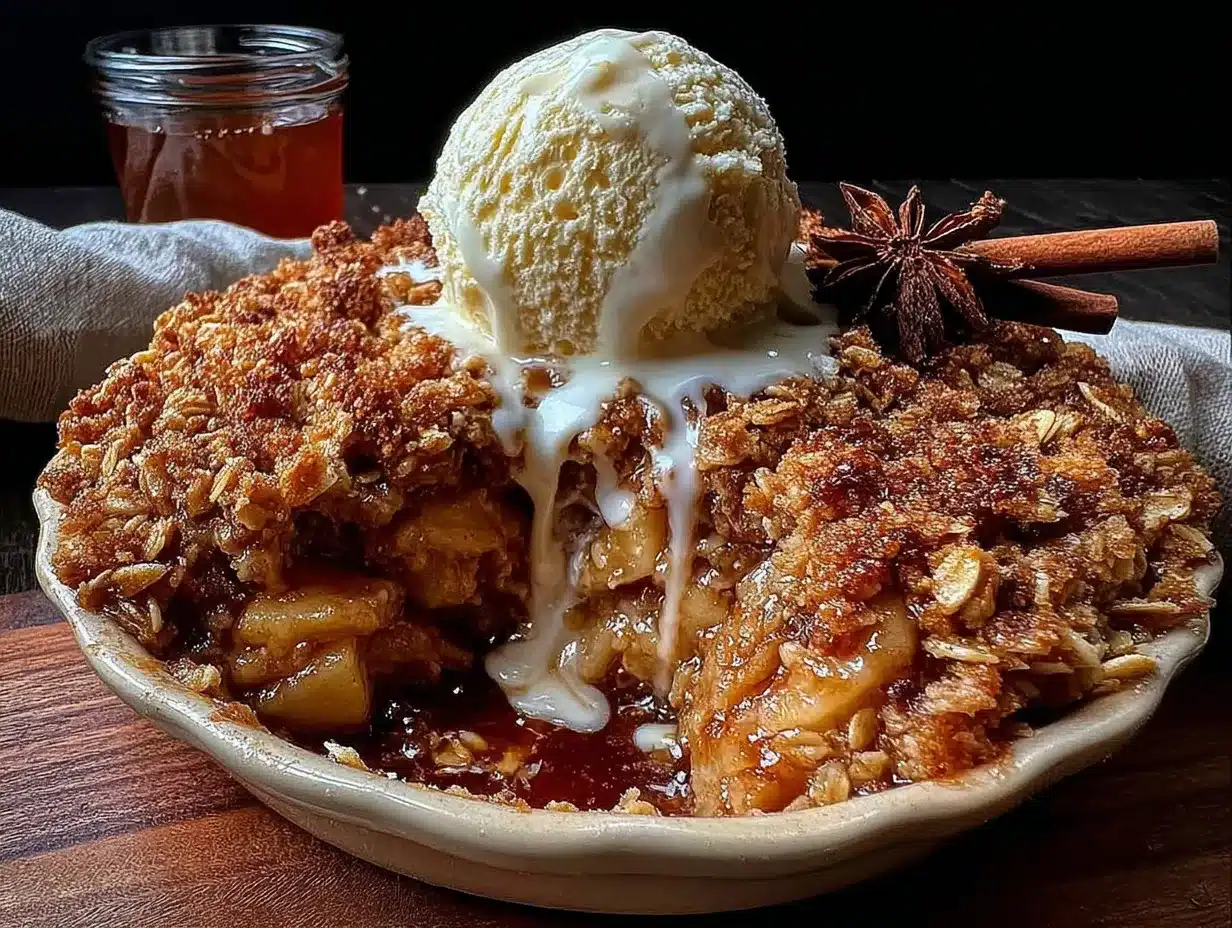
- Old-Fashioned Rolled Oats – 1 cup (90g). Do not use quick oats here. Old-fashioned oats give the topping that wonderful, hearty texture and stay crunchy longer.
- All-Purpose Flour – ¾ cup (95g). The structure of the crumble.
- Light Brown Sugar – ½ cup (100g), packed. For sweetness and that deep, caramel-like flavor.
- Granulated Sugar – ¼ cup (50g). Adds a bit of extra sweetness and helps with browning.
- Ground Cinnamon – 1 teaspoon.
- Salt – ¼ teaspoon. Don’t skip this. It balances the sweetness and makes the butter flavor pop.
- Unsalted Butter – ½ cup (1 stick, 113g), melted. This is the key to those perfect, clumpy oat clusters. I use Land O’Lakes unsalted butter for consistent results.
Equipment Needed
You don’t need a fancy kitchen to make this classic apple crisp. I’ve made it in a rented cabin with a rusty peeler and a Pyrex dish, and it still came out perfect.
- 8×8-inch Baking Dish – A 2-quart square dish works perfectly. You can also use a 9-inch pie plate or a similar-sized cast iron skillet for a rustic look.
- Large Mixing Bowls – One for the apples, one for the topping.
- Vegetable Peeler – A standard Y-peeler makes quick work of apple skins.
- Sharp Knife and Cutting Board – For slicing the apples.
- Measuring Cups and Spoons – For accurate measurements.
- Wooden Spoon or Spatula – For mixing.
- Cooling Rack – Essential for letting the crisp set after baking so it doesn’t turn into a soupy mess.
If you don’t have an 8×8 dish, you can use a 9×9 or even a small cast iron skillet. Just keep an eye on the baking time—a wider dish will cook a bit faster. And honestly, I prefer baking this in a glass dish because I can see the apple juices bubbling up around the edges, which is my cue that it’s ready.
Preparation Method
Alright, let’s get to it. This is the part where your kitchen starts smelling like heaven.
- Preheat your oven to 350°F (175°C). Position a rack in the center of the oven. While it’s heating up, grease your 8×8 baking dish with a little butter or non-stick spray.
- Prepare the apples. Peel, core, and slice your apples into ¼-inch thick pieces. Don’t stress about making them perfectly even, but try to keep them roughly the same size so they cook evenly. I like to slice them directly into the baking dish to save on dishes—just make sure the dish is greased first.
- Make the apple filling. In a large bowl (or right in the baking dish if you’re feeling brave), toss the sliced apples with the granulated sugar, brown sugar, flour, cinnamon, lemon juice, and vanilla extract. Use your hands or a spatula to make sure every apple slice is coated. Let it sit for about 5 minutes while you make the topping. This gives the apples time to start releasing their juices.
- Make the buttery oat crumble topping. In a separate medium bowl, whisk together the rolled oats, flour, brown sugar, granulated sugar, cinnamon, and salt. Pour the melted butter over the dry ingredients and stir with a fork until everything is moistened. You’ll see it start to form clumps—that’s exactly what you want. Don’t overmix it or you’ll end up with a paste.
- Assemble the crisp. Spread the apples into an even layer in your baking dish. Sprinkle the oat topping evenly over the apples. Don’t press it down! Leave it loose and clumpy so it can get crispy. Some apples will peek through, and that’s totally fine.
- Bake. Place the dish on a baking sheet to catch any bubbly juices. Bake for 40-45 minutes, or until the topping is deep golden brown and the apple filling is bubbling up around the edges. If the topping is browning too quickly around the 30-minute mark, tent the dish loosely with foil.
- Cool. This is the hardest part. Let the crisp cool on a wire rack for at least 15-20 minutes before serving. The filling needs this time to set up, or it will be runny. Trust me, I’ve learned this the hard way.
- Serve. Scoop it into bowls while it’s still warm. Top with a scoop of vanilla ice cream or a drizzle of heavy cream. The contrast between the hot, tender apples and the cold, creamy ice cream is absolutely perfect.
Cooking Tips & Techniques
I’ve made this classic apple crisp more times than I can count, and I’ve definitely made my share of mistakes. Here’s what I’ve learned so you don’t have to repeat them.
Don’t skip the lemon juice. I know it seems like a small thing, but it does two important jobs. First, it keeps the apples from turning brown while they bake. Second, it brightens the flavor and keeps the filling from tasting one-dimensionally sweet. It’s the same trick I use in my easy apple fritter bread.
Use old-fashioned oats, not quick oats. Quick oats will turn into a soft, paste-like topping that lacks texture. Old-fashioned oats hold their shape and give you that satisfying crunch. It’s a small swap that makes a huge difference.
Let the apples sit. After you toss them with the sugar and flour, let them sit for 5-10 minutes. This draws out some of their natural juices, which then thicken with the flour during baking to create a lovely, syrupy filling.
Watch the topping. Every oven runs a little differently. If your topping is getting dark before the apples are tender, loosely cover the dish with foil for the last 10-15 minutes of baking. This keeps the topping from burning while the apples finish cooking.
Don’t skip the cooling time. I know it’s tempting to dig in right away, but the filling needs time to set. If you serve it too soon, you’ll end up with a soupy mess. Give it at least 15-20 minutes on a cooling rack. Your patience will be rewarded.
Variations & Adaptations
One of the best things about a classic apple crisp is how easy it is to tweak. Here are some of my favorite ways to change it up.
Gluten-Free Option : Swap the all-purpose flour for a 1:1 gluten-free baking flour blend. Bob’s Red Mill works great. The topping will be a little less crunchy, but still delicious.
Vegan Version : Use melted coconut oil or vegan butter in place of the butter. The topping won’t get quite as crispy, but it’s still really good. Serve with a dairy-free vanilla ice cream.
Add Some Warmth : Add ¼ teaspoon of ground nutmeg and ⅛ teaspoon of ground cloves to the apple mixture. It gives the crisp a more complex, holiday-style flavor. I love this combination when I’m making it for Thanksgiving.
Mix in Some Berries : Toss a handful of fresh or frozen cranberries into the apple mixture before baking. The tartness of the cranberries is a fantastic contrast to the sweet, buttery topping. It’s like a cross between apple crisp and cranberry sauce.
Make it a Skillet Crisp : Cook the apple filling in a 10-inch cast iron skillet over medium heat for about 5 minutes to soften them slightly, then top with the crumble and bake. The skillet gives the edges a beautiful caramelized crust.
I once tried a version with pears instead of apples when I had a bag of ripe Bosc pears sitting on the counter. It was incredible. If you’re feeling adventurous, go for it.
Serving & Storage Suggestions
This crisp is best served warm, straight from the oven, with a generous scoop of vanilla bean ice cream. The way the ice cream melts into the warm apple filling is pure magic. If you’re feeling extra indulgent, drizzle a little caramel sauce over the top.
For a cozy fall brunch, serve it alongside a warm spiced pumpkin apple cider mocktail. The flavors are perfectly complementary, and it makes the whole meal feel special.
To Store : Cover the baking dish tightly with foil or plastic wrap and store in the refrigerator for up to 4 days. The topping will lose some of its crunch over time, but the flavor will still be wonderful.
To Reheat : Spoon individual portions into a small oven-safe dish and warm in a 350°F oven for about 10 minutes. You can also use the microwave in 30-second bursts, but the topping won’t be as crispy. For best results, reheat in the oven.
To Freeze : Assemble the crisp completely but do not bake it. Wrap the dish tightly in a layer of plastic wrap, then a layer of foil. Freeze for up to 3 months. To bake from frozen, add about 15-20 minutes to the baking time and cover with foil for the first half of baking.
Honestly, I think this crisp tastes even better the next day. The flavors have time to meld together, and the apple filling gets even more syrupy and delicious.
Nutritional Information & Benefits
Let’s be real—this is a dessert, and it’s meant to be enjoyed. But it does have some redeeming qualities. Apples are a great source of fiber and vitamin C, and oats are packed with soluble fiber that’s great for heart health. The butter and sugar are there for flavor, and that’s okay.
Here’s the estimated nutritional information per serving (based on 8 servings):
| Nutrient | Amount |
|---|---|
| Calories | ~385 |
| Fat | 14g |
| Saturated Fat | 8g |
| Carbohydrates | 64g |
| Fiber | 4g |
| Sugar | 42g |
| Protein | 3g |
Dietary Note : This recipe contains gluten and dairy. For a gluten-free option, use a 1:1 gluten-free flour blend. For a dairy-free option, use melted coconut oil or vegan butter.
I believe in balance. A slice of this apple crisp with a scoop of ice cream is a beautiful thing, and it’s part of a happy, healthy life.
Conclusion
This classic apple crisp with buttery oat crumble topping is the kind of recipe that becomes a tradition. It’s simple enough for a random Tuesday night, but impressive enough to bring to a holiday dinner. The apples get tender and jammy, the topping gets perfectly crunchy, and the whole thing comes together in under an hour. It’s comfort food at its finest.
I’d love to hear how yours turns out. Did you add any twists? Serve it with something unexpected? Leave a comment below and let me know. And if you’re looking for another cozy fall dessert, try my brown butter peach cobbler—it follows the same easy, no-fuss philosophy. Happy baking, friend!
Frequently Asked Questions
Can I use quick oats instead of old-fashioned oats?
I don’t recommend it. Quick oats will absorb too much moisture and turn into a soft, pasty topping. Old-fashioned oats give you that wonderful, hearty crunch that makes a crisp so satisfying.
Do I need to peel the apples?
Yes, for the best texture. The peels can become tough and chewy during baking, and they won’t break down like the apple flesh does. A vegetable peeler makes quick work of it.
Can I make this ahead of time?
Absolutely. You can assemble the crisp completely (without baking), cover it, and refrigerate it for up to 24 hours. When you’re ready to bake, add about 5-10 minutes to the baking time. You can also bake it fully and reheat it the next day.
Why is my apple crisp watery?
This usually happens for two reasons. Either you didn’t let the crisp cool long enough after baking, or you used apples that release a lot of juice (like McIntosh). Letting it cool for at least 20 minutes on a wire rack helps the filling set up properly.
Can I freeze apple crisp?
Yes! You can freeze it either baked or unbaked. For unbaked, assemble the crisp, wrap it tightly in plastic wrap and foil, and freeze for up to 3 months. Bake from frozen, adding about 15-20 minutes to the baking time. For baked crisp, let it cool completely, then wrap and freeze. Reheat in the oven for best results.
Pin This Recipe!
Easy Homemade Classic Apple Crisp with Oat Topping

This classic apple crisp features tender, cinnamon-spiced apples under a thick, buttery oat crumble topping. It’s quick, easy, and perfect for fall gatherings.
- Prep Time: 15 minutes
- Cook Time: 45 minutes
- Total Time: 1 hour
- Yield: 8 servings 1x
- Category: Dessert
- Cuisine: American
Ingredients
- 6 medium apples (about 2 ½ pounds), peeled, cored, and sliced into ¼-inch thick pieces (mix of Granny Smith and Honeycrisp)
- ¼ cup (50g) granulated sugar
- 2 tablespoons (25g) light brown sugar, packed
- 2 tablespoons (16g) all-purpose flour
- 1 ½ teaspoons ground cinnamon
- 1 tablespoon (15ml) lemon juice
- 1 teaspoon vanilla extract
- 1 cup (90g) old-fashioned rolled oats
- ¾ cup (95g) all-purpose flour
- ½ cup (100g) light brown sugar, packed
- ¼ cup (50g) granulated sugar
- 1 teaspoon ground cinnamon
- ¼ teaspoon salt
- ½ cup (1 stick, 113g) unsalted butter, melted
Instructions
- Preheat your oven to 350°F (175°C). Position a rack in the center of the oven. Grease an 8×8-inch baking dish with butter or non-stick spray.
- Peel, core, and slice the apples into ¼-inch thick pieces. Try to keep them roughly the same size for even cooking.
- In a large bowl, toss the sliced apples with granulated sugar, brown sugar, flour, cinnamon, lemon juice, and vanilla extract until every slice is coated. Let sit for 5 minutes.
- In a separate medium bowl, whisk together the rolled oats, flour, brown sugar, granulated sugar, cinnamon, and salt. Pour the melted butter over the dry ingredients and stir with a fork until moistened and clumpy. Do not overmix.
- Spread the apples into an even layer in the prepared baking dish. Sprinkle the oat topping evenly over the apples. Do not press it down.
- Place the dish on a baking sheet to catch any bubbly juices. Bake for 40-45 minutes, or until the topping is deep golden brown and the apple filling is bubbling around the edges. If the topping browns too quickly, tent loosely with foil after 30 minutes.
- Let the crisp cool on a wire rack for at least 15-20 minutes before serving to allow the filling to set.
- Serve warm, topped with vanilla ice cream or a drizzle of heavy cream.
Notes
For best results, use old-fashioned oats, not quick oats. Let the apples sit after tossing with sugar and flour to draw out juices. Do not skip the cooling time to prevent a watery filling. For a gluten-free option, use a 1:1 gluten-free flour blend. For a vegan version, use melted coconut oil or vegan butter.
Nutrition
- Serving Size: 1 serving
- Calories: 385
- Sugar: 42
- Sodium: 95
- Fat: 14
- Saturated Fat: 8
- Carbohydrates: 64
- Fiber: 4
- Protein: 3
Keywords: apple crisp, oat topping, fall dessert, easy apple crisp, classic apple crisp


