The pumpkin puree was already open in the fridge from the batch of cozy pumpkin cream cheese swirl muffins I made two days ago, and there were three spotty bananas sitting on the counter looking at me with what I can only describe as gentle desperation. You know that moment when you open the pantry and realize you have half a bag of flour, a whisper of brown sugar, and absolutely no desire to wash more than one bowl?
That was my Tuesday afternoon.
I stared at the bananas. I stared at the pumpkin. And somewhere between the third cup of coffee and the realization that I had a meeting in forty-five minutes, this Easy One-Bowl Pumpkin Banana Bread was born. It wasn’t planned. It wasn’t fancy. It was the kind of recipe that comes together when you need something warm and comforting but don’t have the energy for a production.
The first loaf came out so tender and fragrant that I actually burned my tongue trying to sneak a slice before it cooled. The pumpkin keeps it ridiculously moist, the banana adds natural sweetness, and the whole thing comes together in one bowl with a wooden spoon. No stand mixer. No sifting. No drama.
It’s the kind of bread that makes your kitchen smell like fall even if it’s technically still August outside. And honestly? That’s exactly what I needed.
Why You’ll Love This Recipe
I’ve tested this recipe six times to get it just right. Not because it’s complicated, but because I wanted it to be foolproof for those days when you just need a win in the kitchen. Here’s why this one sticks:
- One Bowl, No Fuss: Everything mixes in a single bowl with a spoon. No separating wet and dry ingredients, no stand mixer required. Less dishes means more time enjoying that first warm slice.
- Pantry-Friendly Ingredients: You probably have most of these already. Canned pumpkin puree, overripe bananas, basic baking staples. No special trips to the store for buttermilk or sour cream.
- Perfectly Moist Every Time: The combination of pumpkin and banana creates a texture that’s almost pudding-like in its tenderness. It stays moist for days, which honestly never happens with banana bread.
- Fall Flavor Without the Work: Warm pumpkin pie spice mingles with sweet banana in a way that feels cozy without being overwhelming. It’s like autumn in a loaf pan.
- Freezes Beautifully: Make two loaves. Eat one now, freeze one for later. It thaws like a dream and tastes just as fresh.
What makes this different from every other pumpkin banana bread recipe out there? The method. By mixing the wet ingredients first and adding the dry ingredients gradually, you avoid overmixing, which is the number one reason quick breads turn out tough. Plus, the brown sugar to white sugar ratio is specifically calibrated to complement the pumpkin without overpowering the banana.
This is the kind of bread that makes you close your eyes after the first bite. It’s comfort food reimagined—simpler, faster, but with the same soul-soothing satisfaction. Perfect for impressing brunch guests without breaking a sweat, or turning a regular Wednesday morning into something worth waking up for.
What Ingredients You Will Need
This recipe uses simple, wholesome ingredients that work together to create something greater than the sum of their parts. Most of these are pantry staples, which is exactly what makes this recipe so reliable.
- All-Purpose Flour: 1¾ cups. This gives the bread structure without making it heavy. I’ve tested this with unbleached all-purpose flour and it works beautifully. For a whole wheat option, swap half the flour for white whole wheat, but expect a denser crumb.
- Baking Soda: 1 teaspoon. This is your leavening agent. Make sure it’s fresh—test it by dropping a pinch into vinegar; if it fizzes vigorously, you’re good.
- Pumpkin Pie Spice: 1½ teaspoons. I use store-bought for convenience, but you can make your own with cinnamon, nutmeg, ginger, and cloves. The spice level here is warm but not aggressive.
- Cinnamon: 1 teaspoon. Because you can never have too much cinnamon. It pairs beautifully with both the pumpkin and the banana.
- Salt: ½ teaspoon. Don’t skip this. Salt enhances all the other flavors and balances the sweetness.
- Unsalted Butter: ½ cup, melted and slightly cooled. I use salted butter in a pinch and just reduce the added salt to ¼ teaspoon. Melted butter gives a tender crumb that creamed butter can’t quite match.
- Brown Sugar: ¾ cup, packed. Light or dark brown sugar both work. Dark brown sugar will give a deeper, almost molasses-like flavor that’s lovely with the pumpkin.
- Granulated Sugar: ¼ cup. Just enough to add sweetness without making it cloying. The banana and pumpkin bring natural sweetness too.
- Eggs: 2 large, at room temperature. Room temperature eggs incorporate more evenly into the batter. If you forget to take them out ahead of time, place them in a bowl of warm water for five minutes.
- Pumpkin Puree: 1 cup. Not pumpkin pie filling—make sure you grab 100% pure pumpkin puree. I prefer Libby’s for its consistent texture, but store brands work fine too.
- Mashed Banana: 1 cup, about 2-3 very ripe bananas. The riper, the better. Those spotty, almost-black bananas that nobody wants to eat are perfect here. They mash easier and add more sweetness.
- Vanilla Extract: 1 teaspoon. Pure vanilla extract makes a difference, but imitation vanilla works in a pinch. Add a tiny bit extra if you’re using imitation.
- Optional Mix-Ins: ½ cup chocolate chips, chopped walnuts, or pecans. I’m partial to semi-sweet chocolate chips because the bitterness plays off the sweet pumpkin and banana beautifully.
Equipment Needed
One of the best things about this recipe is how little equipment it requires. You don’t need a fancy kitchen to make this work.
- Large Mixing Bowl: Any large bowl will do. I use a ceramic one because it’s heavy and doesn’t slide around, but glass or stainless steel works just fine.
- Wooden Spoon or Rubber Spatula: A wooden spoon is my go-to for quick breads. It’s sturdy enough to handle thick batter and gentle enough not to overmix. A silicone spatula works too, especially for scraping the sides.
- 9×5 Inch Loaf Pan: This is the standard size. If you use an 8×4 inch pan, your bread will be taller and可能需要增加 baking time by 5-10 minutes. If you use a 10×5 inch pan, it will be shorter and bake faster.
- Parchment Paper: Not strictly necessary, but it makes lifting the finished bread out of the pan so much easier. I leave an overhang on two sides for handles.
- Cooling Rack: A wire rack allows air to circulate around the bread as it cools, preventing the bottom from getting soggy. If you don’t have one, you can use the inverted loaf pan to create a makeshift rack.
- Measuring Cups and Spoons: For accuracy. I cannot stress this enough—baking is science, and guessing measurements leads to sad bread.
I’ve made this in a pinch using a metal loaf pan from the dollar store and it turned out just fine. Don’t let equipment hold you back.
Preparation Method
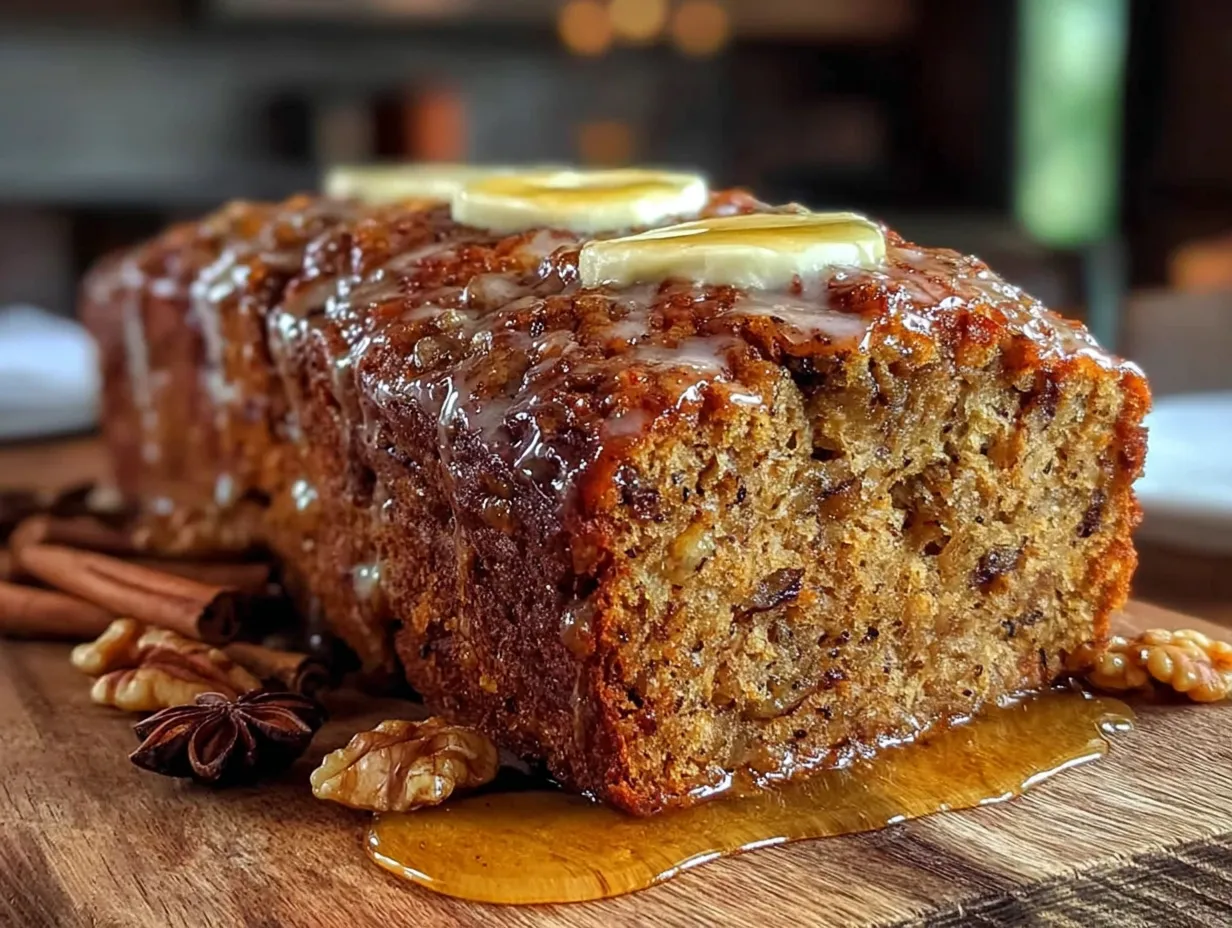
Preheat your oven to 350°F (175°C). Line your 9×5 inch loaf pan with parchment paper, leaving an overhang on the long sides. Lightly grease the exposed ends with butter or non-stick spray.
Step 1: Mix the Wet Ingredients
In your large mixing bowl, add the melted butter, brown sugar, and granulated sugar. Stir them together with your wooden spoon until they’re well combined and look like wet sand. Add the eggs one at a time, stirring after each addition until incorporated. Don’t rush this—each egg should be fully mixed in before you add the next.
Add the pumpkin puree, mashed banana, and vanilla extract. Stir until everything is combined. The mixture will look a little lumpy from the banana, and that’s perfectly fine. In fact, small lumps of banana are a good thing—they’ll create little pockets of sweetness throughout the bread.
Step 2: Add the Dry Ingredients
Sprinkle the flour, baking soda, pumpkin pie spice, cinnamon, and salt over the wet mixture. Stir gently, using a folding motion, until just combined. You want to see no more streaks of flour, but a few lumps are okay. Overmixing at this stage develops gluten, which will make your bread tough and rubbery.
If you’re adding chocolate chips or nuts, fold them in now with about three or four gentle stirs. The batter will be thick and slightly sticky—that’s exactly what you want.
Step 3: Transfer to Pan
Pour the batter into your prepared loaf pan and spread it evenly with your spatula. Give the pan a gentle tap on the counter to release any air bubbles trapped in the batter. The batter should come about two-thirds of the way up the sides of the pan.
Step 4: Bake
Place the pan in the center of the preheated oven and bake for 50-60 minutes. The bread is done when a toothpick inserted into the center comes out clean or with a few moist crumbs attached. If the top is browning too quickly (around the 40-minute mark), tent the pan loosely with aluminum foil.
Your kitchen will start smelling like the world’s coziest bakery around the 30-minute mark. Enjoy it.
Step 5: Cool
Let the bread cool in the pan on a wire rack for 15 minutes. Then use the parchment paper overhang to lift the bread out of the pan and transfer it to the rack to cool completely. This is the hardest part—waiting. But slicing into warm bread too early will cause it to crumble and fall apart. Trust me, I’ve learned this the hard way.
For the cleanest slices, let the bread cool completely, at least 2 hours. If you can’t wait that long, I understand. Just know that your slices will be a little messy, and they’ll still taste incredible.
Cooking Tips & Techniques
After six rounds of testing, I’ve gathered some insights that will help you nail this bread every single time.
Don’t Overmix: This is the golden rule of quick breads. Mix until the flour just disappears into the batter. A few streaks of flour are better than a tough, dense loaf. I speak from experience—my first test batch was overmixed and came out more like a brick than bread.
Check Your Oven Temperature: Ovens lie. I’ve had ovens that run 25 degrees hot and others that run 25 degrees cold. An inexpensive oven thermometer will save you from underbaked or overbaked bread. If your bread is browning too fast on the outside but still raw in the middle, your oven is probably running hot.
Room Temperature Ingredients Matter: Cold eggs and cold butter don’t incorporate as smoothly into the batter. Room temperature ingredients create a more uniform emulsion, which leads to a more tender crumb. Set your eggs and butter out 30 minutes before you start baking.
The Toothpick Test: Insert a toothpick into the center of the bread. If it comes out clean, it’s done. If it comes out with wet batter, it needs more time. If it comes out with a few moist crumbs, it’s perfect—take it out immediately to avoid overbaking.
Let It Cool: I know it’s tempting to cut into warm bread, but cooling allows the structure to set. Cutting too early will give you gummy, crumbly slices. If you absolutely must have warm bread (and I get it), microwave a slice for 10 seconds after it’s fully cooled.
Toast It: Day-old slices of this bread are arguably better than fresh. Toast a slice and spread it with salted butter. The edges get crispy while the inside stays soft. It’s a revelation.
Variations & Adaptations
This recipe is incredibly forgiving and adaptable. Here are some variations I’ve tried and loved:
Chocolate Chip Pumpkin Banana Bread: Fold in ½ cup of semi-sweet chocolate chips. The bitterness of the chocolate balances the sweetness of the banana and pumpkin beautifully. I’ve also tried dark chocolate chips and white chocolate chips, and both work well.
Nutty Pumpkin Banana Bread: Add ½ cup of toasted walnuts or pecans. Toasting the nuts first brings out their oils and adds a deeper flavor. Just spread them on a baking sheet and toast at 350°F for 5-7 minutes before adding to the batter.
Gluten-Free Version: Substitute the all-purpose flour with a 1:1 gluten-free baking flour blend. I’ve tested this with Bob’s Red Mill 1:1 Baking Flour and it worked perfectly. The texture is slightly more delicate, so let it cool completely before slicing.
Dairy-Free Version: Use melted coconut oil or a neutral vegetable oil instead of butter. The flavor will be slightly different, but the texture remains moist and tender. I’ve also used vegan butter sticks with good results.
Spice It Up: Add ¼ teaspoon of ground ginger or cardamom for an extra layer of warmth. I made a version with a pinch of cayenne pepper once, and it was surprisingly good—the heat was subtle but present.
Streusel Topping: Mix ¼ cup flour, ¼ cup brown sugar, 2 tablespoons melted butter, and ½ teaspoon cinnamon. Sprinkle over the batter before baking for a crunchy, sweet crust. It’s a game-changer.
If you love quick bread variations, you should also try my moist one-bowl brown butter banana bread with walnuts for another take on classic banana bread.
Serving & Storage Suggestions
This bread is versatile enough for breakfast, brunch, dessert, or a midnight snack. Here’s how to make the most of it.
Serving: Serve at room temperature or slightly warm. A slice with a pat of salted butter is classic and perfect. For something extra, spread with cream cheese frosting or a drizzle of honey. It’s also fantastic alongside a cup of coffee or a creamy iced pumpkin chai latte with easy brown sugar cold foam for the ultimate fall pairing.
Storage: Wrap the cooled bread tightly in plastic wrap or aluminum foil and store at room temperature for up to 4 days. The moisture from the pumpkin and banana actually helps it stay fresh longer than traditional banana bread. If your kitchen is particularly warm, you can store it in the refrigerator, but bring slices to room temperature before serving for the best texture.
Freezing: This bread freezes beautifully. Wrap the cooled loaf tightly in plastic wrap, then in aluminum foil, and place in a freezer-safe bag. It will keep for up to 3 months. To thaw, leave it at room temperature for several hours or overnight in the refrigerator. You can also freeze individual slices for quick breakfasts—just grab a slice, toast it, and go.
Reheating: For that just-baked experience, warm slices in a 350°F oven for 5-7 minutes or in the toaster for 2-3 minutes. The microwave works in a pinch (20 seconds), but the texture won’t be as nice.
Flavor Development: Here’s a secret—this bread actually tastes better on day two. The flavors have time to meld and deepen. So if you can resist eating it all on day one, you’re in for a treat on day two.
Nutritional Information & Benefits
While this is definitely a treat, it does have some redeeming qualities worth noting.
Estimated Nutritional Values (per slice, based on 10 slices):
- Calories: 285
- Total Fat: 11g
- Saturated Fat: 6g
- Carbohydrates: 43g
- Fiber: 2g
- Sugar: 24g
- Protein: 4g
Health Benefits: Pumpkin is packed with vitamin A, which supports eye health and immune function. Bananas provide potassium, which is essential for heart health and muscle function. The fiber content, while modest, comes from real whole food ingredients rather than processed additives.
Dietary Considerations: This recipe is vegetarian and can be made dairy-free and gluten-free with the substitutions mentioned above. It’s not low-carb or keto-friendly, but it is a more wholesome option than many bakery-style quick breads that rely on excessive oil and sugar.
Allergens: Contains wheat (gluten), dairy (butter), and eggs. If you’re adding nuts, those are allergens too. Always check your ingredient labels if cooking for someone with allergies.
I’m not a nutritionist, but I do believe in balance. This bread has real ingredients, real flavor, and real comfort. Sometimes that’s exactly what you need.
Conclusion
This Easy One-Bowl Pumpkin Banana Bread is the kind of recipe that becomes a staple. It’s simple enough for a Tuesday afternoon, impressive enough for a holiday brunch, and forgiving enough for beginner bakers. The combination of pumpkin and banana creates something that’s more than the sum of its parts—it’s moist, flavorful, and deeply comforting.
What I love most about this recipe is how adaptable it is. You can dress it up with chocolate chips and streusel, keep it simple with just the basic ingredients, or experiment with different spice combinations. It’s a canvas for your creativity, and it almost always turns out beautifully.
I’d love to hear how this recipe turns out for you. Did you add chocolate chips? Try it with walnuts? Make it gluten-free? Drop a comment below and share your version. And if you’re looking for more cozy fall recipes, check out my brown butter pumpkin chocolate chip cookies with sea salt for another seasonal favorite.
Happy baking, friends. May your kitchen smell like fall and your loaf pan never stick.
Frequently Asked Questions
Can I use frozen bananas?
Yes, absolutely. Thaw them completely and drain off any excess liquid before mashing. Frozen bananas actually break down more easily and can add even more moisture to the bread.
Can I make this into muffins instead of a loaf?
Definitely. Grease a 12-cup muffin tin and fill each cup about ¾ full. Bake at 350°F for 18-22 minutes, or until a toothpick inserted in the center comes out clean. You’ll get about 12-14 muffins.
Why did my bread sink in the middle?
This usually happens when the bread is underbaked or when the oven temperature is too low. Make sure your oven is properly preheated and use the toothpick test to check for doneness. Opening the oven door too early can also cause sinking.
Can I reduce the sugar?
You can reduce the granulated sugar to 2 tablespoons, but I wouldn’t reduce the brown sugar—it contributes to both sweetness and moisture. The bread will be less sweet, but still flavorful thanks to the banana and pumpkin.
How do I know when my bananas are ripe enough?
Look for bananas with lots of brown spots or even completely black skins. They should be soft to the touch and smell sweet. If your bananas aren’t ripe enough, you can speed up the process by placing them in a paper bag with an apple overnight.
Pin This Recipe!
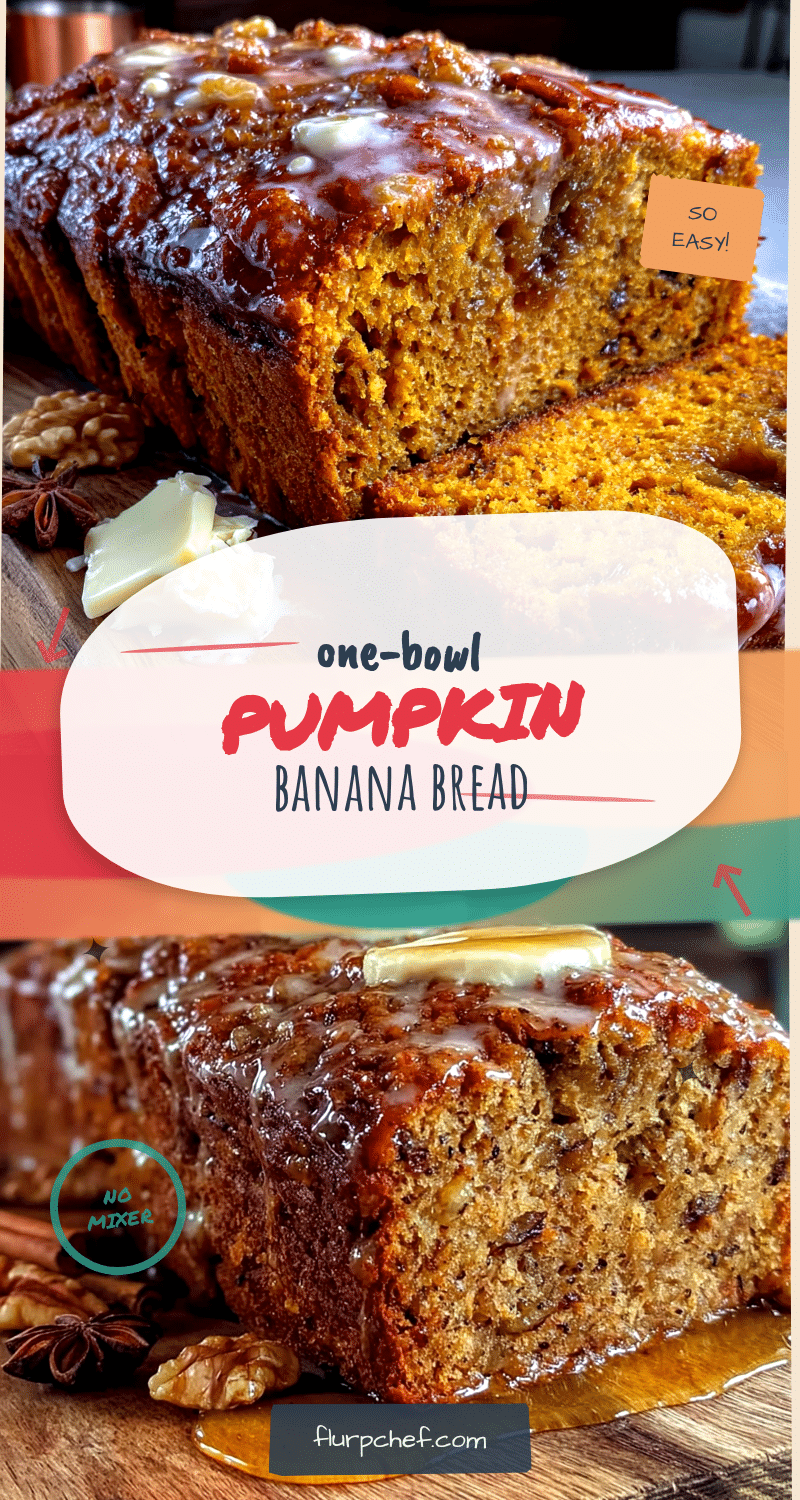
Easy One-Bowl Pumpkin Banana Bread Recipe
This easy one-bowl pumpkin banana bread is incredibly moist, tender, and full of warm fall flavors. Made with simple pantry ingredients, it comes together in one bowl with no mixer required.
- Prep Time: 15 minutes
- Cook Time: 55 minutes
- Total Time: 1 hour 10 minutes
- Yield: 10 servings 1x
- Category: Quick Bread
- Cuisine: American
Ingredients
- 1¾ cups all-purpose flour
- 1 teaspoon baking soda
- 1½ teaspoons pumpkin pie spice
- 1 teaspoon cinnamon
- ½ teaspoon salt
- ½ cup unsalted butter, melted and slightly cooled
- ¾ cup packed brown sugar
- ¼ cup granulated sugar
- 2 large eggs, at room temperature
- 1 cup pumpkin puree (not pumpkin pie filling)
- 1 cup mashed banana (about 2–3 very ripe bananas)
- 1 teaspoon vanilla extract
- ½ cup chocolate chips, chopped walnuts, or pecans (optional)
Instructions
- Preheat oven to 350°F (175°C). Line a 9×5 inch loaf pan with parchment paper, leaving an overhang on the long sides. Lightly grease the exposed ends with butter or non-stick spray.
- In a large mixing bowl, combine melted butter, brown sugar, and granulated sugar. Stir until well combined and looks like wet sand.
- Add eggs one at a time, stirring after each addition until incorporated.
- Add pumpkin puree, mashed banana, and vanilla extract. Stir until combined. The mixture will be slightly lumpy from the banana.
- Sprinkle flour, baking soda, pumpkin pie spice, cinnamon, and salt over the wet mixture. Stir gently with a folding motion until just combined. Do not overmix.
- If using, fold in chocolate chips or nuts with a few gentle stirs.
- Pour batter into prepared loaf pan and spread evenly. Tap the pan gently on the counter to release air bubbles.
- Bake for 50-60 minutes, until a toothpick inserted in the center comes out clean or with a few moist crumbs. If top browns too quickly, tent with foil around 40 minutes.
- Cool in pan on a wire rack for 15 minutes, then lift out using parchment overhang and transfer to rack to cool completely (at least 2 hours) before slicing.
Notes
Don’t overmix the batter to avoid tough bread. Room temperature ingredients create a better emulsion. For cleanest slices, let bread cool completely. Day-old slices are even better when toasted. Freezes well for up to 3 months.
Nutrition
- Serving Size: 1 slice
- Calories: 285
- Sugar: 24
- Sodium: 280
- Fat: 11
- Saturated Fat: 6
- Carbohydrates: 43
- Fiber: 2
- Protein: 4
Keywords: pumpkin banana bread, one bowl banana bread, easy pumpkin bread, fall quick bread, moist banana bread


