My neighbor Beth wasn’t trying to impress anyone. I’d stopped by to borrow a ladder—ours had mysteriously vanished into the garage abyss—and the smell hit me before I even made it past her front door. Something warm, slightly chocolatey, with a hint of vanilla that wrapped around you like a cozy blanket. She was pulling a baking sheet out of the oven, wearing an old sweater with a flour smudge on her cheek, and she just shrugged when I asked what she was making. “Oh, just those red cookies. You know, for the cookie swap tomorrow.”
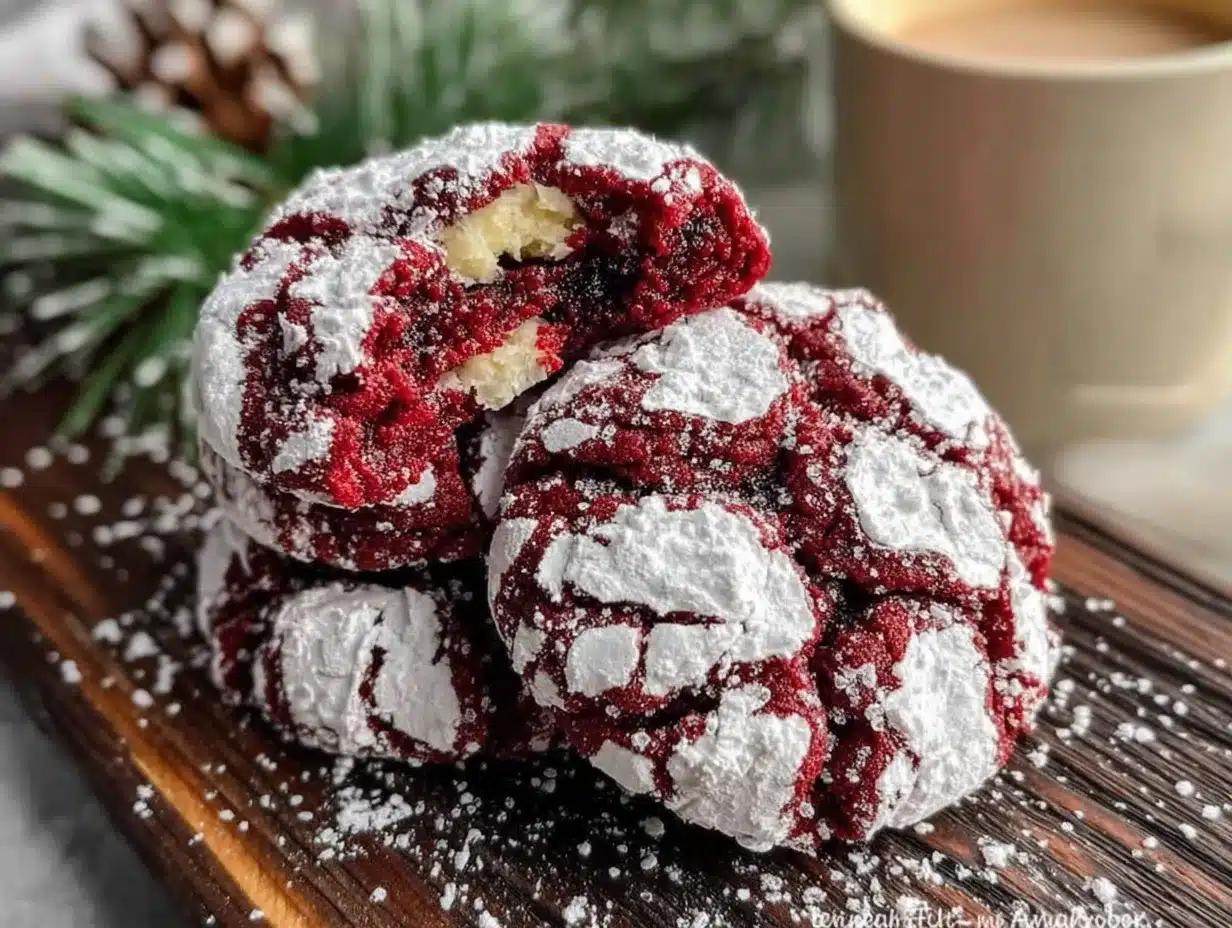
Just those red cookies. Let me tell you, there was nothing “just” about them. They were these gorgeous, crackled little clouds of red velvet goodness, dusted with powdered sugar like they’d been caught in a snow flurry. I stood there in her kitchen, probably looking a little too eager, while she slid one onto a napkin for me. That first bite? Honestly, it was one of those moments where you close your eyes without meaning to. The edges were slightly chewy, the centers soft and fudgy, and that tangy cream cheese flavor? Perfection.
I asked for the recipe, of course. She scribbled it on the back of an envelope while I balanced her ladder in one hand and a second cookie in the other. Maybe you’ve been there—you taste something so good at someone else’s house that you know you’ll be dreaming about it for weeks. That was me with these festive red velvet crinkle cookies. I’ve made them every holiday season since, and they never fail to disappear from the cookie platter before anything else.
Why You’ll Love This Recipe
These festive red velvet crinkle cookies are the kind of recipe that makes you look like a baking hero without actually having to work that hard. I’ve tested this version about six times—yes, six—to get that perfect balance of fudgy center and crackly exterior. Here’s why they’ve become my go-to holiday cookie:
- Quick & Easy: No chilling required, and they come together in about 30 minutes from start to finish. Perfect for those last-minute cookie swap invites or when you realize you need a dessert for tomorrow’s party.
- Simple Ingredients: You probably have most of these in your pantry already. No fancy extracts or hard-to-find specialty items—just good old-fashioned baking staples.
- Perfect for the Holidays: That bright red color against the snowy powdered sugar? It’s literally Christmas on a cookie tray. These are made for cookie swaps, holiday parties, and gift plates.
- Absolute Crowd-Pleaser: Kids love the color, adults love the flavor, and everyone loves that crinkly, crackly top. I’ve never brought these anywhere without someone asking for the recipe.
- Unbelievably Delicious: The combination of cocoa, buttermilk, and cream cheese creates this subtle tang that keeps you coming back for “just one more.” They’re soft, chewy, and have that perfect red velvet flavor—not too chocolatey, not too sweet.
What makes these different from every other red velvet cookie recipe out there? It’s the technique. Instead of just mixing everything together and hoping for the best, this method uses room-temperature butter and a careful folding process that creates those beautiful cracks without drying out the dough. Trust me, I’ve tried the shortcuts, and they just don’t deliver the same texture.
This recipe isn’t just good—it’s the kind that makes you close your eyes after the first bite. It’s comfort food reimagined for the holidays: festive enough for a party, but simple enough for a Tuesday afternoon baking session with your kids.
What Ingredients You Will Need
This recipe uses simple, wholesome ingredients to deliver that classic red velvet flavor and signature crinkle texture. Most of these are pantry staples, which makes these festive red velvet crinkle cookies perfect for spontaneous holiday baking sessions.
For the Cookie Dough
- Unsalted butter, softened (1/2 cup, 1 stick) — Make sure it’s truly room temperature, not melted. This is crucial for proper creaming.
- Granulated sugar (1 cup) — Regular white sugar works perfectly here. No need for anything fancy.
- Large egg, room temperature (1) — Cold eggs can seize up your butter mixture, so let it sit out for 30 minutes first.
- Buttermilk (2 tablespoons) — Adds that signature tang and tenderness. If you don’t have buttermilk, add 1 teaspoon of lemon juice to regular milk and let it sit for 5 minutes.
- Vanilla extract (1 teaspoon) — I prefer pure vanilla extract, but imitation works fine too.
- Red gel food coloring (1 tablespoon, or more for deeper color) — Gel coloring is key here. Liquid drops will throw off the moisture balance and make your dough too wet.
- All-purpose flour (1 and 1/2 cups) — Spoon and level your flour, don’t scoop directly from the bag. Scooping packs it down and gives you too much.
- Unsweetened cocoa powder (1/4 cup) — I recommend Hershey’s Special Dark for a richer color, but any unsweetened cocoa works.
- Baking powder (1/2 teaspoon) — Check the expiration date! Old baking powder won’t give you that nice puff.
- Salt (1/4 teaspoon) — Just regular table salt. It balances the sweetness.
For Rolling
- Powdered sugar (1/2 cup, plus more for refreshing) — This creates that beautiful snowy crinkle effect. You’ll want extra on hand for re-rolling.
A quick note on the cocoa powder: I’ve tested this with natural cocoa, Dutch-process, and that dark cocoa blend. They all work, but the darker cocoa gives a more dramatic red-black contrast against the white powdered sugar. If you’re using natural cocoa, expect a slightly brighter red color—which is honestly gorgeous in its own way.
For the red food coloring, I swear by Americolor Super Red gel. It’s concentrated, so you get that vibrant red without adding too much liquid. I learned this the hard way after a batch turned out pink and flat because I used liquid coloring. Don’t be me.
Equipment Needed
Nothing too fancy here—you probably already own most of these. But a few specific tools really do make a difference with these festive red velvet crinkle cookies.
- Stand mixer or hand mixer — You can mix by hand, but your arm will thank you for using a mixer. The creaming step needs a good 2-3 minutes of beating.
- Large mixing bowls (at least 2) — One for dry ingredients, one for wet. It makes the process so much smoother.
- Baking sheets (2) — Light-colored aluminum sheets work best. Dark sheets can cause the bottoms to brown too quickly.
- Parchment paper or silicone baking mats — Non-negotiable for preventing sticking and ensuring even baking.
- Cookie scoop (1.5 tablespoon size) — This creates uniform cookies that bake evenly. I use my OXO scoop for everything.
- Cooling rack — Wire racks let air circulate so the cookies cool properly without getting soggy bottoms.
- Small bowl for powdered sugar — For rolling the dough balls.
If you don’t have a cookie scoop, just use a tablespoon measure and roll the dough into balls with your hands. The key is keeping them all the same size so they bake evenly. And if you’re using dark non-stick baking sheets, reduce your oven temperature by 25°F to prevent over-browning.
Preparation Method
Let me walk you through this step by step. I’ve made these festive red velvet crinkle cookies so many times that I’ve got the process down to a science. Follow along, and you’ll have a batch of gorgeous cookies in no time.
- Preheat your oven to 350°F (175°C). Line two baking sheets with parchment paper or silicone mats. Do this first so the oven is ready when your dough is.
- Cream the butter and sugar. In a large bowl, beat the softened butter and granulated sugar together until light and fluffy, about 2-3 minutes. You want it to look pale and almost doubled in volume. Scrape down the sides of the bowl halfway through. This step is crucial—proper creaming creates air pockets that help the cookies puff up and crack beautifully.
- Add the wet ingredients. Beat in the egg, buttermilk, and vanilla extract until well combined. The mixture might look a little curdled at this point—that’s totally normal. Don’t panic.
- Add the red food coloring. Pour in the gel food coloring and mix until the dough is uniformly red. I start with 1 tablespoon and add more if I want a deeper color. Remember, the color will darken slightly as the cookies bake.
- Combine the dry ingredients. In a separate bowl, whisk together the flour, cocoa powder, baking powder, and salt. Whisking aerates the mixture and ensures everything is evenly distributed.
- Mix dry into wet. Gradually add the dry ingredients to the wet mixture, mixing on low speed or folding by hand until just combined. Stop as soon as you don’t see any more flour streaks. Overmixing develops gluten and makes the cookies tough instead of tender.
- Chill the dough (optional but recommended). If your dough feels too sticky to handle, pop it in the fridge for 15-20 minutes. This makes rolling easier and helps the cookies hold their shape. I usually skip this step because I’m impatient, but it does make a difference if your kitchen is warm.
- Roll the dough balls. Scoop out about 1.5 tablespoons of dough and roll it into a smooth ball between your palms. The dough should feel slightly tacky but not sticky. If it’s sticking to your hands too much, chill it for a few more minutes.
- Coat in powdered sugar. Roll each dough ball generously in powdered sugar. And I mean generously—you want a thick, snowy coating. This is what creates those beautiful crinkles as the cookies spread in the oven. Place the coated balls on the prepared baking sheets, spacing them about 2 inches apart.
- Bake for 10-12 minutes. The cookies should look puffed and cracked, with the edges set but the centers still slightly soft. They’ll continue to set as they cool on the baking sheet. For softer, fudgier cookies, bake for 10 minutes. For slightly crisper edges, go for 12.
- Cool properly. Let the cookies rest on the baking sheet for 5 minutes before transferring them to a wire rack to cool completely. This resting time is important—moving them too soon can cause them to fall apart.
A few things I’ve learned the hard way: don’t overcrowd the baking sheet. These cookies spread, and if they’re too close together, they’ll merge into one giant cookie blob. Also, if your first batch comes out looking more pink than red, add a bit more food coloring to the remaining dough. The color intensity varies based on your cocoa powder and food coloring brand.
Cooking Tips & Techniques
After making these festive red velvet crinkle cookies more times than I can count, I’ve picked up a few tricks that make the process smoother and the results more consistent. Let me share what I’ve learned—including the mistakes I’ve made so you don’t have to.
The powdered sugar situation. Here’s something nobody tells you: the powdered sugar will start to dissolve and absorb into the dough as the cookies sit. If you’re baking in batches, you might notice the second batch doesn’t have as dramatic of a crinkle effect. The fix? Roll the dough balls in powdered sugar right before they go into the oven, not all at once. I keep a bowl of powdered sugar next to me and roll each batch just before baking.
Room temperature ingredients matter. I used to think this was just chefs being fussy, but it makes a real difference. Cold butter doesn’t cream properly, and cold egg can seize up your mixture. Set your butter and egg out on the counter about an hour before you start baking. Your dough will come together smoother and bake more evenly.
The scoop and roll technique. Use a cookie scoop to portion out your dough, then roll each portion into a ball. The rolling motion helps create a smooth surface that cracks beautifully in the oven. If you just drop scoops of dough into the sugar, you’ll get uneven coating and less dramatic cracks.
My biggest failure. The first time I made these, I used liquid red food coloring because that’s what I had in the cabinet. The dough turned out way too wet, the cookies spread into flat discs, and the color was more salmon than festive red. I learned my lesson: gel coloring is non-negotiable for the right texture and color.
Timing strategy. These cookies come together fast, so I like to have my baking sheets lined and my powdered sugar ready before I even start mixing. It makes the process feel less chaotic, especially if you’re baking with kids or while multitasking other holiday prep.
Variations & Adaptations
One of the best things about these festive red velvet crinkle cookies is how versatile they are. I’ve played around with quite a few variations over the years, and here are my favorites:
White chocolate chip version. Fold in 1/2 cup of white chocolate chips right after mixing the dough. The creamy white chocolate against the red cookie is gorgeous, and it adds a nice sweetness. This is my personal favorite variation—I made it for a cookie exchange last year and got three recipe requests.
Gluten-free adaptation. Substitute the all-purpose flour with a 1:1 gluten-free baking flour blend. I’ve tested this with Bob’s Red Mill 1:1 Baking Flour and it works beautifully. The texture is slightly more delicate, so handle the dough gently. Add an extra tablespoon of buttermilk if the dough seems too dry.
Vegan version. Use vegan butter (I like Miyoko’s), a flax egg (1 tablespoon ground flaxseed mixed with 3 tablespoons water, let sit for 5 minutes), and plant-based buttermilk (1 teaspoon lemon juice plus enough oat milk to make 2 tablespoons). The cookies will be slightly less tender but still delicious.
Peppermint twist. Add 1/2 teaspoon of peppermint extract along with the vanilla. Roll the baked cookies in crushed candy canes for an extra festive touch. This is perfect for Christmas parties—just be careful not to overdo the peppermint extract, as it’s potent.
Mini cookie version. Use a teaspoon-sized scoop and bake for 7-8 minutes. These are perfect for holiday snack platters or for packaging up as gifts. You’ll get about 48 mini cookies from one batch.
Serving & Storage Suggestions
These festive red velvet crinkle cookies are best served at room temperature, which is perfect for holiday gatherings. The powdered sugar coating stays intact and the texture is perfectly soft and chewy.
Presentation ideas. Arrange them on a white platter for maximum color contrast—the red against white is stunning. I like to sprinkle a little extra powdered sugar over the top right before serving for that fresh-from-the-oven look. For gift-giving, layer them in a tin with parchment paper between each layer to prevent the powdered sugar from rubbing off.
What to serve with them. A glass of cold milk is the classic pairing, but these cookies also go beautifully with hot cocoa, coffee, or even a glass of red wine for an adults-only treat. They’re also fantastic crumbled over vanilla ice cream for a quick dessert.
Storage instructions. Store the cookies in an airtight container at room temperature for up to 5 days. Place a piece of bread in the container to keep them soft—the cookies will absorb moisture from the bread and stay tender. Change the bread every couple of days if they last that long.
Freezing instructions. You can freeze the baked cookies for up to 3 months. Layer them in a freezer-safe container with parchment paper between layers. Thaw at room temperature for about 30 minutes before serving. Alternatively, freeze the unbaked dough balls on a baking sheet, then transfer to a freezer bag. Bake from frozen, adding 2-3 minutes to the baking time.
Flavor development. Honestly, these cookies taste even better the next day. The flavors meld together and the texture becomes even more fudgy. So don’t stress about making them the day before your event—it actually works in your favor.
Nutritional Information & Benefits
Let’s be real—these are holiday cookies, not health food. But I believe in enjoying treats in moderation, and these festive red velvet crinkle cookies are worth every single bite.
Per cookie (based on 24 cookies):
- Calories: 145
- Fat: 6g
- Carbohydrates: 22g
- Sugar: 14g
- Protein: 2g
- Fiber: 1g
Dietary considerations: These cookies contain dairy (butter, buttermilk), eggs, and gluten. With the substitutions mentioned above, they can be adapted for vegan or gluten-free diets. They are not suitable for nut-free diets unless you verify your ingredients are processed in nut-free facilities.
Health highlights. The cocoa powder contains antioxidants called flavonoids, which have been linked to heart health benefits. And honestly? There’s something to be said for the mental health benefits of baking and sharing treats with people you love. That counts for something in my book.
Conclusion
These festive red velvet crinkle cookies have earned a permanent spot in my holiday baking rotation, and I have a feeling they’ll become a tradition in your kitchen too. They’re simple enough for a casual baking afternoon but striking enough to steal the show at any cookie swap or holiday party.
I love that this recipe came from a completely unremarkable Tuesday afternoon at my neighbor’s house. It reminds me that the best recipes often come from the most unexpected places—not from fancy cooking blogs or celebrity chefs, but from real people making something delicious without making a big deal about it.
Go ahead and make these your own. Add the white chocolate chips, throw in some peppermint, or keep them classic. However you make them, I promise they’ll disappear fast.
I’d love to hear how yours turn out! Drop a comment below and let me know if you tried any variations or if these become a new holiday tradition in your home. And if you’re looking for more holiday baking inspiration, you might love my soft and chewy gingerbread cookies or my easy cut-out sugar cookies for decorating with the kids.
Frequently Asked Questions
Why didn’t my cookies crinkle?
The most common reason is not enough powdered sugar coating. You need a thick, generous layer for the cracks to form properly. Also, make sure your oven is fully preheated—if the cookies start baking at a lower temperature, they’ll set before the cracks can form.
Can I use liquid food coloring instead of gel?
I really don’t recommend it. Liquid food coloring adds too much moisture to the dough, which changes the texture and can make the cookies spread too much. Gel coloring gives you that vibrant red without the extra liquid.
How do I keep the powdered sugar from dissolving?
Roll the dough balls in powdered sugar immediately before baking, not all at once. If you let them sit, the sugar will start to absorb into the dough. You can also refresh the powdered sugar coating by sifting a little extra over the baked cookies just before serving.
Can I make the dough ahead of time?
Absolutely! You can refrigerate the dough for up to 3 days. Just let it sit at room temperature for about 10 minutes before rolling into balls, as it will be firmer straight from the fridge. You can also freeze the dough balls for up to 3 months.
Why did my cookies turn out flat?
This usually happens for one of three reasons: your butter was too soft or melted, you overmixed the dough, or your baking powder is expired. Make sure your butter is softened but not melted, mix just until combined, and check that your baking powder is fresh.
Pin This Recipe!

Festive Red Velvet Crinkle Cookies: Easy Holiday Recipe

These festive red velvet crinkle cookies are soft, chewy, and fudgy with a beautiful crackled top dusted with powdered sugar. Made with simple ingredients and no chilling required, they come together in about 30 minutes and are perfect for holiday cookie swaps, parties, and gift plates.
- Prep Time: 15 minutes
- Cook Time: 10 minutes
- Total Time: 25 minutes
- Yield: 24 servings 1x
- Category: Dessert
- Cuisine: American
Ingredients
- 1/2 cup unsalted butter, softened
- 1 cup granulated sugar
- 1 large egg, room temperature
- 2 tablespoons buttermilk
- 1 teaspoon vanilla extract
- 1 tablespoon red gel food coloring
- 1 and 1/2 cups all-purpose flour
- 1/4 cup unsweetened cocoa powder
- 1/2 teaspoon baking powder
- 1/4 teaspoon salt
- 1/2 cup powdered sugar (for rolling, plus more for refreshing)
Instructions
- Preheat your oven to 350°F (175°C). Line two baking sheets with parchment paper or silicone mats.
- In a large bowl, beat the softened butter and granulated sugar together until light and fluffy, about 2-3 minutes. Scrape down the sides of the bowl halfway through.
- Beat in the egg, buttermilk, and vanilla extract until well combined. The mixture might look slightly curdled.
- Add the red gel food coloring and mix until the dough is uniformly red.
- In a separate bowl, whisk together the flour, cocoa powder, baking powder, and salt.
- Gradually add the dry ingredients to the wet mixture, mixing on low speed or folding by hand until just combined. Do not overmix.
- If the dough feels too sticky, chill it in the refrigerator for 15-20 minutes.
- Scoop out about 1.5 tablespoons of dough and roll into a smooth ball between your palms.
- Roll each dough ball generously in powdered sugar, coating thickly. Place on prepared baking sheets, spacing about 2 inches apart.
- Bake for 10-12 minutes. The cookies should look puffed and cracked, with edges set but centers still slightly soft.
- Let the cookies rest on the baking sheet for 5 minutes, then transfer to a wire rack to cool completely.
Notes
For best crinkle effect, roll dough balls in powdered sugar immediately before baking. Gel food coloring is essential for proper texture and color. If using dark baking sheets, reduce oven temperature by 25°F. Cookies taste even better the next day.
Nutrition
- Serving Size: 1 cookie
- Calories: 145
- Sugar: 14
- Sodium: 95
- Fat: 6
- Saturated Fat: 3.5
- Carbohydrates: 22
- Fiber: 1
- Protein: 2
Keywords: red velvet crinkle cookies, holiday cookies, easy cookie recipe, red velvet cookies, crinkle cookies, Christmas cookies


